The Art of Darkness: Night Photography with Mobile, Digital, and Analog Cameras
Night photography is the art of capturing stunning images in the dark. It requires special techniques and a good understanding of light conditions.
In this article, you will learn about the equipment you need, how to choose the best settings, and creative techniques to help you capture impressive night shots—whether you are using a mobile phone, digital camera, or analog camera.

The Right Equipment for Impressive Night Shots
For optimal results in night photography, having the right equipment is crucial. This chart provides a quick overview of the pros and cons of different types of cameras, along with suitable models and accessories:
| Camera Type |
Advantages |
Disadvantages | Apps and Accessoires |
|---|---|---|---|
| Mobile | Always with you, easy to use, compact |
Limited manual settings, smaller sensors | NightCap Camera, Moment Pro Camera App, external lenses, tripods |
| Digital | Wide selection of lenses (DSLR), compact (mirrorless), high image quality |
Expensive, heavier than mobile phones | Fast prime lenses (e.g., 50 mm f/1.8), wide-angle lenses (e.g., 24 mm f/1.4), tripods, flashes |
| Analog | Nostalgic look, artistic control |
Expensive films, no instant feedback | ISO 800+ films, external or built-in light meter, manual settings |
Tripod and Accessories
For sharp night shots, a sturdy tripod is essential to prevent your camera from shaking and securely position your camera. Using a remote shutter release during long exposures helps to eliminate even the slightest movements that could lead to blurriness. If you don't have a tripod handy, there are alternative methods to stabilize your camera. You can use stable surfaces like walls or railings to support the camera. Alternatively, you can lean against a solid structure and hold the camera firmly against your body. Employing a remote shutter release or the camera's self-timer also helps to minimize shake effectively.
.png)
Don't forget to always carry spare batteries, especially when you're out for extended periods of time. Nothing is more frustrating than running out of power in the middle of an exciting photo session. Another tip: Bring a waterproof cover or some spare cloths to protect your equipment from moisture. This way, you'll be prepared for any situation and can capture the magic of the night in stunning images.
RAW-Format and ISO setting
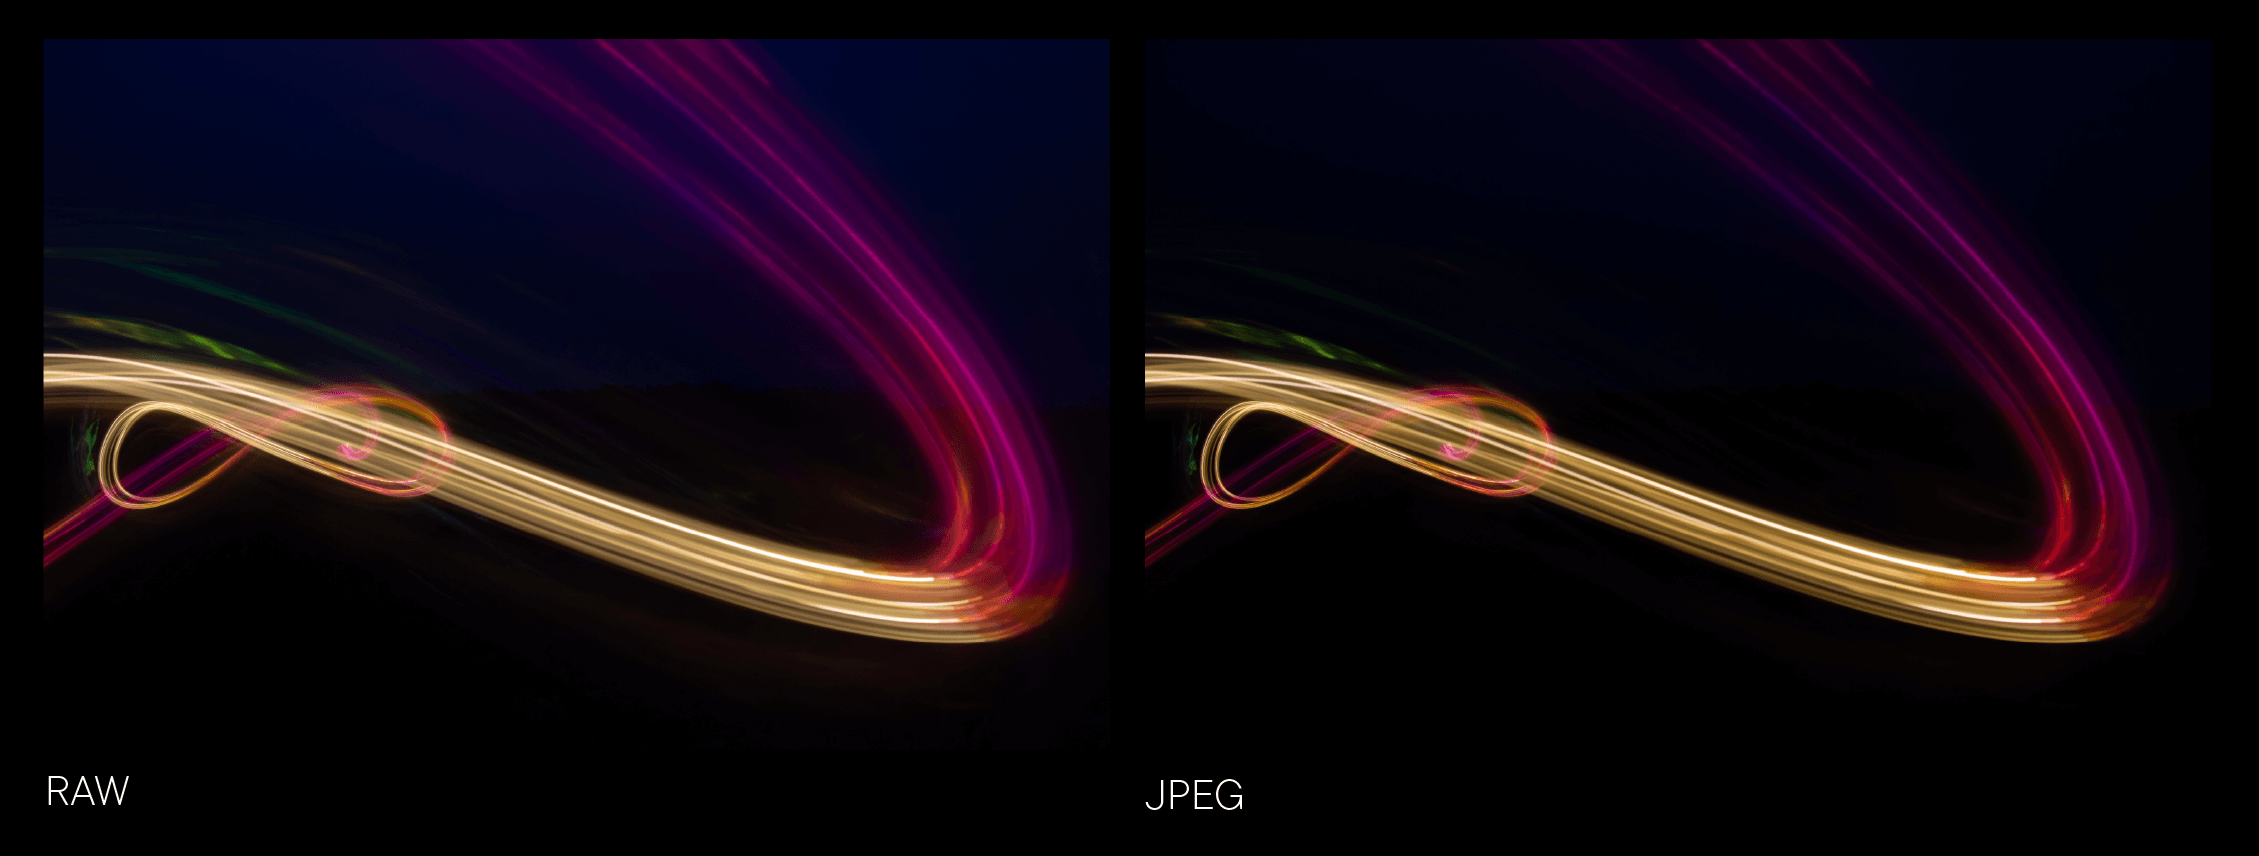
Photographing in RAW format offers the significant advantage of higher image quality and more extensive editing capabilities. RAW files capture much more detail and color nuances, which you can optimize during post-processing.
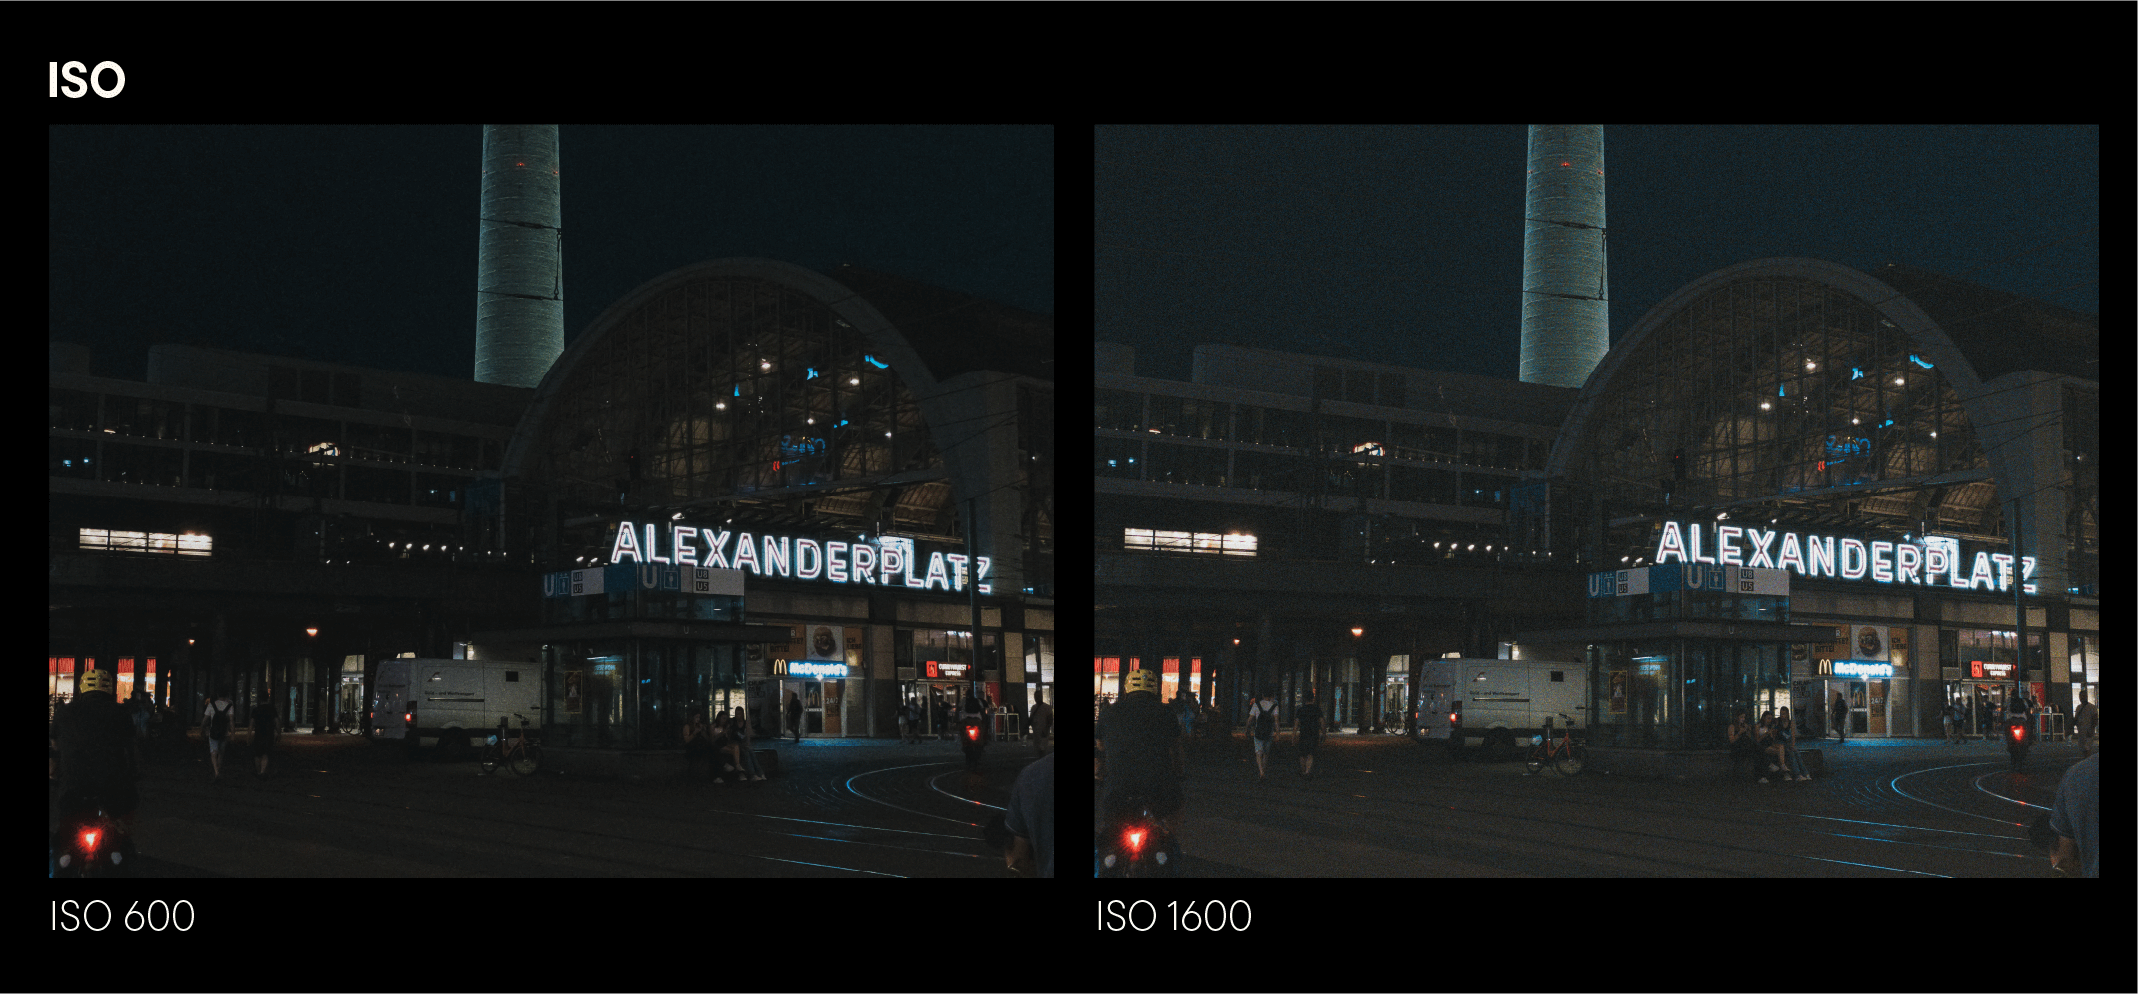
It's best to select a low ISO value between 100 and 400 to minimize image noise. While this value may vary depending on your camera, the general rule is: the lower the ISO value, the less image noise.
Aperture, Exposure Time, and White Balance
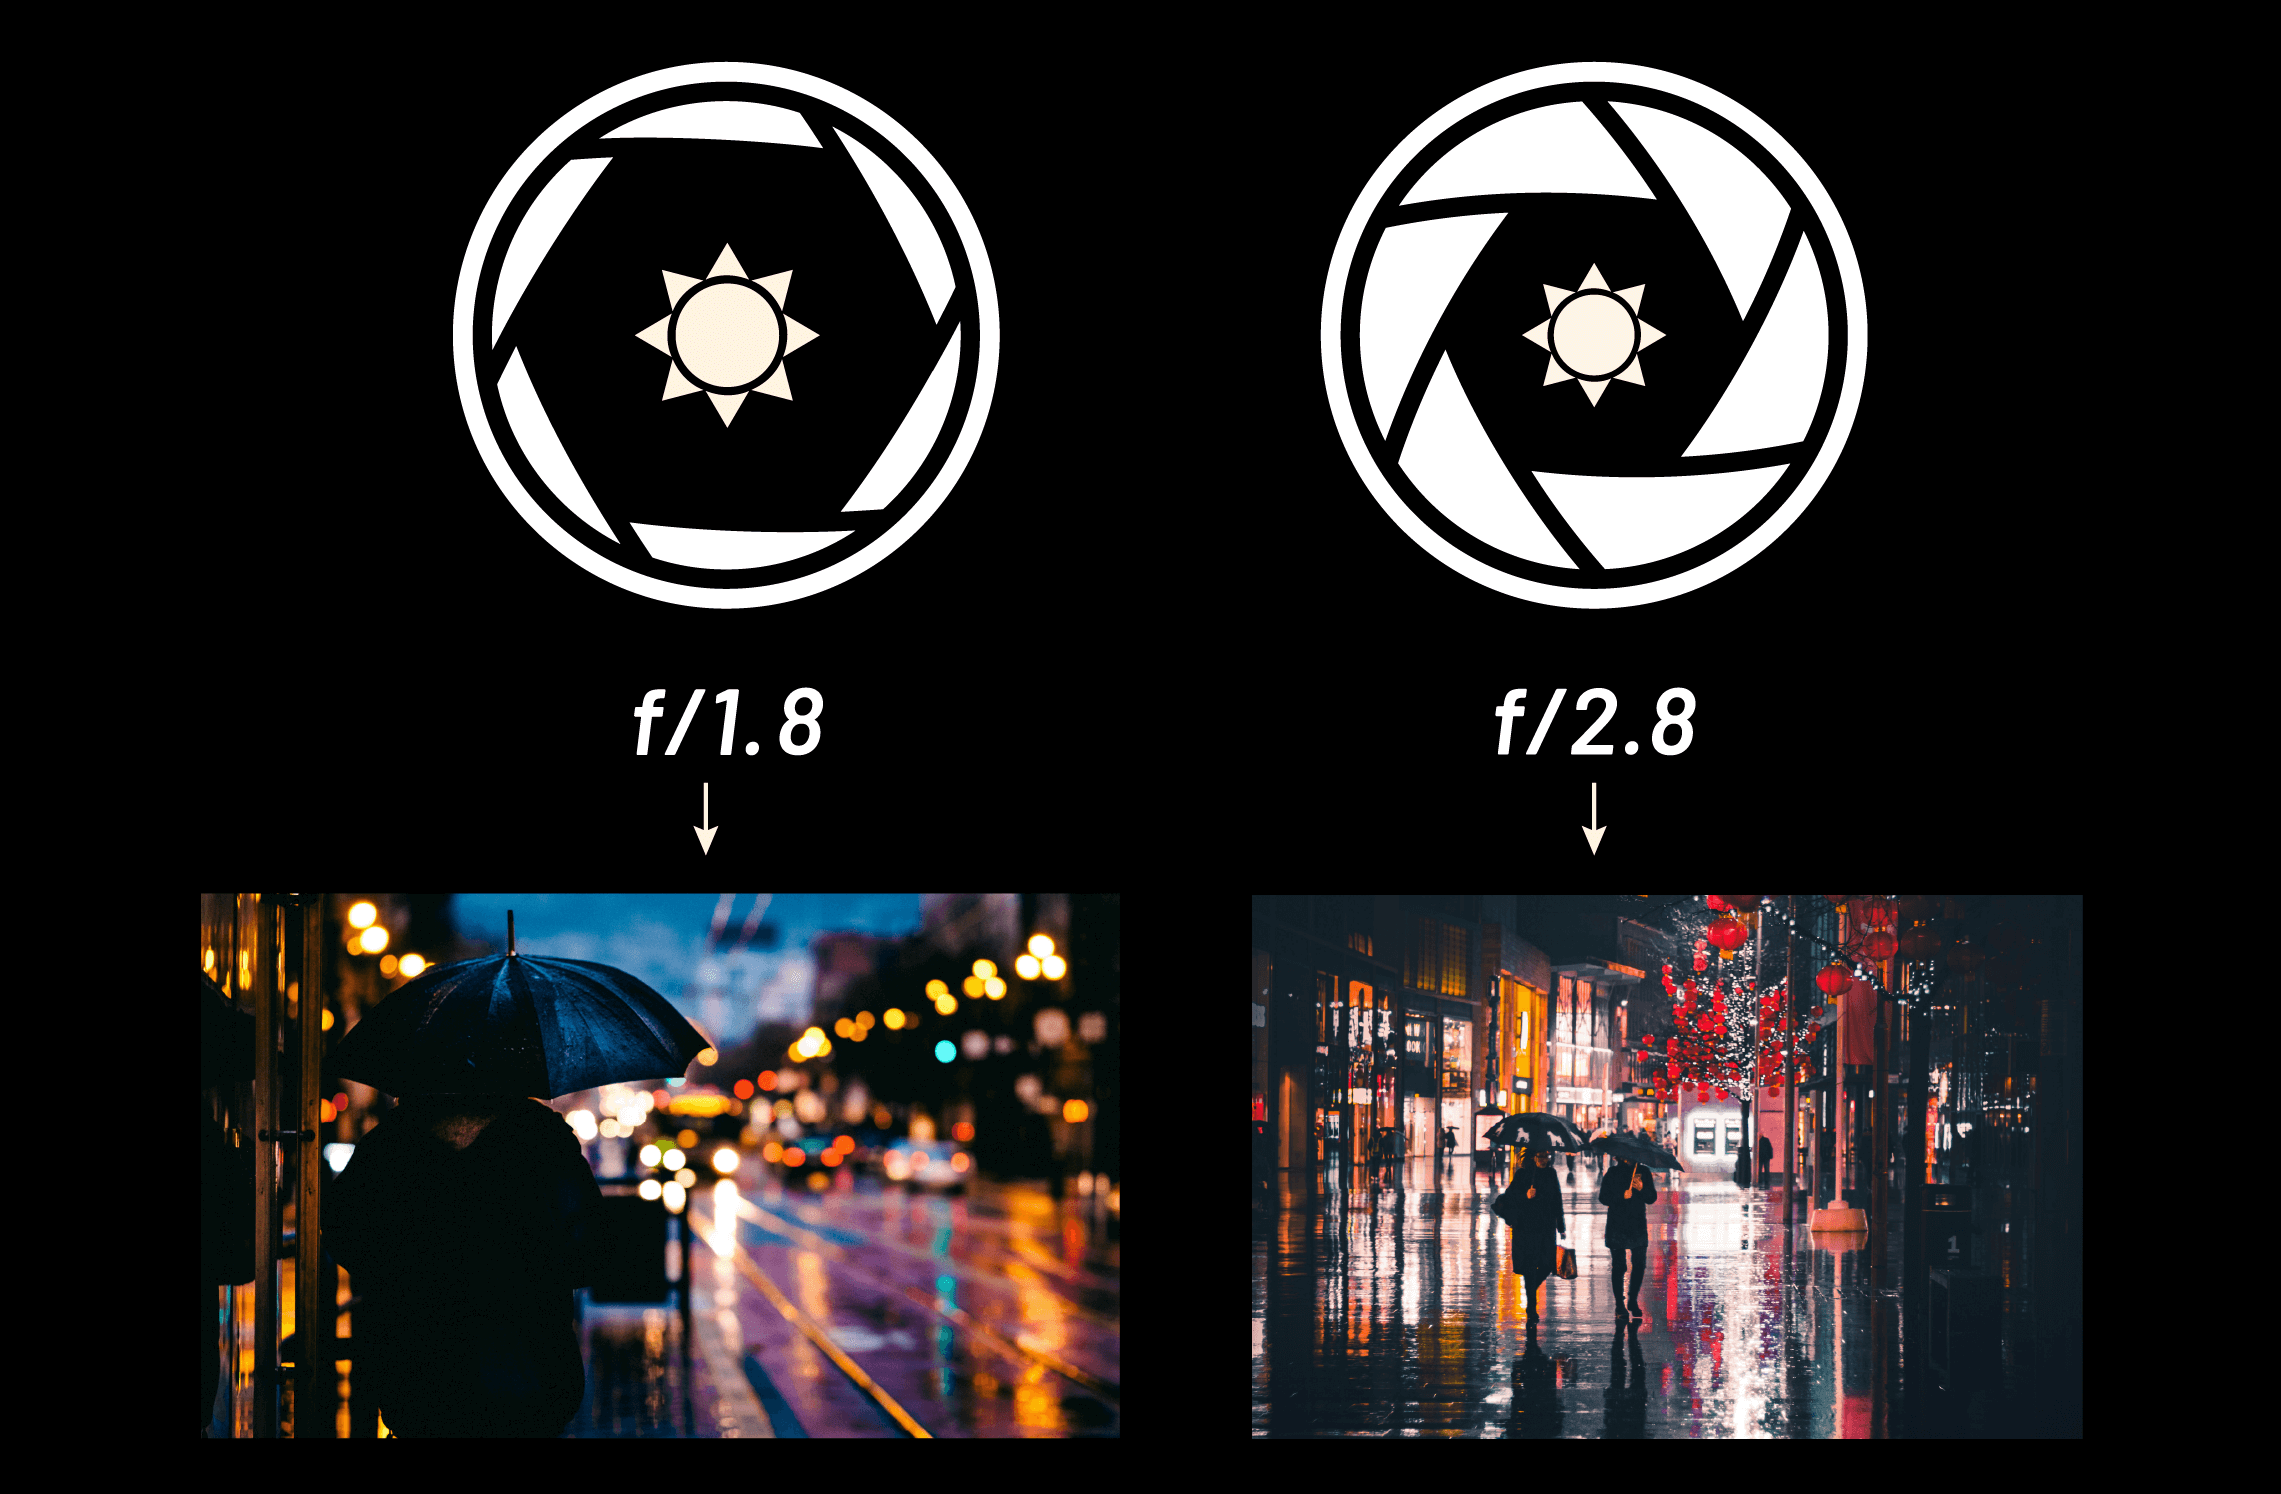
A wide-open aperture (f/1.8 to f/2.8) allows more light to reach the sensor, making it ideal for night photography. With this setting, you can capture detailed and sharp images even in low-light conditions. Combining a wide-open aperture with long exposure times of 10 to 30 seconds allows you to capture clear images that beautifully capture the nighttime scene.
For night photography, a white balance of around 3,000 to 4,000 Kelvin is often recommended as it enhances cool colors and reduces many of the typical warm color casts from artificial light sources such as streetlamps. When shooting in RAW, you also have the flexibility to precisely adjust the white balance in post-processing to achieve the desired colors and moods.
Focus, Sharpness, and Light Sources: Perfect Settings for Night Photography
The unique lighting conditions at night demand special techniques and carefully selected equipment. Learn how to set focus optimally, use depth of field effectively, and harness both natural and artificial light sources to create stunning images:
Manual Focus and Autofocus
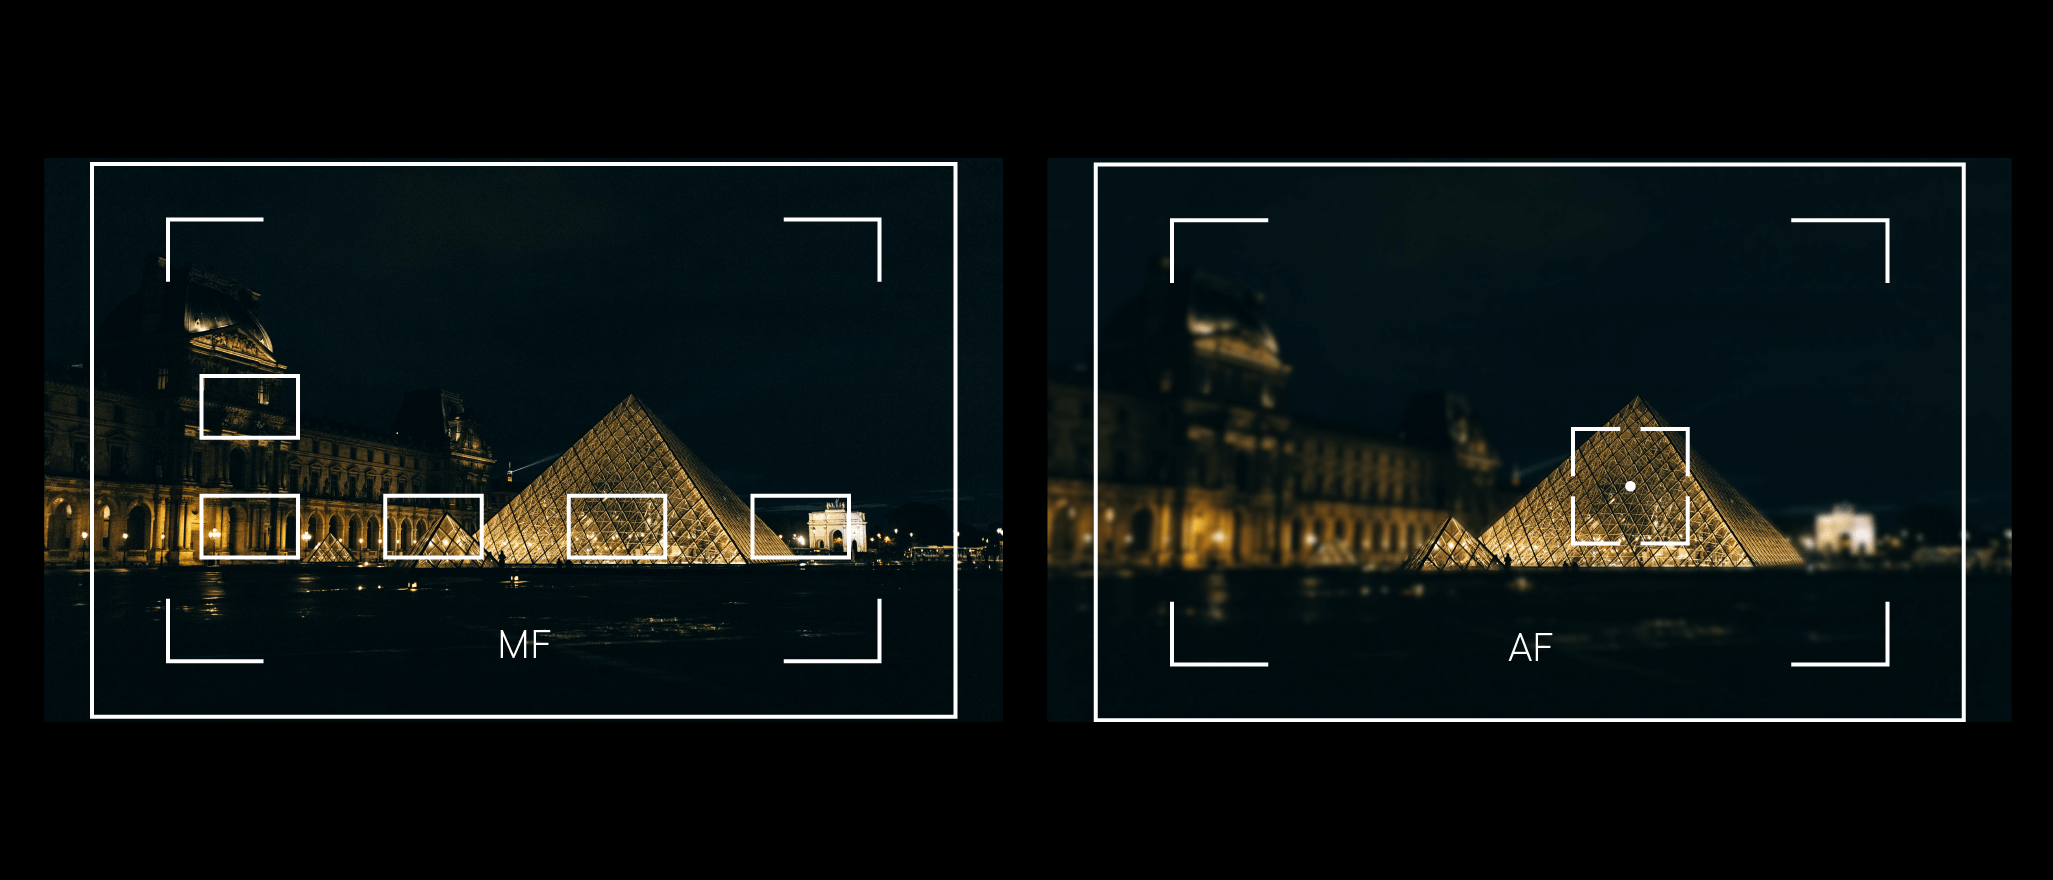
In night photography, manual focus is often the best choice because autofocus can struggle to work accurately in low light conditions.
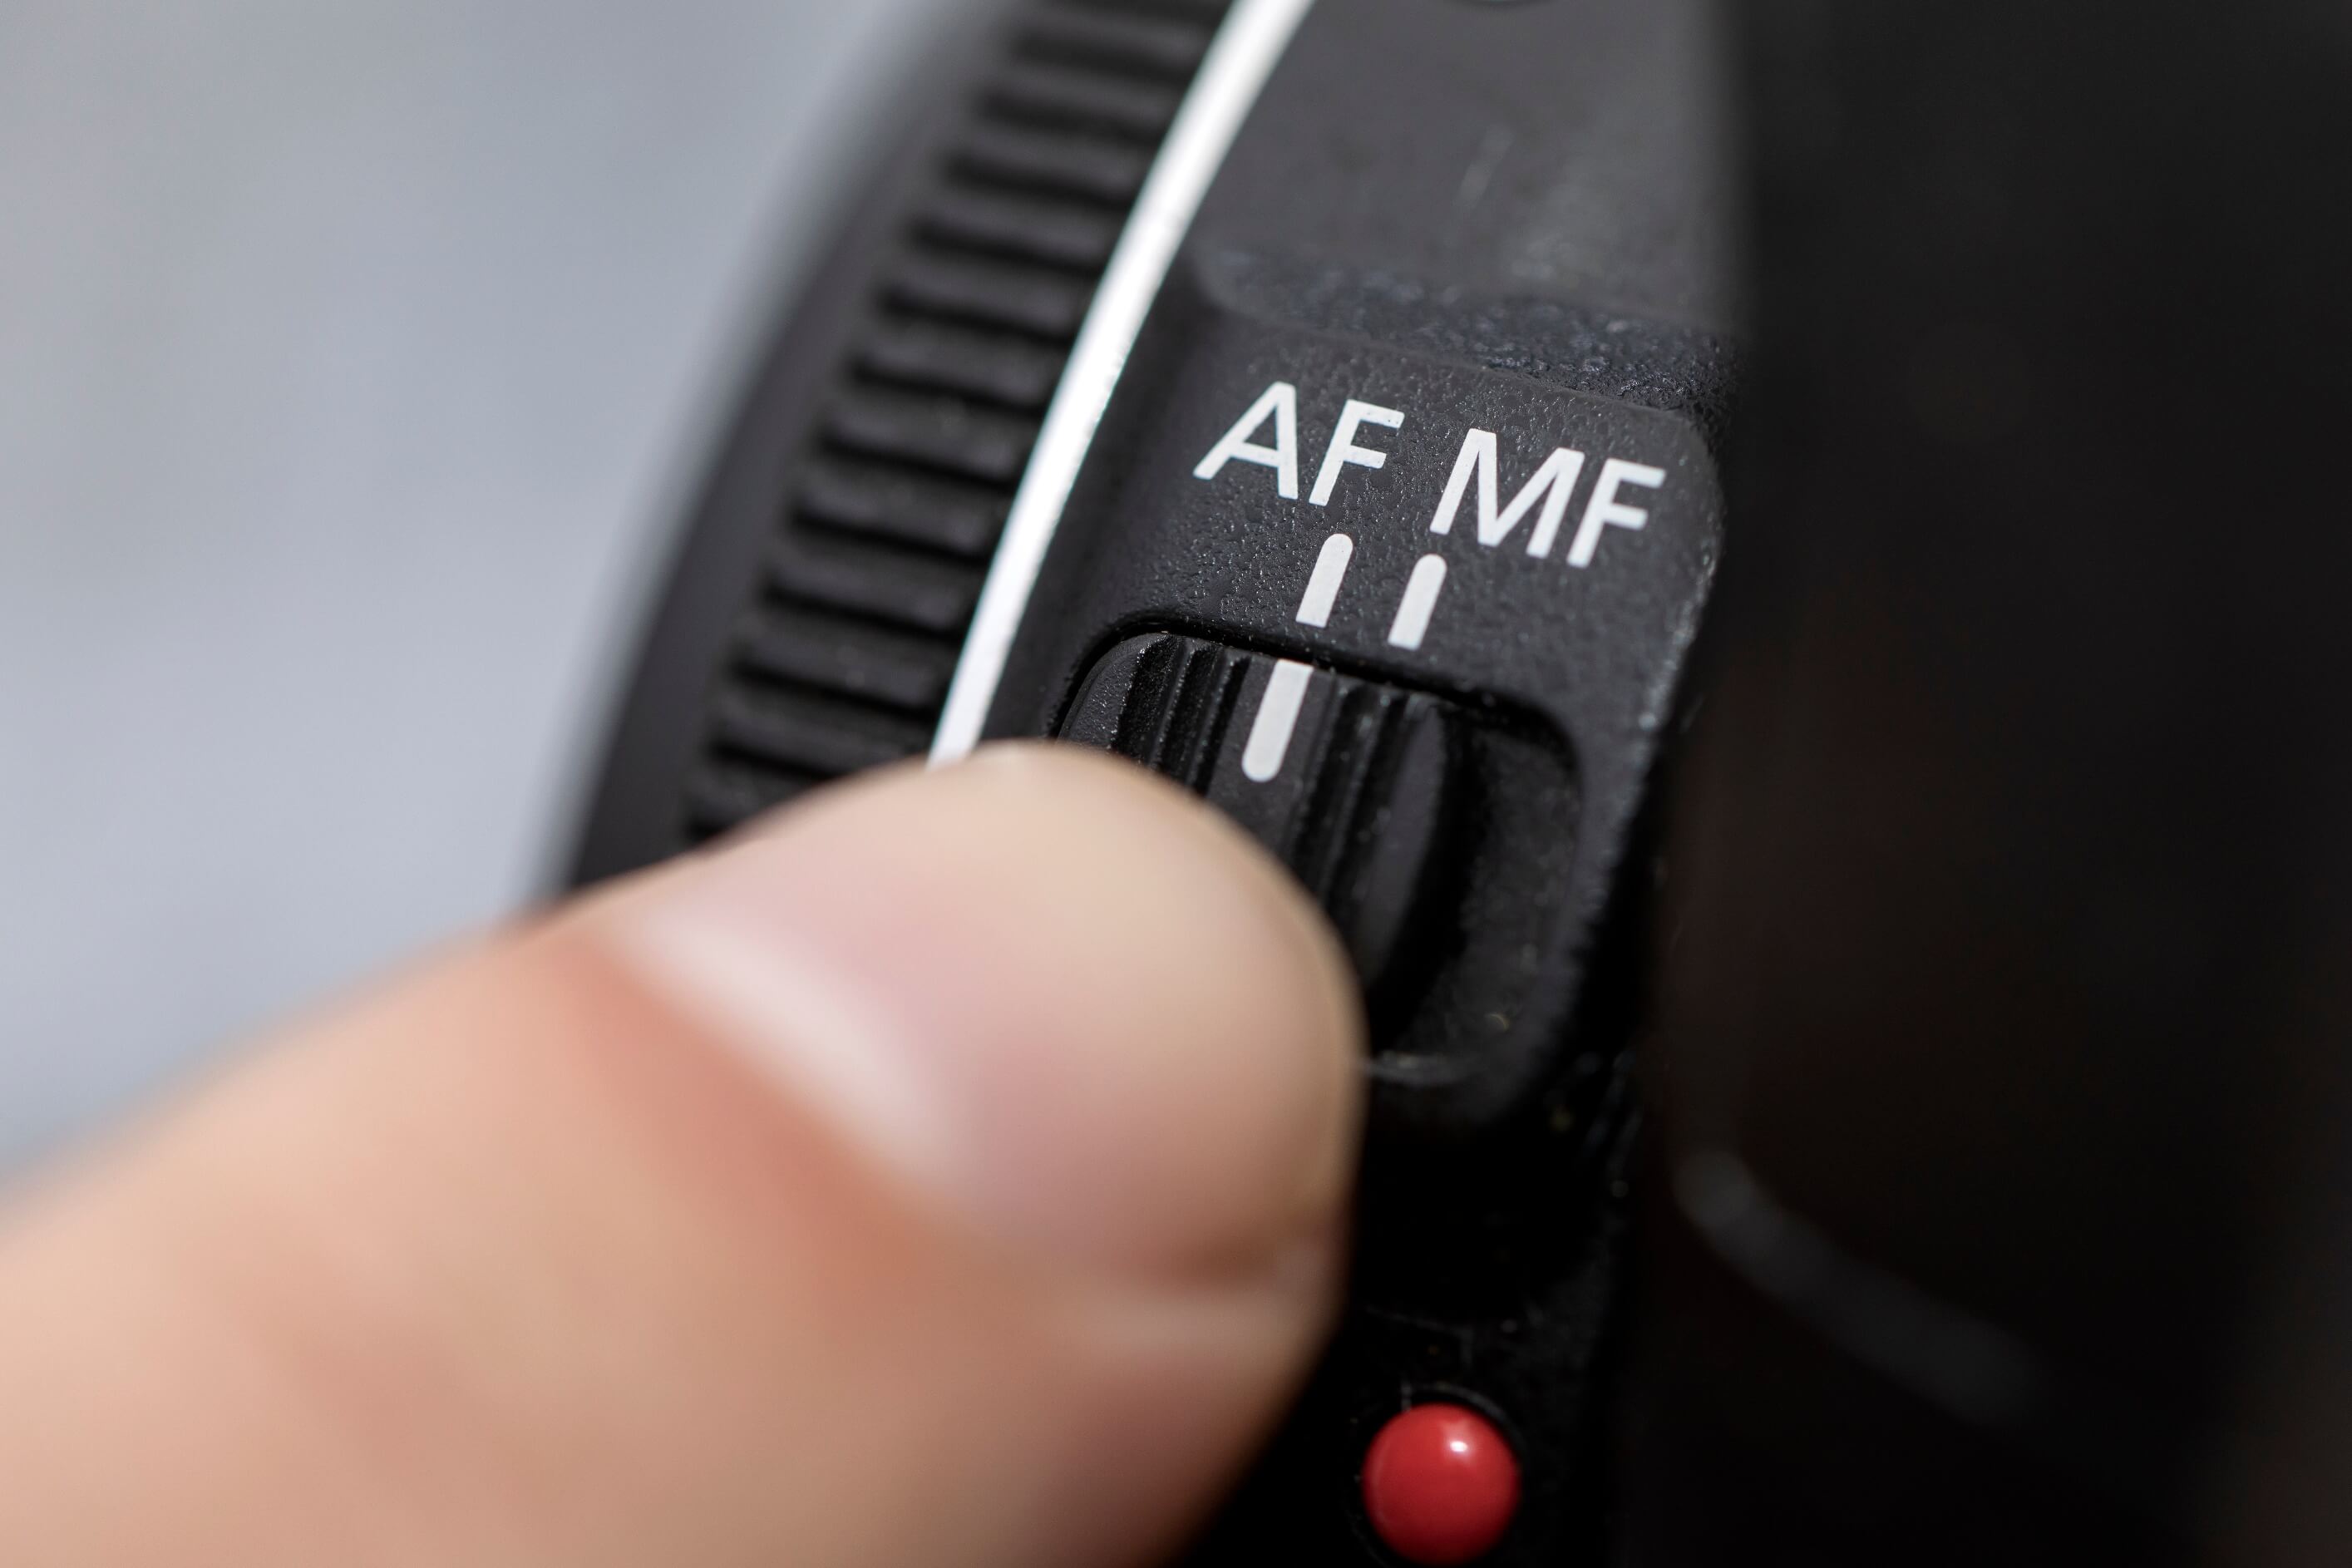
Focus peaking and magnification assist you in achieving precise focus by visually highlighting sharply focused areas. This is particularly useful when photographing stars, distant city lights, or other dimly lit subjects. However, autofocus can also be helpful when there is sufficient light, such as from street lamps or car headlights, providing strong contrasts.
.png)
Depth of Field and Composition Techniques
Depth of field is crucial in night photography: You achieve shallow depth of field by opening the aperture wide – around f/1.8 to f/2.8. This emphasizes the main subject and blurs the background effectively.
.png)
Composition techniques like the rule of thirds help you create a balanced image. This involves dividing the frame into nine equal rectangles using two horizontal and two vertical lines. Place important elements along these lines or at their intersections to achieve a harmonious composition.
Natural and Artificial Light Sources
When using natural light sources such as the moon and stars for your landscape shots, your images will have a soft and even illumination. However, you can also create interesting light and shadow patterns with artificial light sources like streetlamps, car headlights, and illuminated buildings.
Avoiding Overexposure and Lens Flares
Overexposure is a common issue in photography, especially when bright light sources are present in the frame. To mitigate this, reduce the exposure time to about 1 to 10 seconds, depending on the brightness of the light source and the surrounding environment. Additionally, choose an ISO value between 100 and 400 to minimize image noise and maintain better control over the exposure.
The histogram function on your camera can help you check the exposure and ensure that no areas are overexposed. The histogram should be evenly distributed and not heavily skewed towards the edges.
You can avoid lens flares caused by bright light sources by using a lens hood or covering the lens with your hand. For very bright light sources, choose a camera position where the light source is partially obscured, such as by a tree or a building. This helps to minimize unwanted reflections and glare.
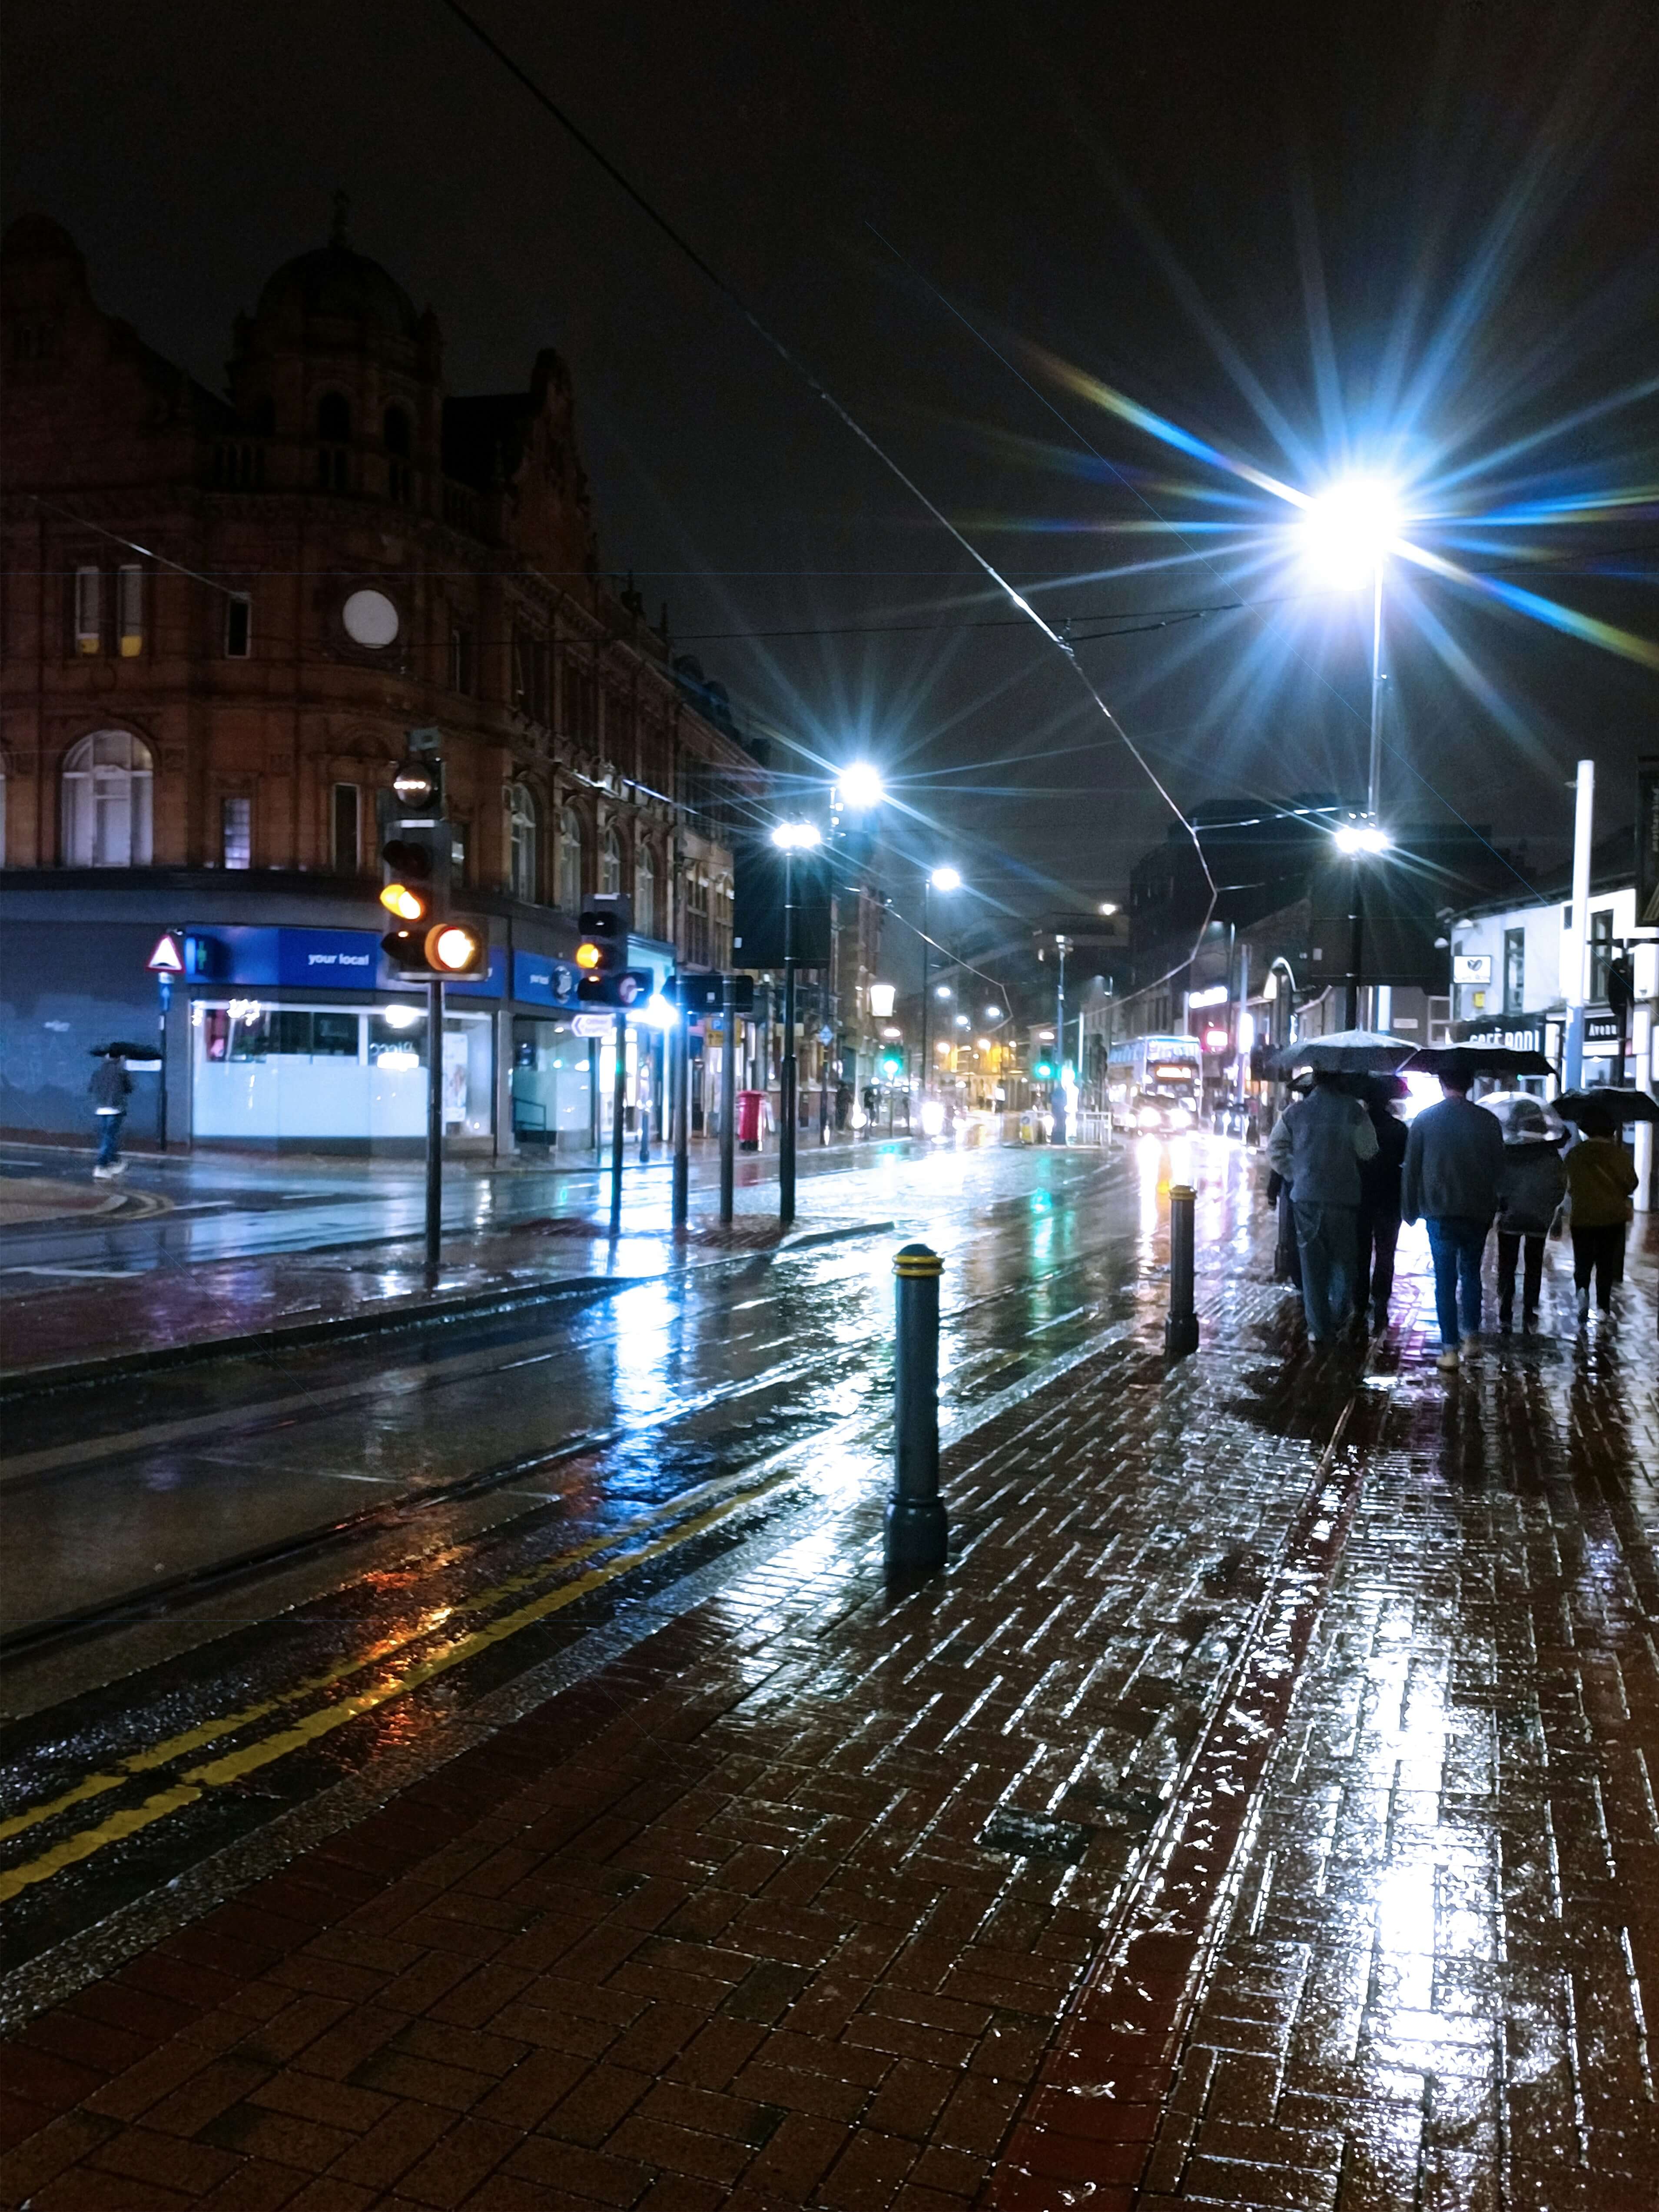
Another tip: When composing your shot, ensure that bright light sources do not shine directly into the lens. Instead, position them to the side or outside the main subject.
Capturing Magical Moments in the Dark: Here's How
Night photography offers you the opportunity to unleash your creativity. Learn how to use long exposures, light painting reflections, and light trails here:
Long Exposure and Light Painting
With long exposure photography, you can capture motion and achieve stunning effects. Set your camera on a stable tripod, select an exposure time of 10 to 30 seconds, and set the ISO between 100 and 400. During light painting, move a light source such as a flashlight or light stick while the camera is exposing. This technique creates patterns and shapes in your photos.
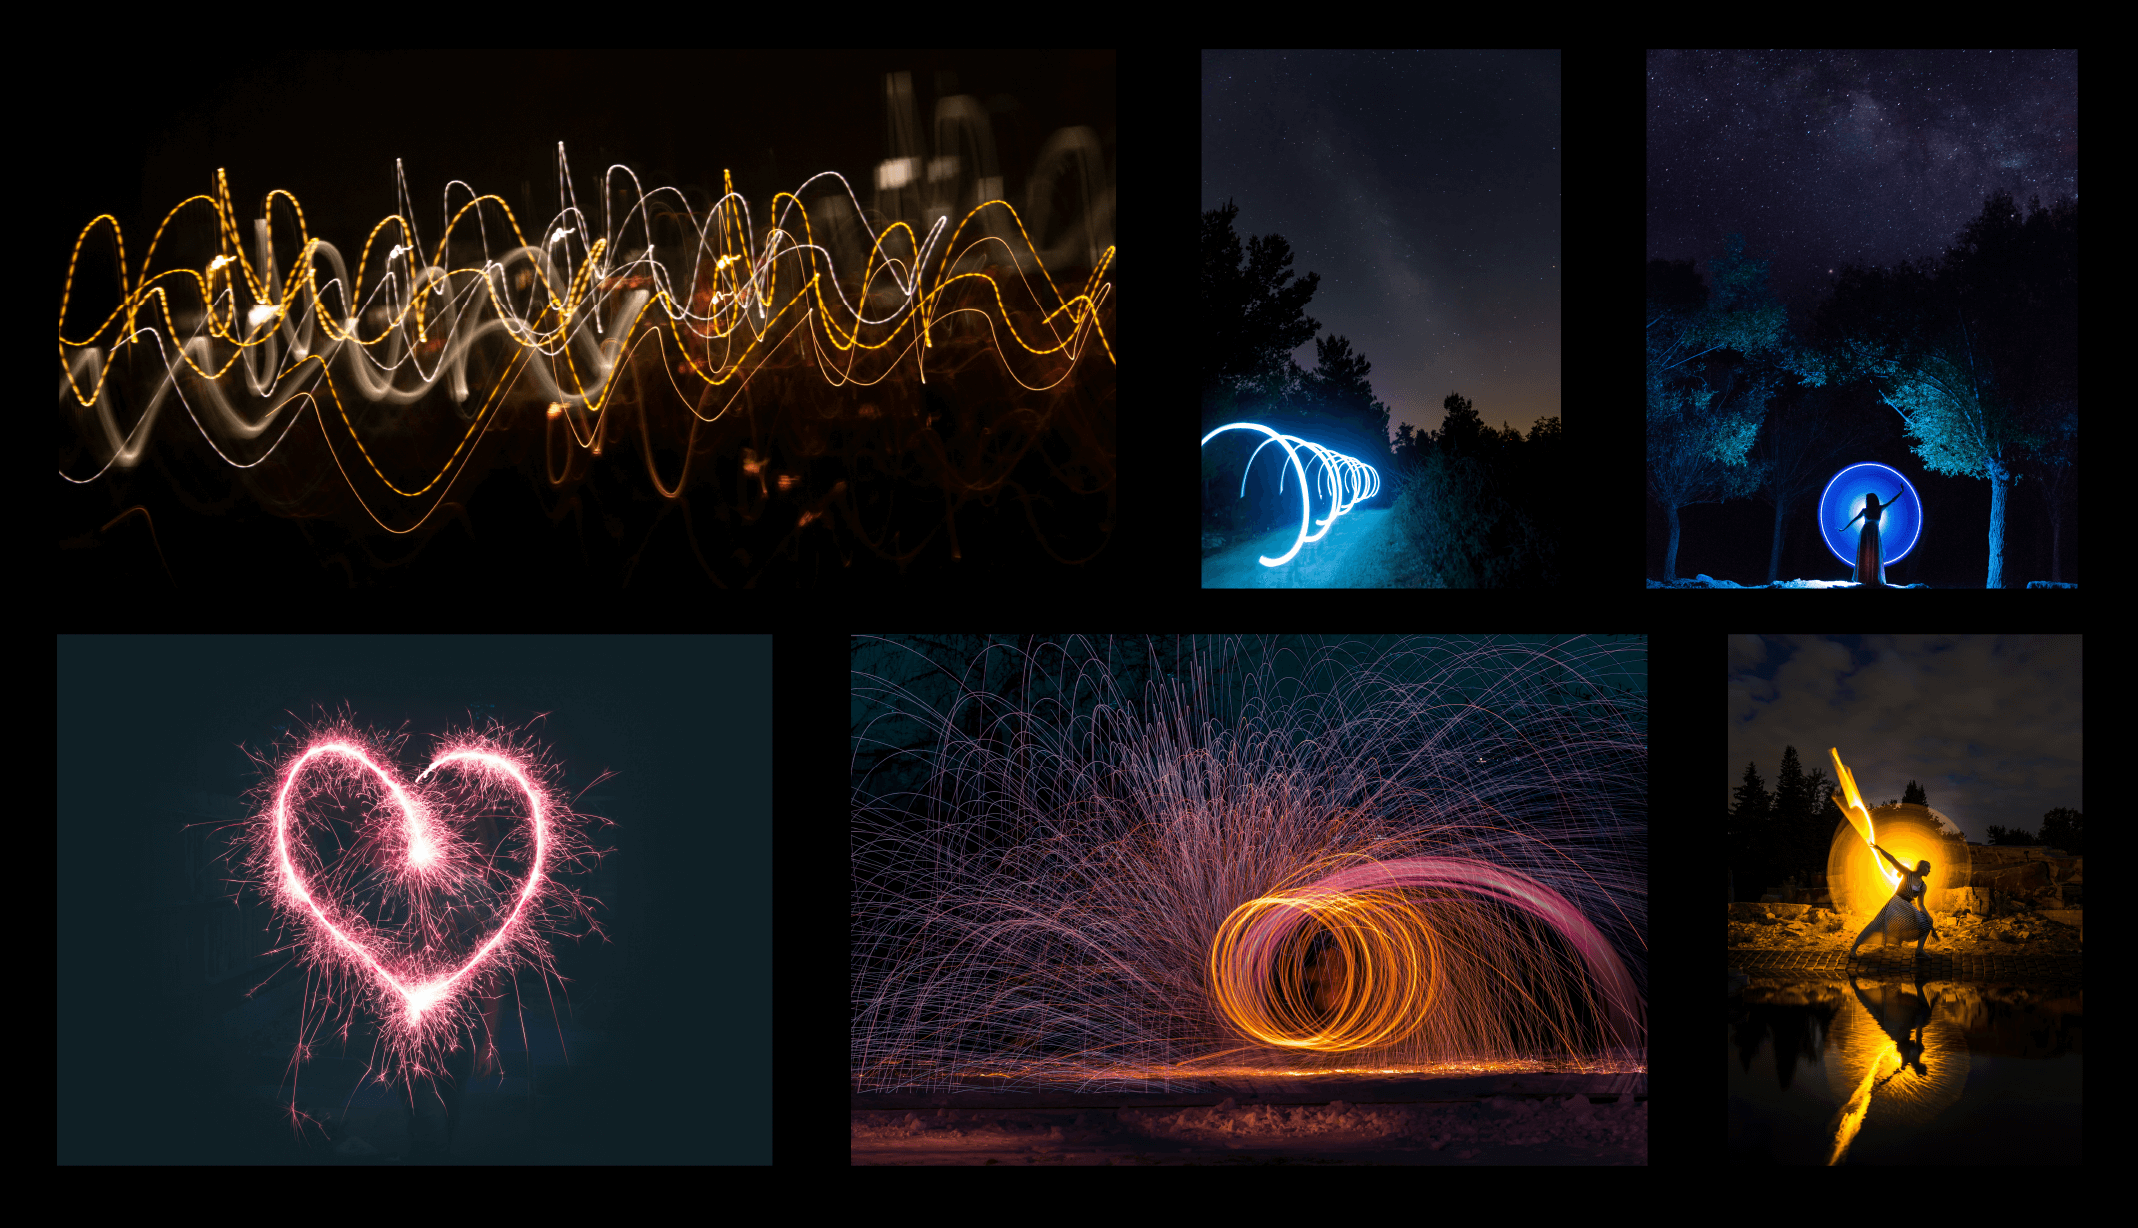
Reflections and Light Trails
Nutze Wasseroberflächen, um Lichter einer Stadt oder des Sternenhimmels zu fotografieren.
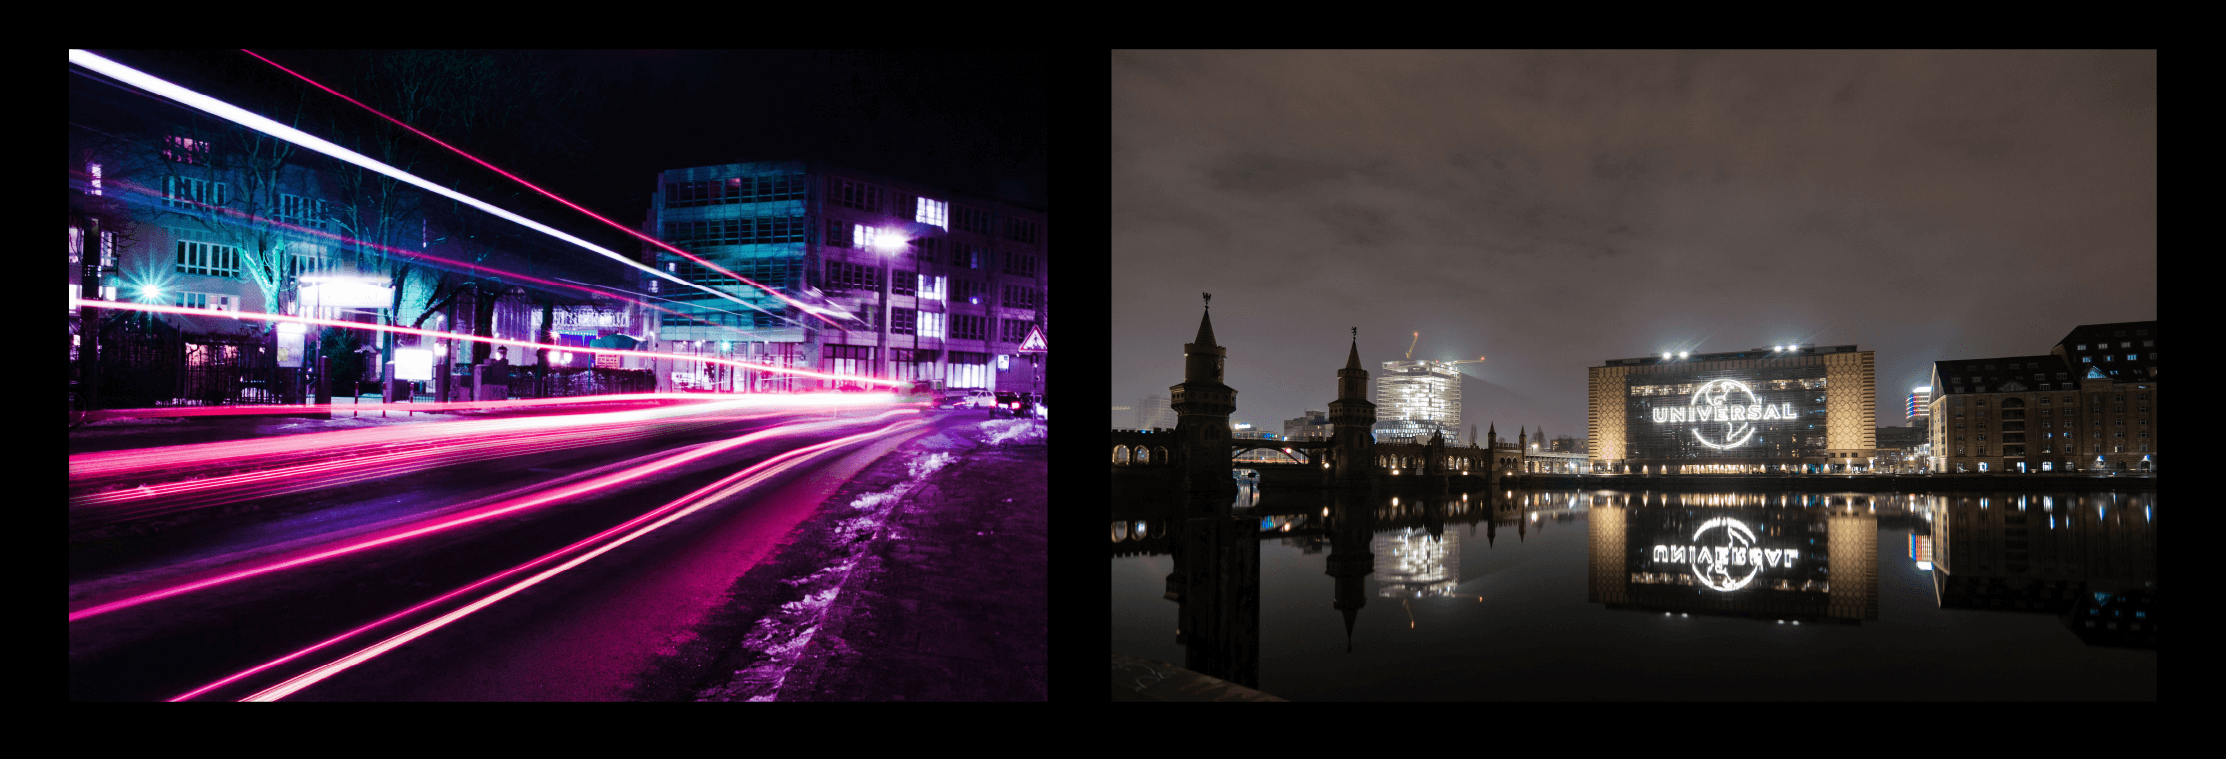
Reflections add extra depth to your images. Traffic routes are also ideal for capturing light trails. For example, you can represent the movement of cars as light lines using long exposure. However, note that some planning is required to find the perfect location and timing for these shots.
Starry Sky, Milky Way, Astro- and Moon Photography
Photographing stars and the moon requires specific knowledge: Use a wide-open aperture (e.g., f/2.8), a long exposure time (15 to 30 seconds), and a low ISO value (100 to 800) to capture sharp and detailed images. With these settings, you can also capture the impressive Milky Way. Use a wide-angle lens to capture as much of the sky as possible. Ensure you photograph in a location with minimal light pollution so that the stars and Milky Way are clearly visible. You can also use apps like Stellarium or PhotoPills to find the best times and positions for your shots.
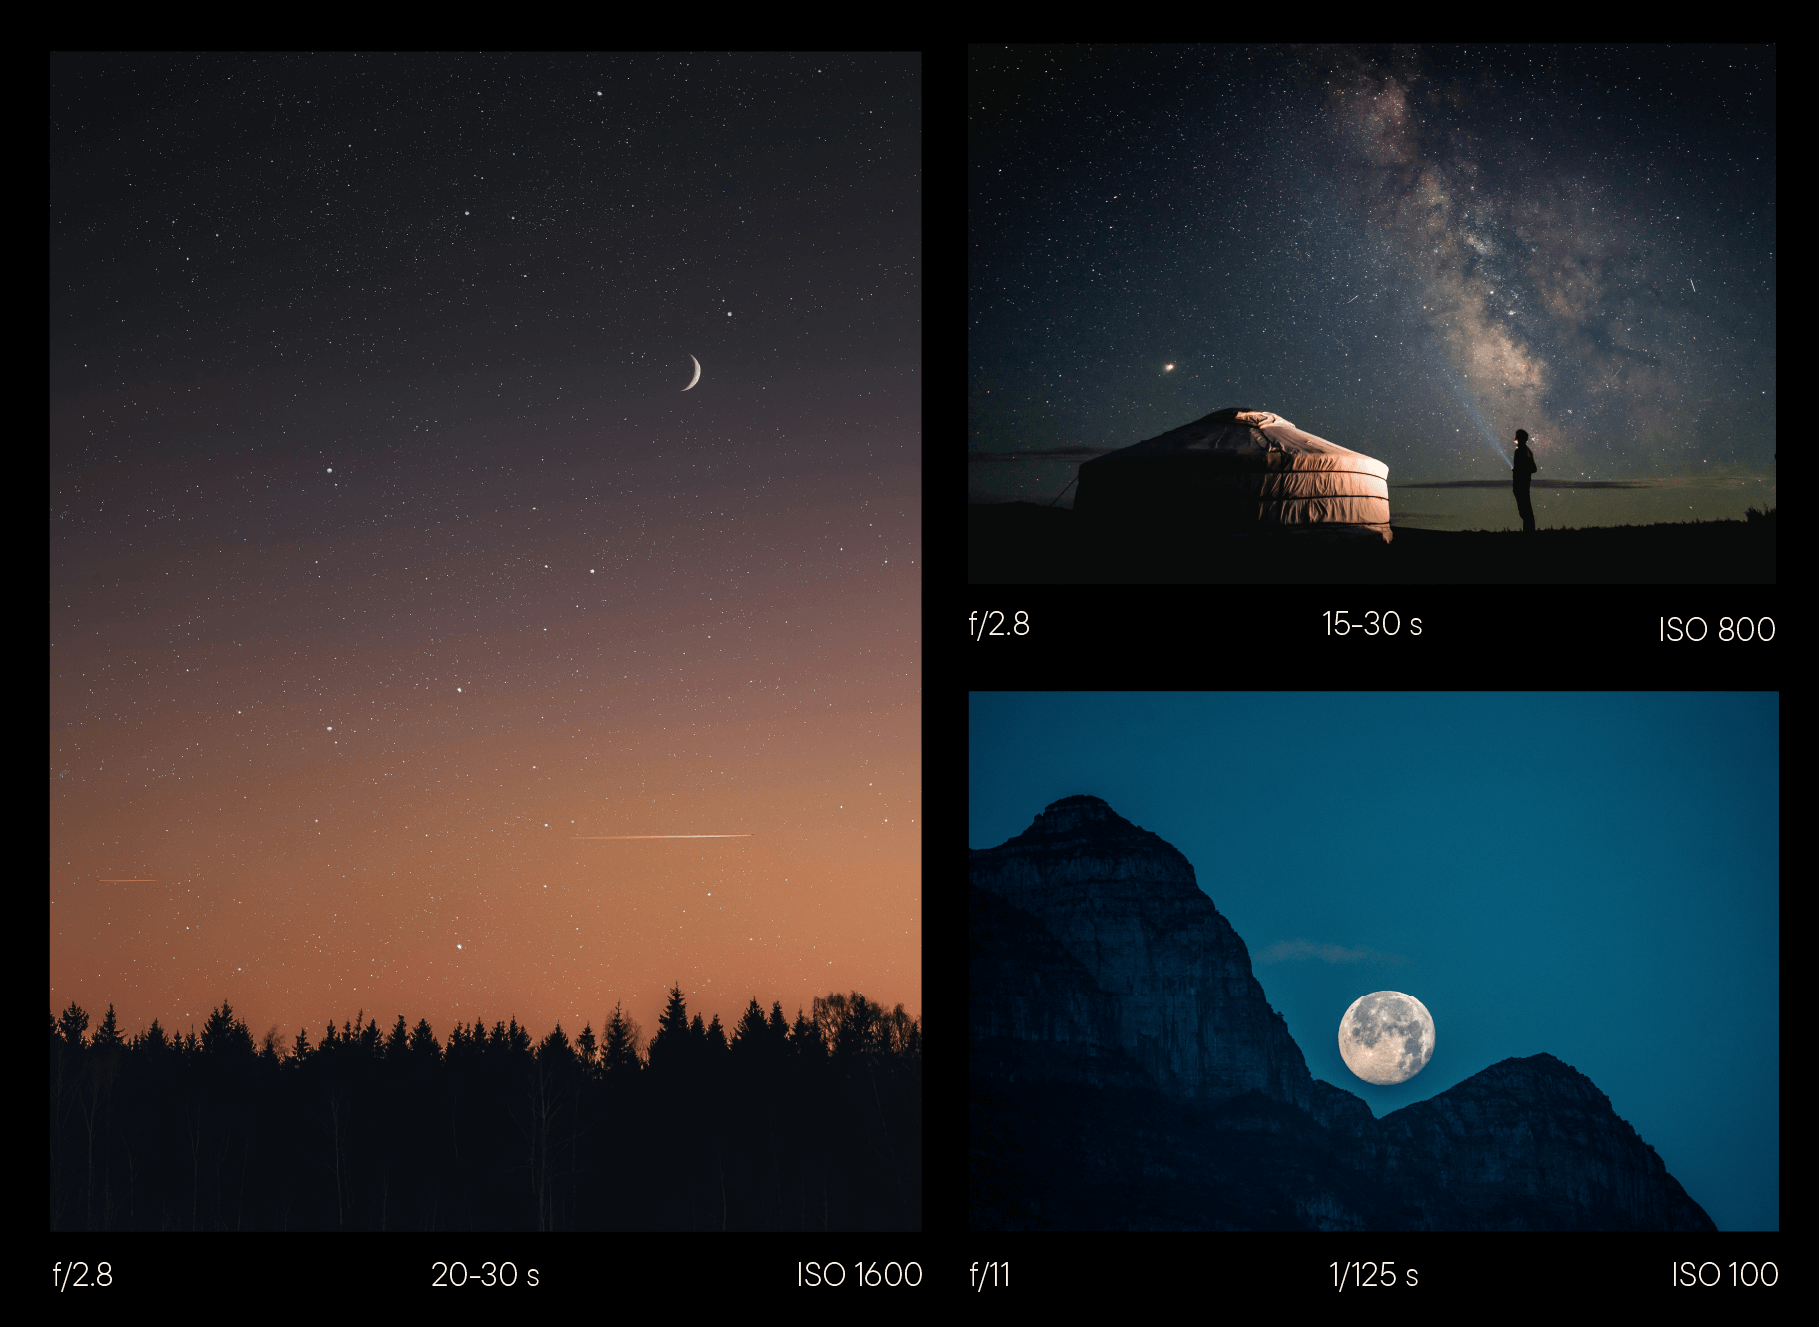
For moon photography, opt for a shorter exposure time due to the moon's brightness. A telephoto lens is ideal for capturing the moon in large, detailed shots.
Northern Lights
For capturing the northern lights, use the same settings as for astrophotography: Use a wide-open aperture, a long exposure time, and a low ISO value to depict the lights clearly and vividly. Ensure you are in a region where Northern Lights are frequent, such as the northern or southern polar regions. Plan your shots carefully and utilize apps like My Aurora Forecast to determine the best times for your Northern Lights photography.
Firework
Capture the colorful light patterns of a fireworks display for spectacular shots: Set your camera on a tripod and select a medium aperture (e.g., f/8) with a long exposure time (2 to 5 seconds) to capture the light trails of the fireworks. Choose an ISO value between 100 and 200 to achieve a good balance between image noise and light sensitivity.
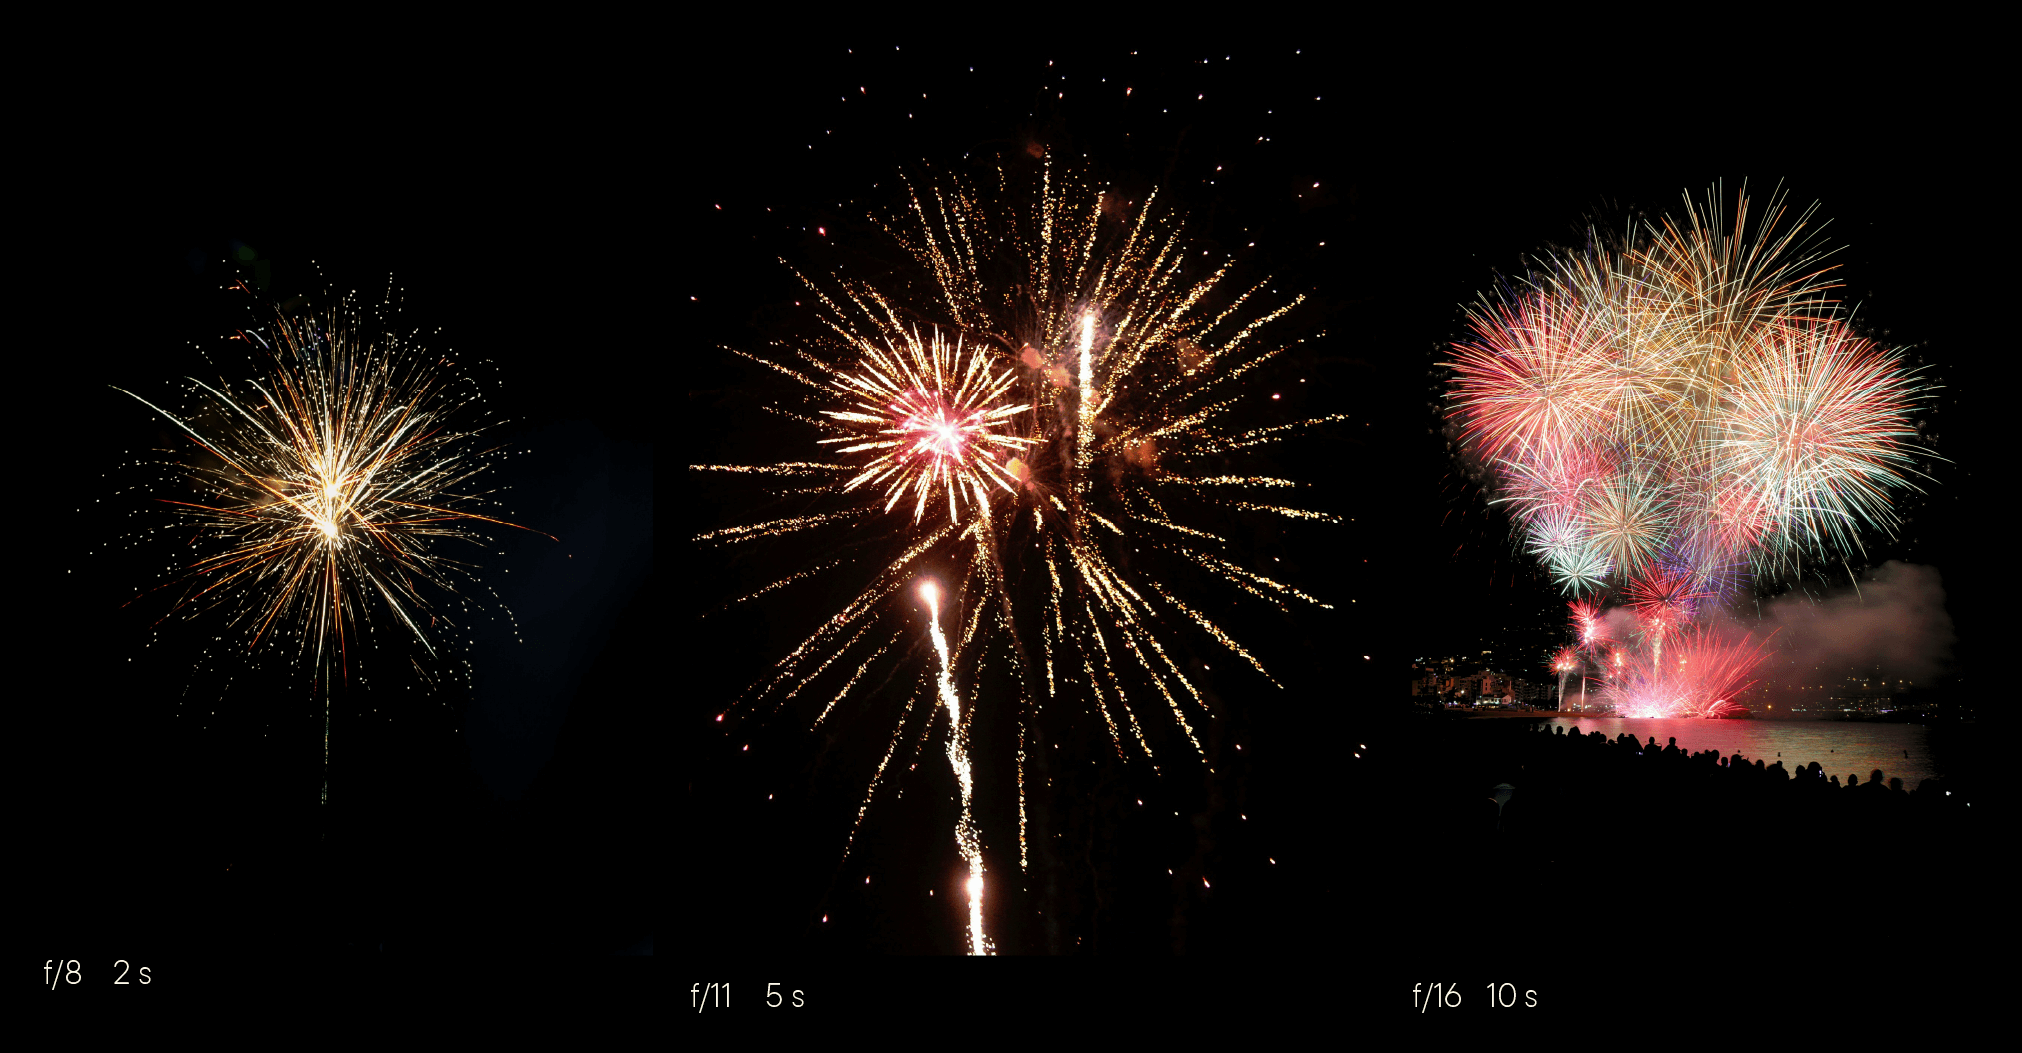
Plan your position in advance to ensure a clear view of the fireworks and avoid any distracting light in your frame. Experiment with different exposure times to achieve various effects.
Abandoned Places
Photograph old buildings and ruins that exude a special atmosphere at night. Use a wide-open aperture (e.g., f/1.8 to f/2.8) and a long exposure time (10 to 30 seconds) to capture the eerie and mysterious ambiance. A low ISO value (100 to 400) helps minimize image noise. Use a flashlight or another light source to illuminate specific areas and create interesting shadows.
Nature at Night
Forests, mountains, and beaches look completely different at night and are popular subjects for photography. Use a wide-open aperture (f/1.8 to f/2.8) and a long exposure time (15 to 30 seconds) to capture the nighttime landscape. A low ISO value (100 to 400) ensures clear and noise-free images. Utilize natural light sources such as the moon or artificial light sources like a flashlight to create interesting effects.
Urban Photography
Cityscapes at night are filled with light sources and moving elements. To capture the city lights, combine long exposure with low ISO settings. Moving objects like cars or people can be captured as light trails or motion blur through long exposure. Avoid overexposure and adjust the color temperature to match the artificial light sources for an atmospheric image.
Perfecting Your Night Shots: Post-Processing
By using the right post-processing techniques, you can elevate your night shots to a new level. Experiment with various settings and tools to develop your own style and capture the nocturnal world effectively.
Software and Basic Editing Steps
Adobe Lightroom and Photoshop are popular tools for post-processing night shots. Here are some detailed steps and tips to get the most out of your night photography:

1. Adjusting Exposure:
- Open your image on Lightroom or Photoshop.
- Adjust the exposure to optimize the brightness of the image. Drag the exposure slider to the right to brighten the image, or to the left to darken it.
- Check the histogram to ensure that highlights and shadows are not clipped.

2. Increase Contrast:
- Increase the contrast to enhance the differences between light and dark areas.
- Drag the contrast slider to the right to increase the contrast.
- Make sure not to over-process the image, to maintain its natural appearance.

3. Enhance Colors:
- Adjust the color temperature slider to the right (warmer) or to the left (cooler) until the colors look realistic.
- Use targeted color corrections to intensify or diminish specific colors. On Lightroom, you can do this in the HSL (Hue, Saturation, Luminance) panel.

4. Increase Sharpness:
- On Lightroom, you'll find the sharpening slider in the Detail panel. Drag the sharpening slider to the right to enhance details.
- Use the masking slider to sharpen only the edges and leave smooth areas unsharpened. Hold down the Alt key while moving the slider to preview the effect.

5. Using Vignettes:
- Use vignettes to direct focus towards the main subject.
- On Lightroom, you can find the vignetting options in the Effects panel. Drag the slider to the left to add a dark vignette.
- Adjust the roundness and feathering of the vignette to achieve a natural effect.
.pdf?ts=1768828741)
Noise Reduction
Image noise is a common issue in night photography, especially at high ISO values. Here are some detailed steps for noise reduction:
1. Reduce Luminance Noise:
- Open your image in Lightroom or Photoshop and navigate to the Detail panel.
- Drag the slider to the right to reduce the noise. Start with a setting around 20 to 40 and adjust as needed.
- Make sure the image doesn't become too soft, as this may cause loss of details.
2. Reduce Color Noise:
- Drag the slider to the right to minimize color noise. An adjustment around 25 to 50 is often sufficient.
- Check the image at 100% view to ensure you've effectively reduced color noise without distorting the colors.
3. Fine-tuning:
- Use the Detail and Contrast sliders in the noise reduction window to make fine adjustments.
- Drag the Detail slider to the right to preserve fine details, and adjust the Contrast slider to the left or right to refine the overall image.
Your Path to Perfect Night Photography
Night photography requires patience, technical knowledge, and creativity. With the right techniques, equipment, and careful post-processing, you can capture stunning images in the darkness. Experiment, learn from your experiences, and discover the magic of night photography.
Download our checklist for perfect night photography now and start your nocturnal photo adventures!
