Creatively wrapping up presents
Beautifully wrapping up ifolor photo products as presents
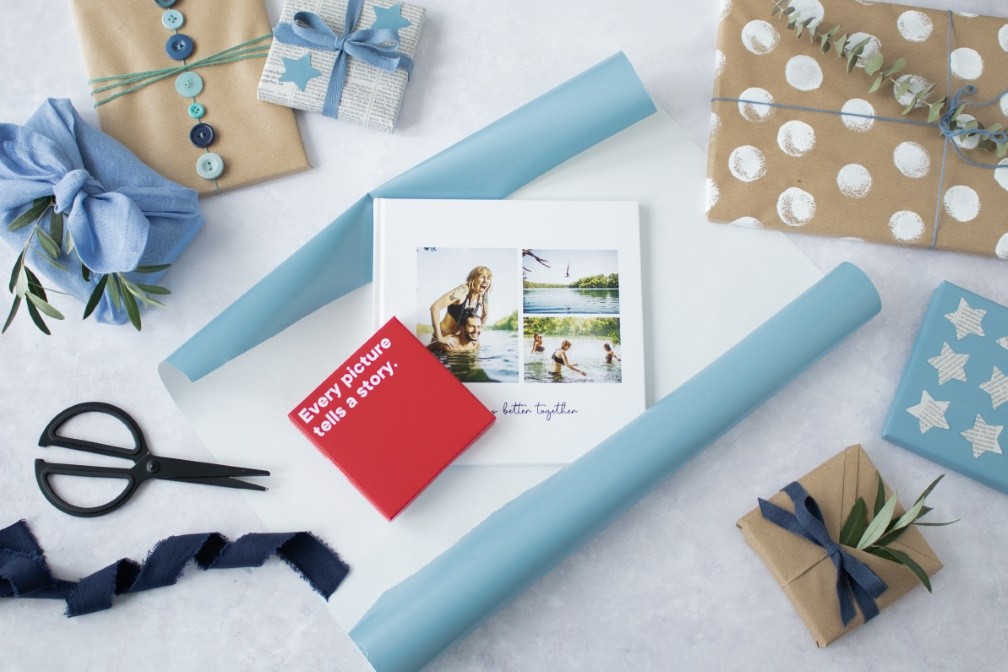
Individually designed photo products always make great gifts. By wrapping gifts beautifully and creatively for loved ones you can watch their face light up with joy. We'll show you how to creatively wrap and decorate your ifolor photo products.
Creative wrapping for gifts
By using the Kimono technique, you can wrap rectangular or square gifts in wrapping paper and make the wrapping paper really stand out. You can use this technique on photo books, photo calendars, rectangular photo box and of course almost all other boxes and books, which have this shape.
Here is what you will need:
- Wrapping paper
- Ribbon
- A pair of scissors
- Tape
- Decorations to add to gift at the end
- Twigs, dried flowers or even a printed photo
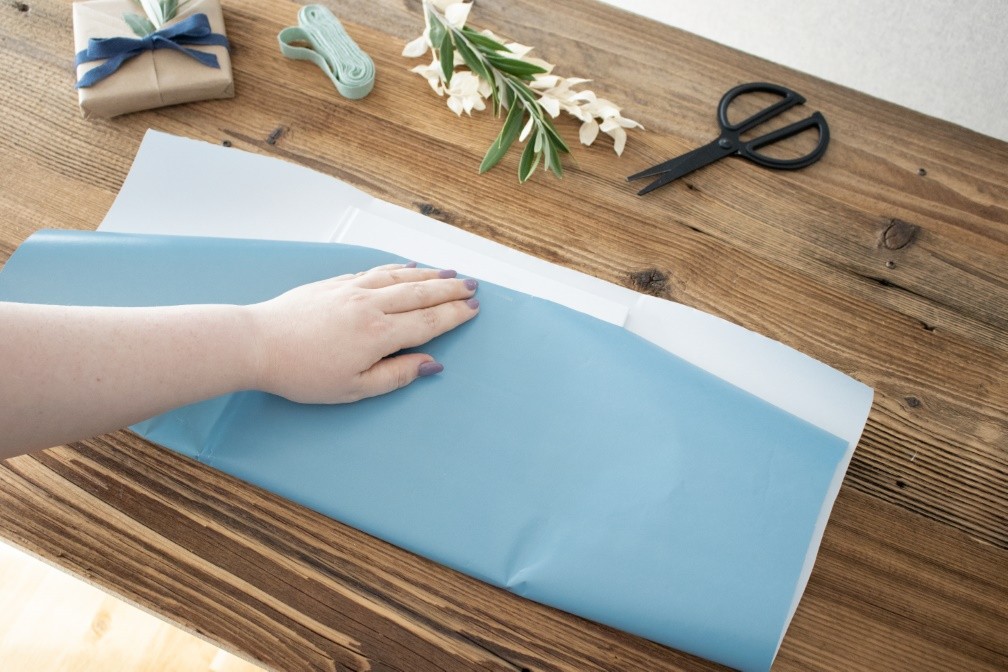
Step 1: Cutting
First, cut a sheet of wrapping paper so that you can fold the paper up to the top of the gift on one side and to at least three quarters of the surface of your gift on the opposite side (as shown in the picture for step 1). On both the left and right sides, the wrapping paper should fold down slightly over the centre of your gift.
For the first step of wrapping, fold up the longer side so that at least three quarters of your gift is covered by the wrapping paper.
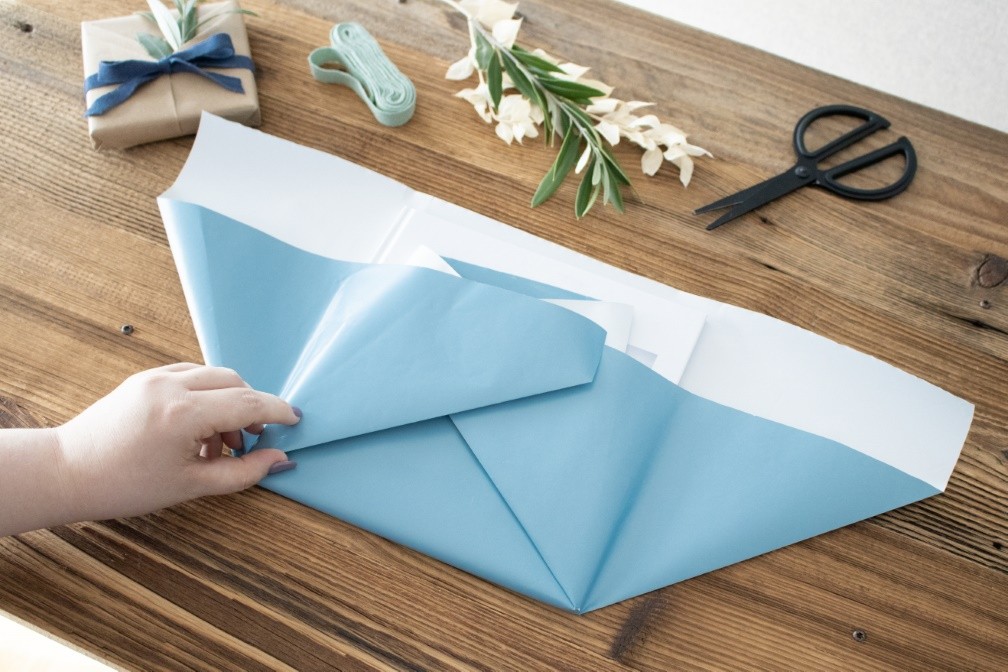
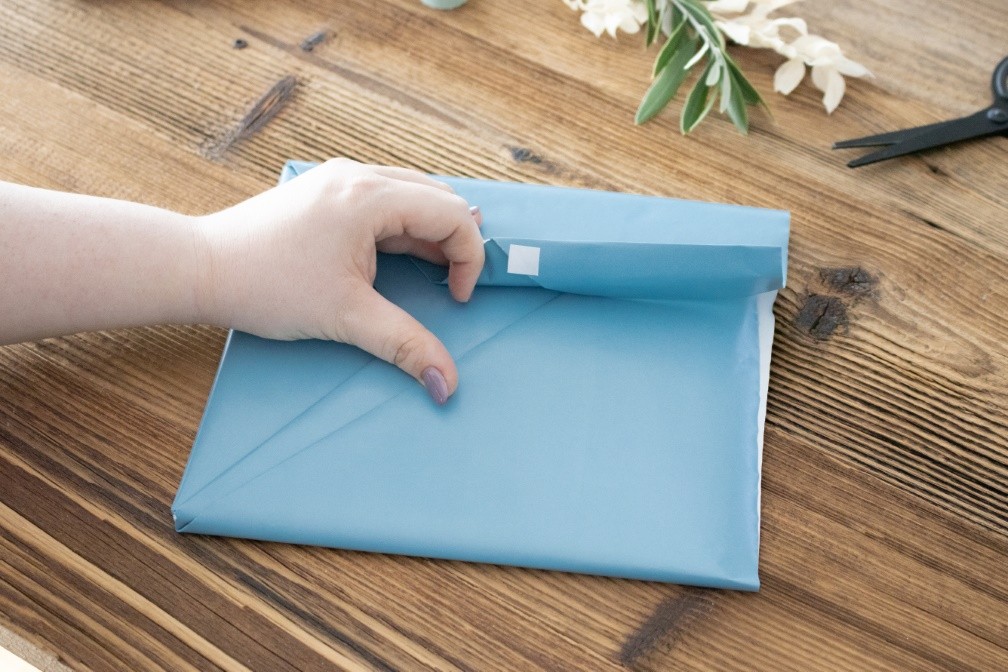
Step 2: fold up the sides and fold down the overhangs.
For the second step, fold up the paper to make a triangle on the left and right sides. Next smooth the bottom edge and fold the top corner over the surface of your gift to the opposite side.
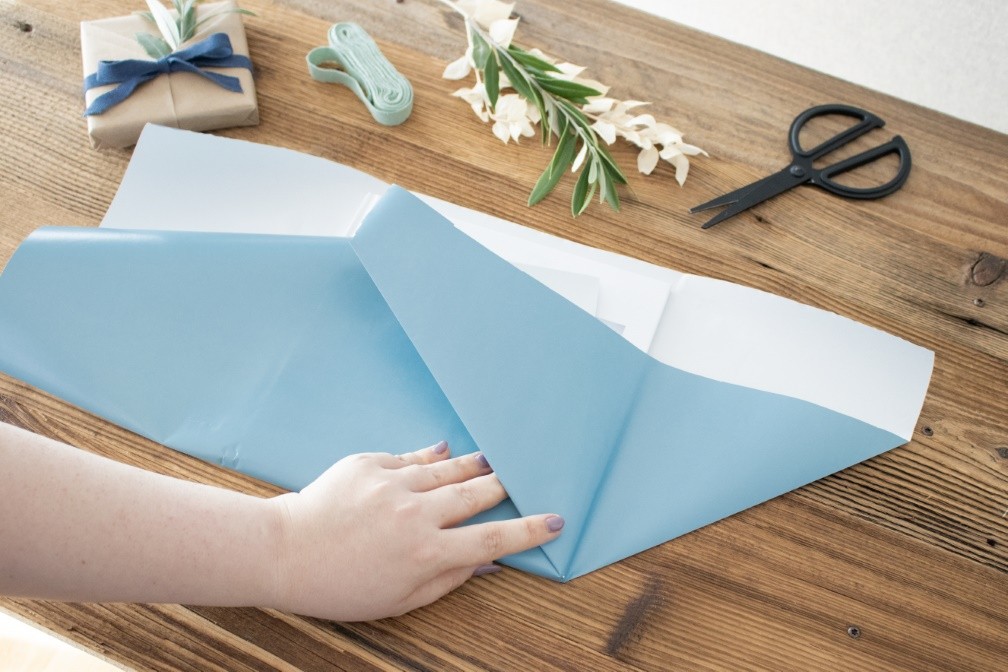
Wrapping gifts using the Kimono technique – step 2.
Step 3: fold up the bottom corners
Now fold the bottom triangles upwards over the gift. The right side up and then to the left side of the gift and vice versa.
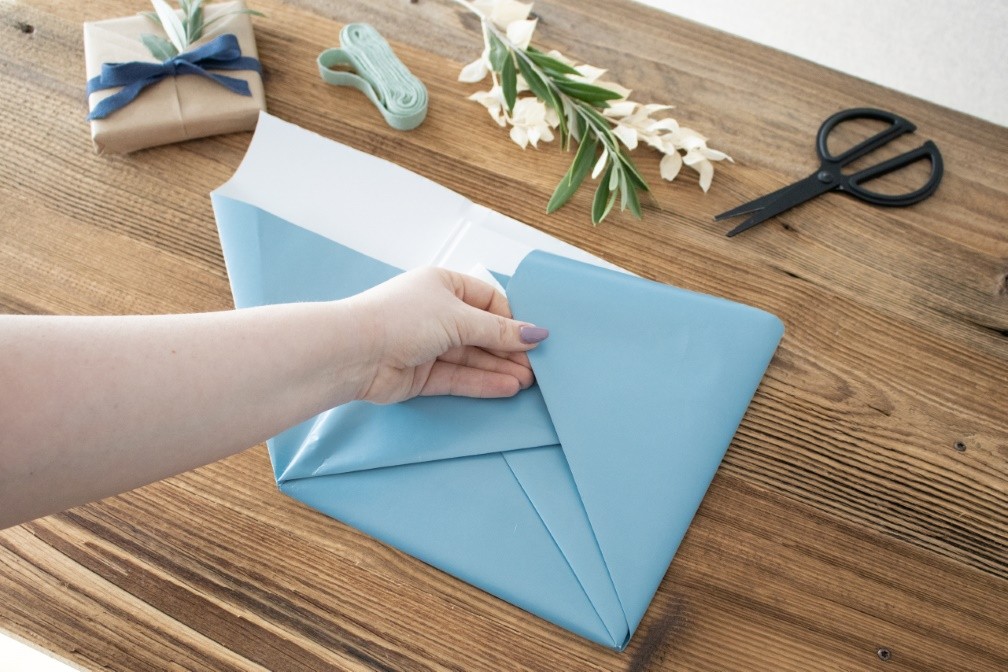
Using the Kimono style to wrap up gifts – Step 3.
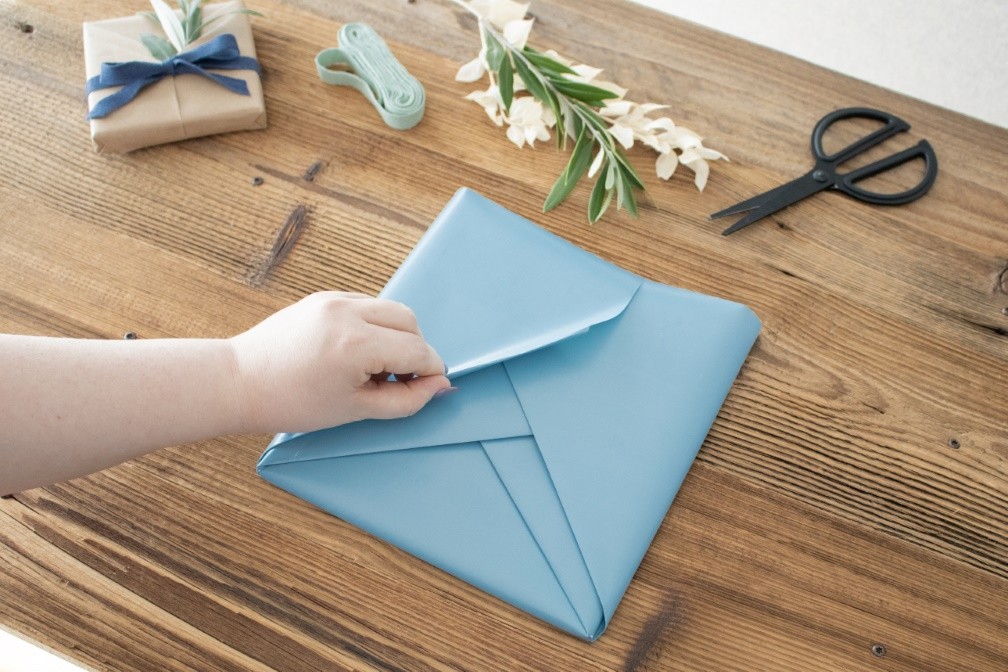
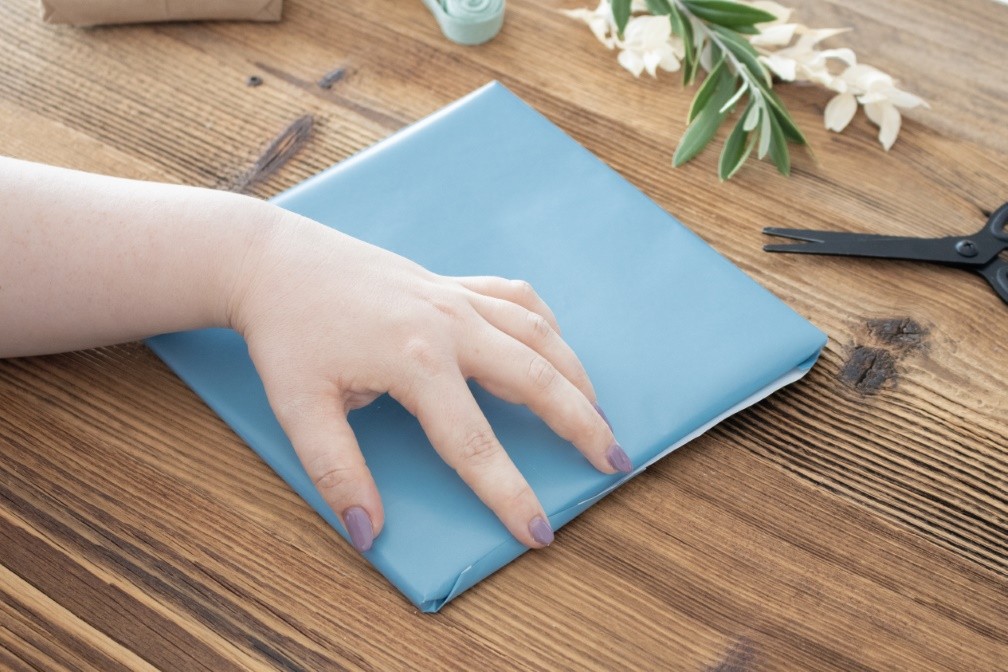
Step 4: fold over and secure the top edge of the paper
The sides will have been folded over each other, which means one side is at the top. To make a neat finish, fold the edge that ends in the middle of the gift over once. Then use some tape to keep it in place.
Using the Kimono style to wrap up gifts – Step 4.
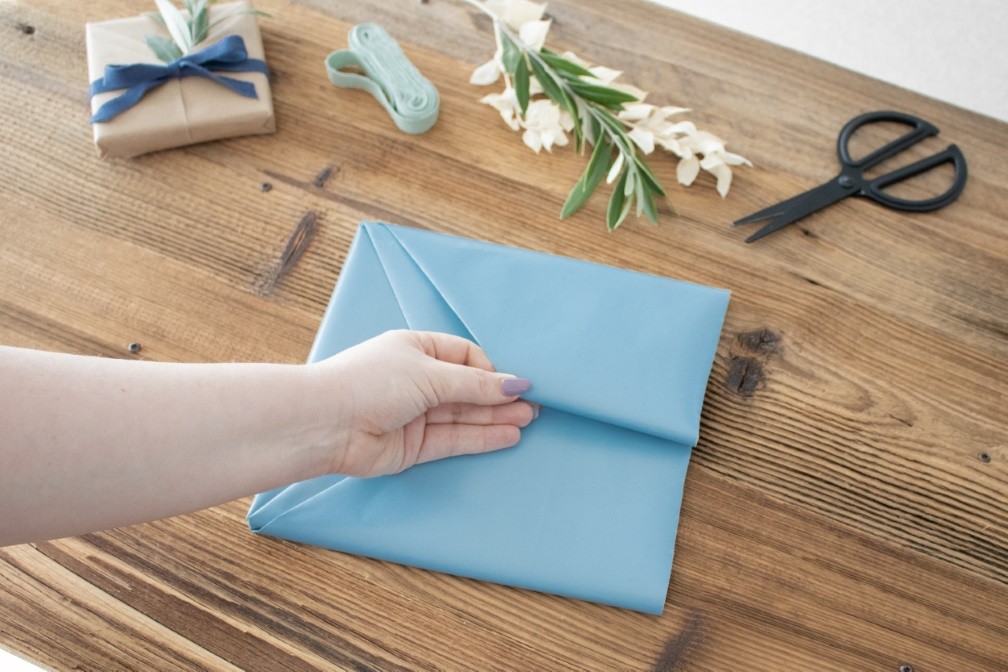
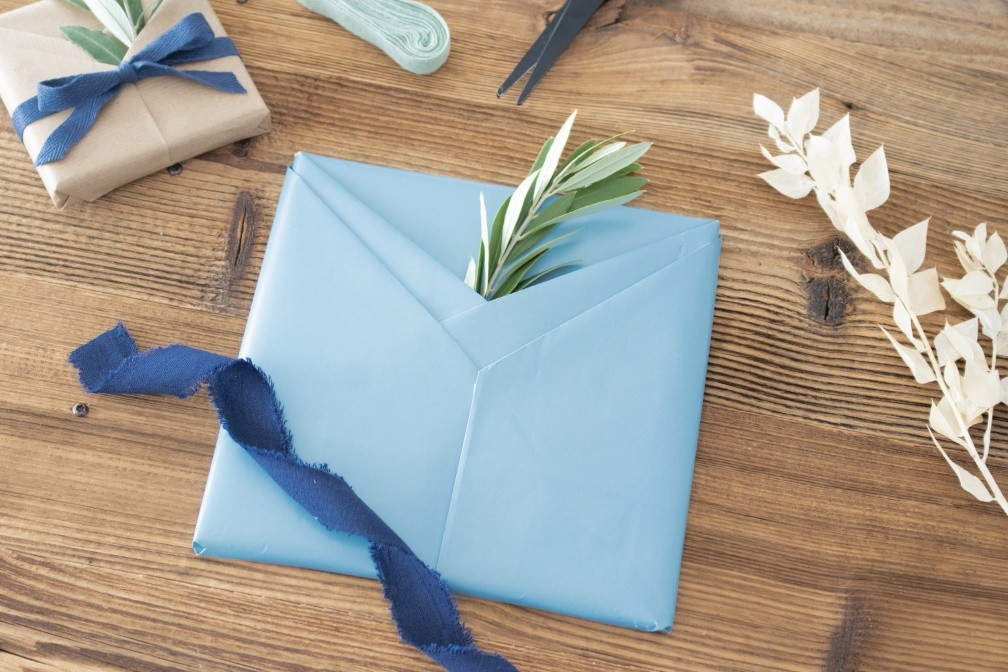
Step 5: fold the bottom edge and decorate the gift
Last step: for the final step you will need to fold over the open bottom edge of the wrapping paper and glue it to keep it in place. The kimono technique is now finished, and you can use the flaps on the front to add a decorative branch, a photo print or even a photo strip. Finally, add some matching ribbon or a bow and voilà your beautifully individually wrapped present is good to go.
Using the Kimono style to wrap up gifts – Step 5.
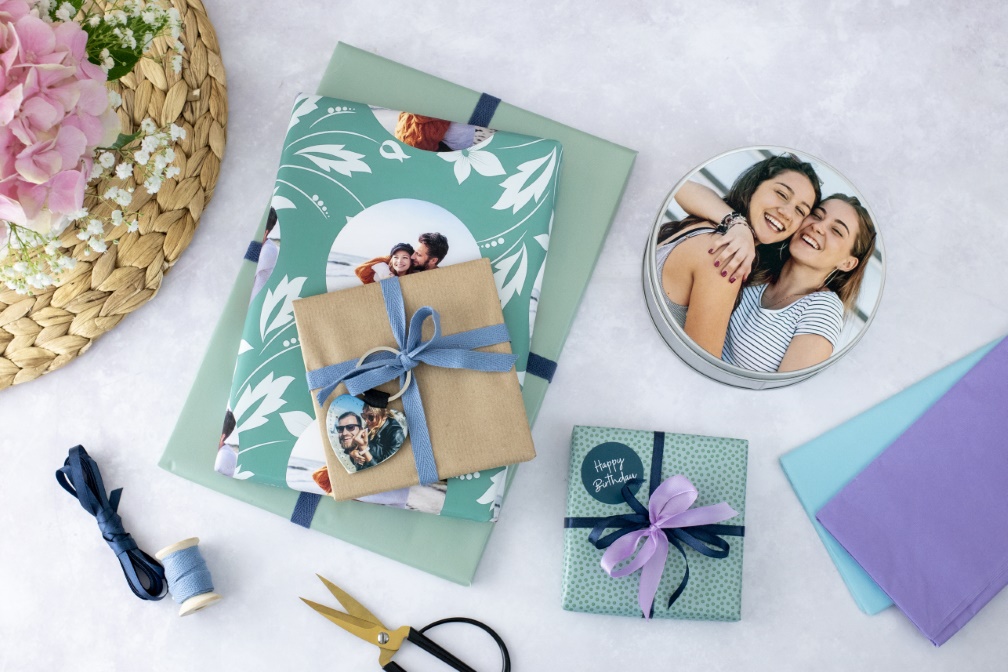
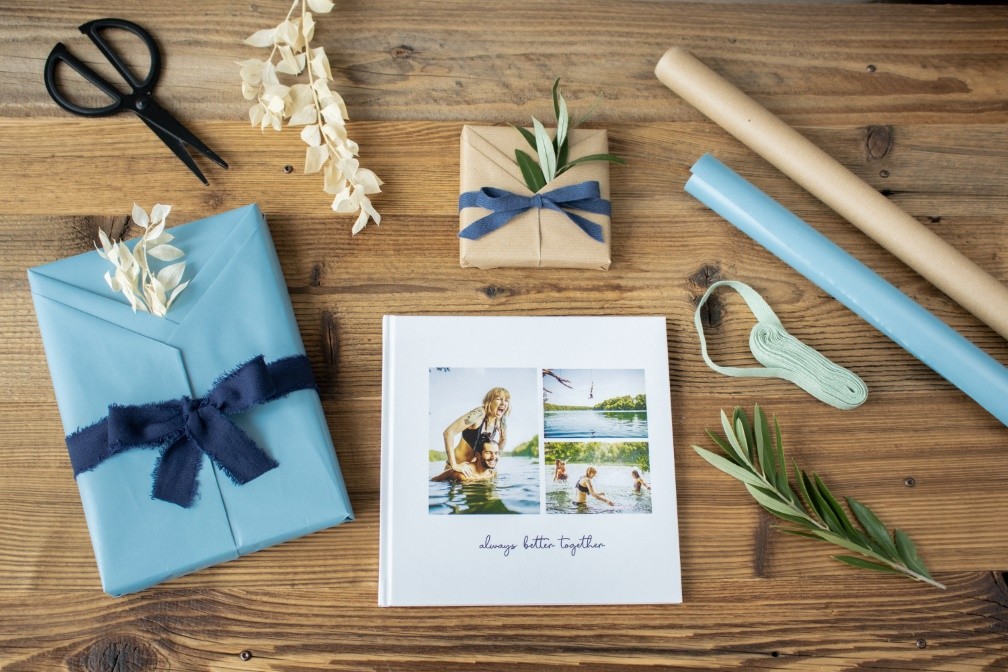
Wrapping up presents with products from ifolor
Here you can find out how to use individually designed photo products from ifolor to wrap up or decorate and personalise your presents.
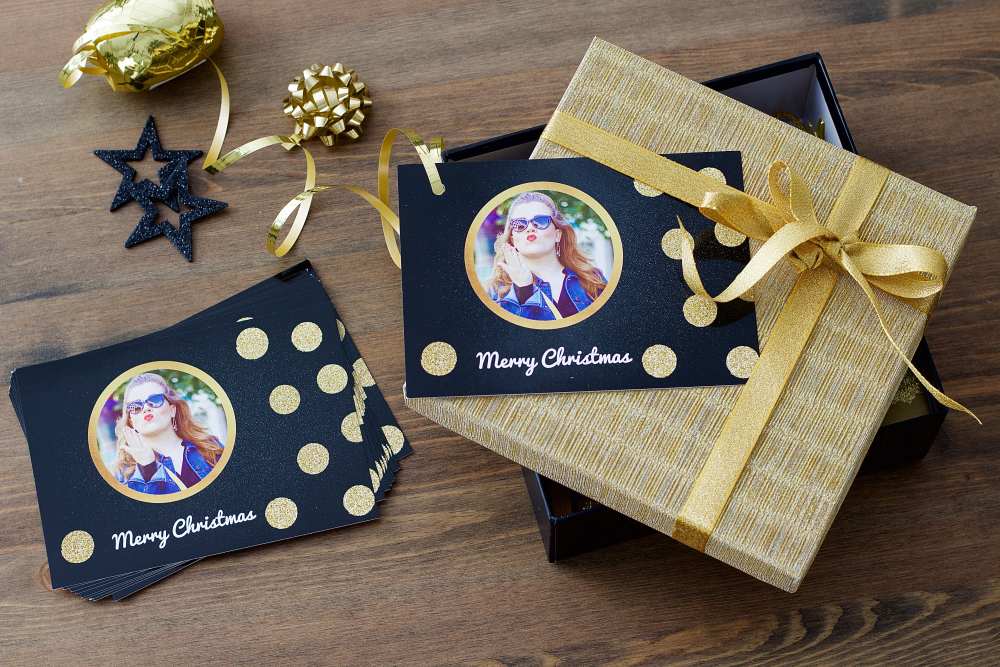
Making a gift tag using a photo postcard
Personalise a postcard and hang it on your gift as a creative gift tag. Personalise it on the front and write a personal message to the recipient on the back – voilà, your DIY gift tag is ready to go.
Tip
If your photo product is not square or it has an awkward shape, you can leave it in its original ifolor packaging, i.e. the shipping box or envelope, to make it easier for you to wrap up.
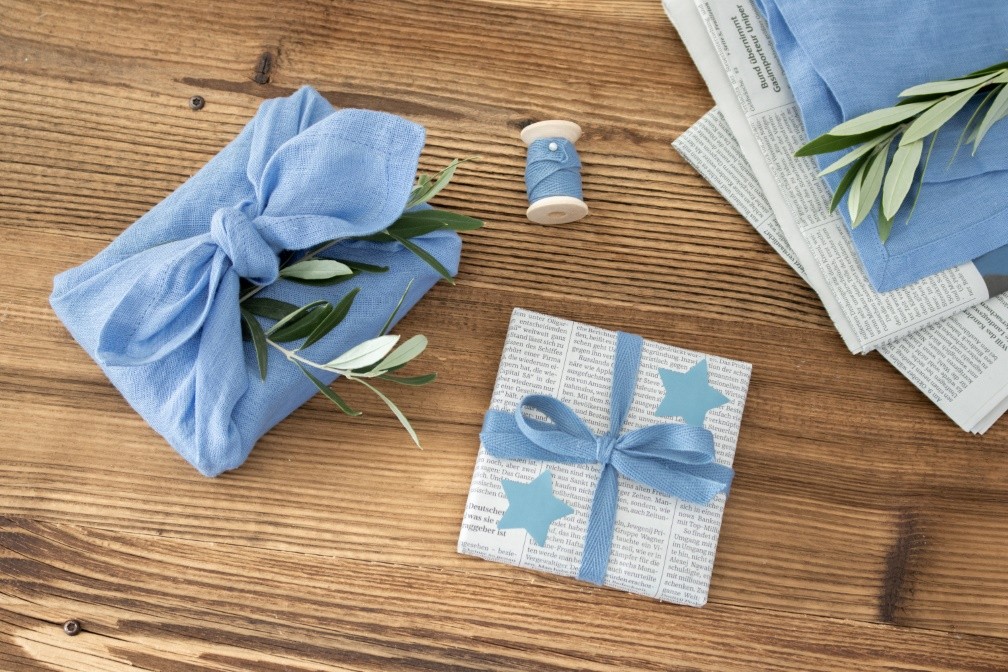
Instead of wrapping paper: use an upcycling technique
If you don't have any wrapping paper at home or if you would like to use a more sustainable alternative, then materials such as newspaper, fabric, cloth or napkins can be used. Newspaper is perfect for last-minute gifts that need to be quickly wrapped as you probably always have newspaper at home. It's best to choose a section without pictures or with only a few small pictures, as this gives it a great look. On the other hand, pictures or headlines can also sometimes match the occasion, which will give your wrapping paper a fantastic look.
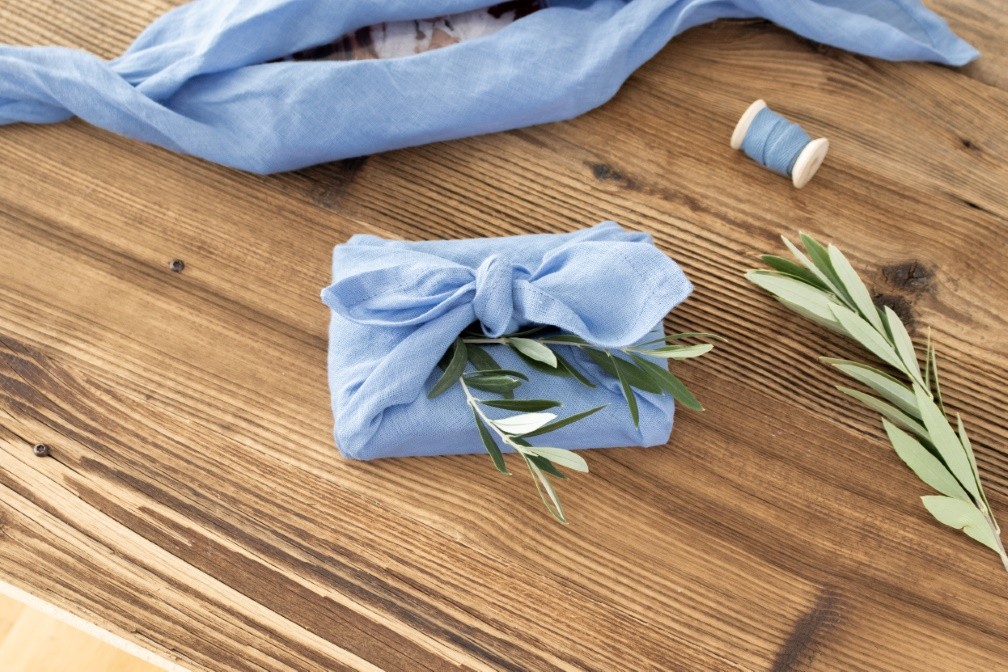
Material and napkins are particularly suitable for round or multi-part gifts, as the material adapts easily and does not crease or tear like paper. To do this, place your gift in the centre of the cloth or piece of fabric and slightly roll up the two opposite corners to place them over the gift - similar to Christmas crackers.
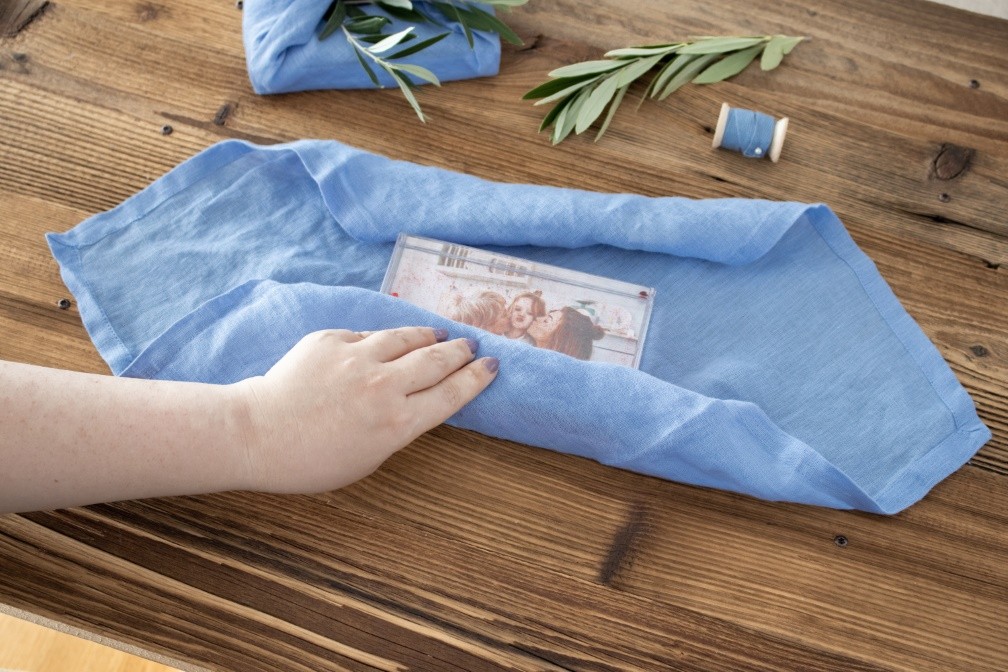
Wrap your photo product in a nice cloth.
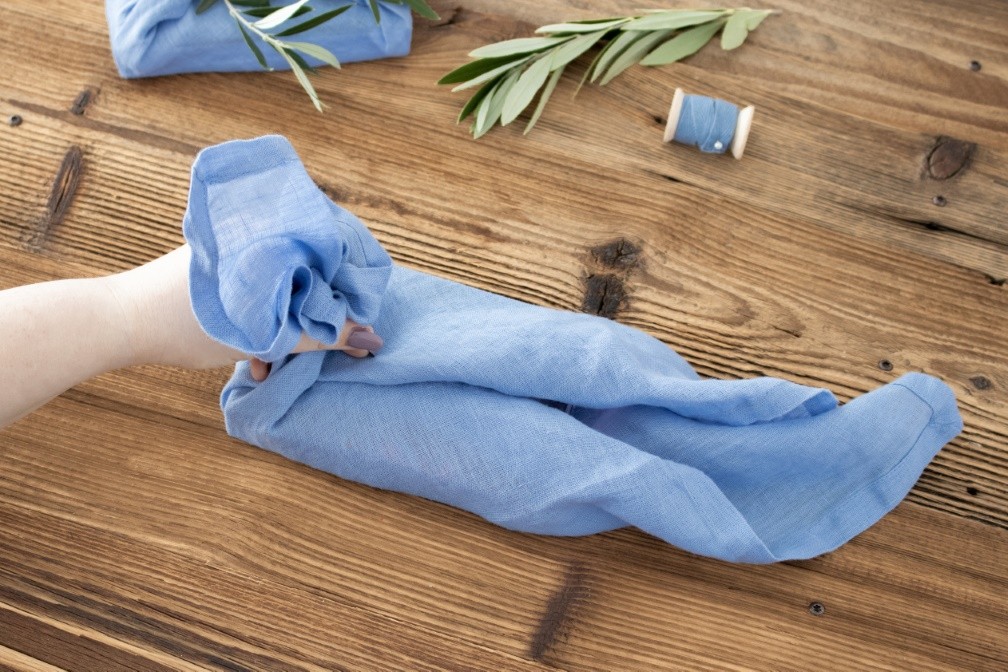
Now gently pull the other two corners together over the gift and then knot them. Your fabric gift wrap is ready and can be decorated with ribbon, thread or a decorative twig.
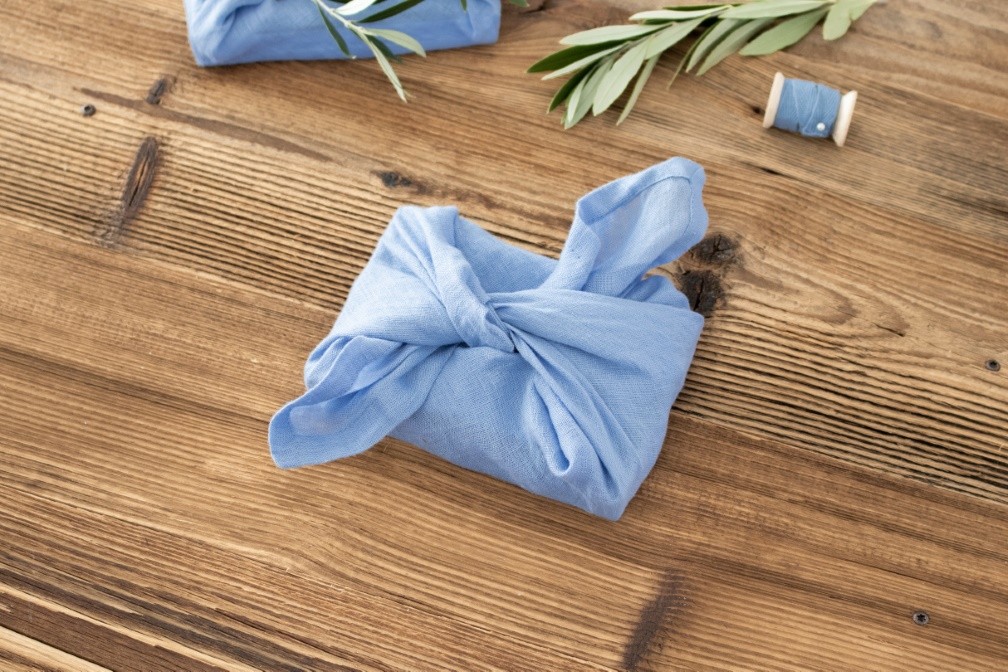
Fold the sides of the scarf and knot them over the gift.
Tip
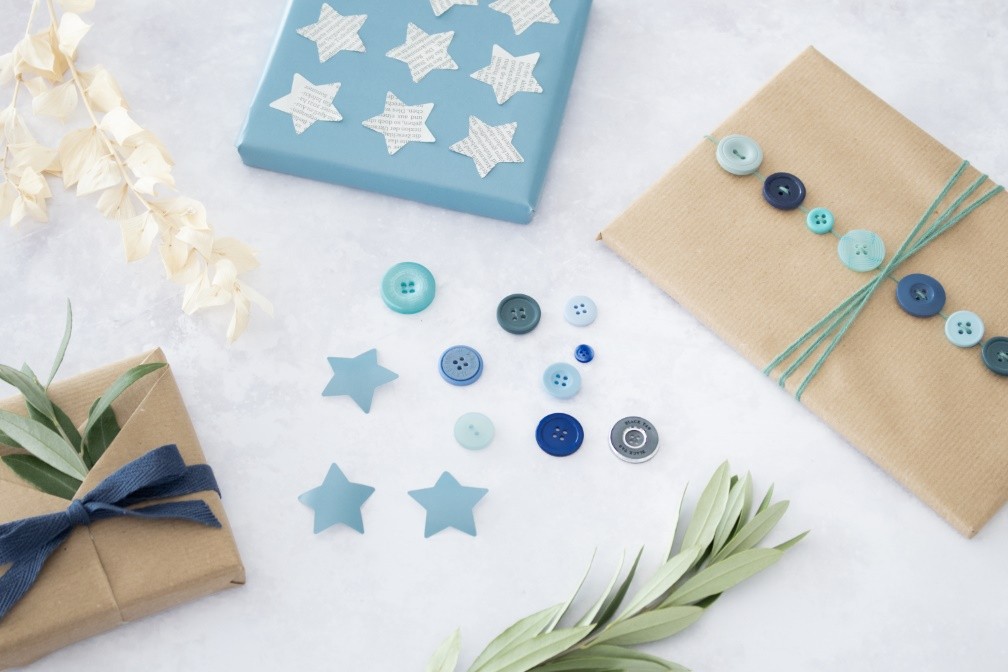
Keep spare pieces of wrapping paper, newspaper and material to make other decorations. Cut or punch out stars or various geometric shapes from the spare pieces and use them as small decorations on other gift wrappings.
Creatively wrap and add the finishing touches to your wrapped gift
Sometimes you don’t need fancy wrapping paper or unusual packaging. Instead, add the finishing touches to your wrapped gift with some decorations. Tie it around, stick it on, tuck it in: a wide variety of materials can be used to decorate gifts:
- Twigs, petals and dried flowers
- Buttons, ribbon, string and thread
- Stars, hearts and other paper shapes or spare pieces of material
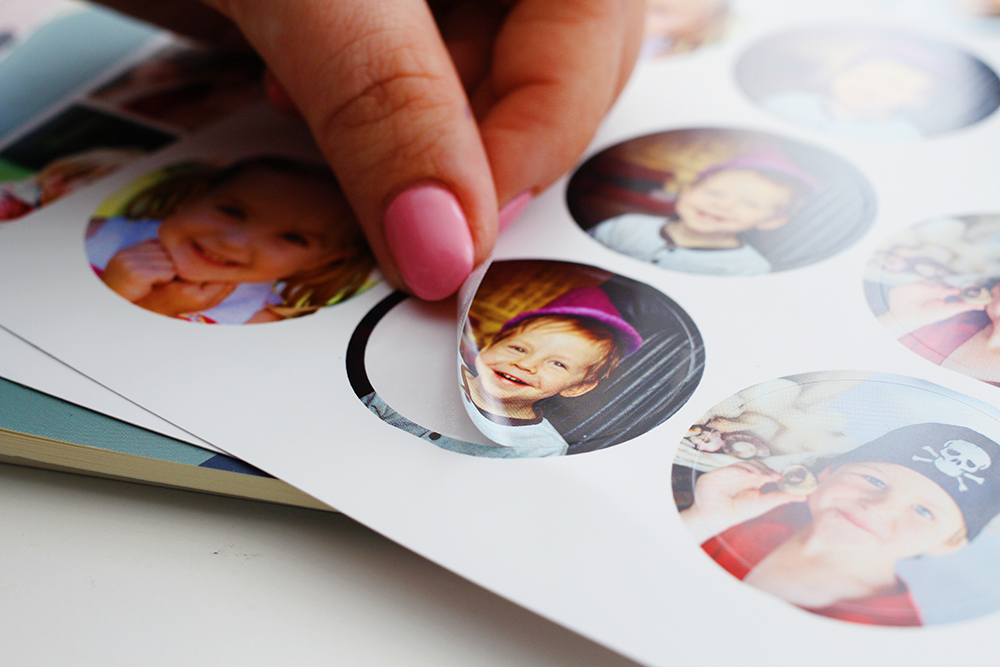
Decorate gifts with photo stickers
With just a few easy clicks you can create great photo stickers from your own photos to decorate your gifts.
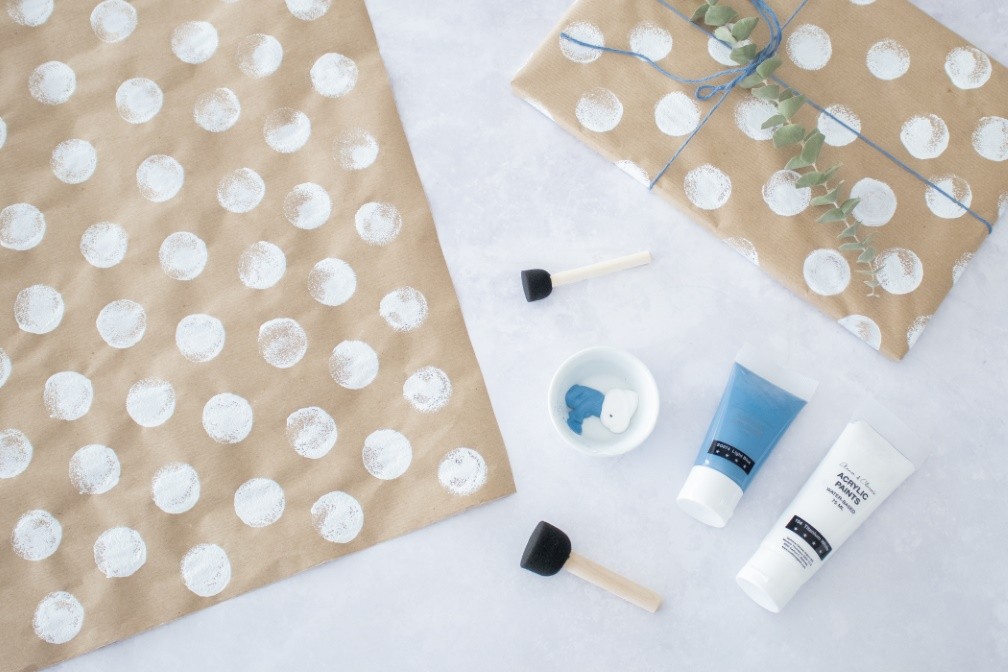
Adding some colour to your wrapping paper
Another great way to decorate your gifts individually is to paint or spray some simple wrapping paper or newspaper with paint. You can also buy dabs of paint, small sponges and stamps in arts and crafts shops. Acrylic paint is best type of paint to use for adding some colour to your wrapping paper. Instead of painting the paper, you can also decorate it with hand lettering or personalise it directly for your loved ones.
Tip
For families, this is also an excellent way to wrap presents with children. Children can help to design the wrapping paper to wrap their gifts for grandma and grandpa. This can be done by spreading colourful dots onto the wrapping paper with their fingers.
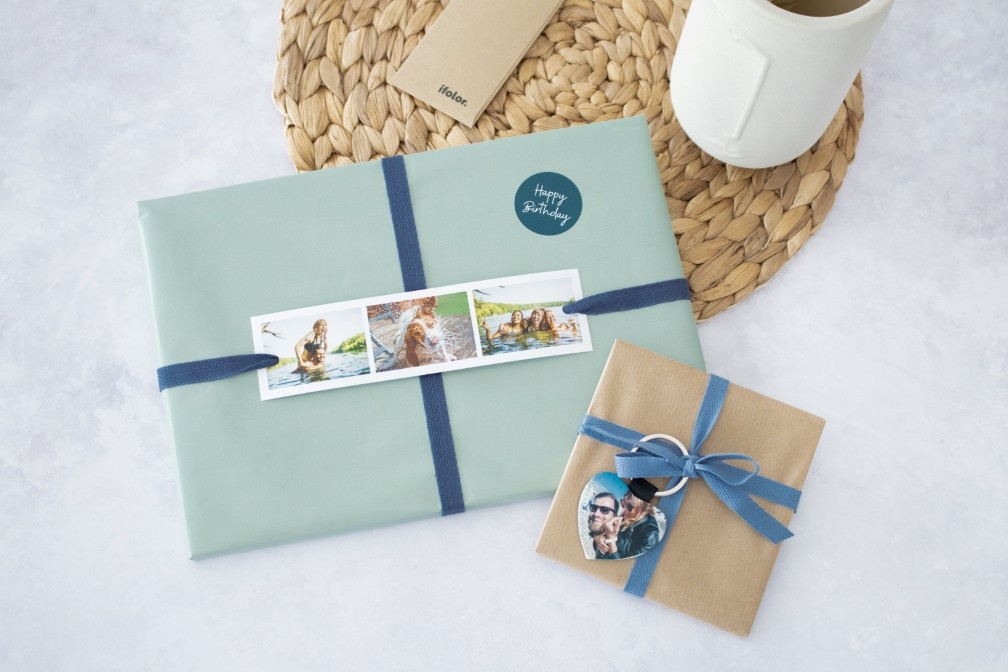
Create personalised gift tags
Attach individually designed tags to your gifts to personalise them. The ifolor photo strips or keyrings, which come in various shapes are perfect for this. Upload your photos and create cool gift tags with sentimental value in no time at all.