
Photoshop Tutorial on Creating an Artificial Bokeh Effect
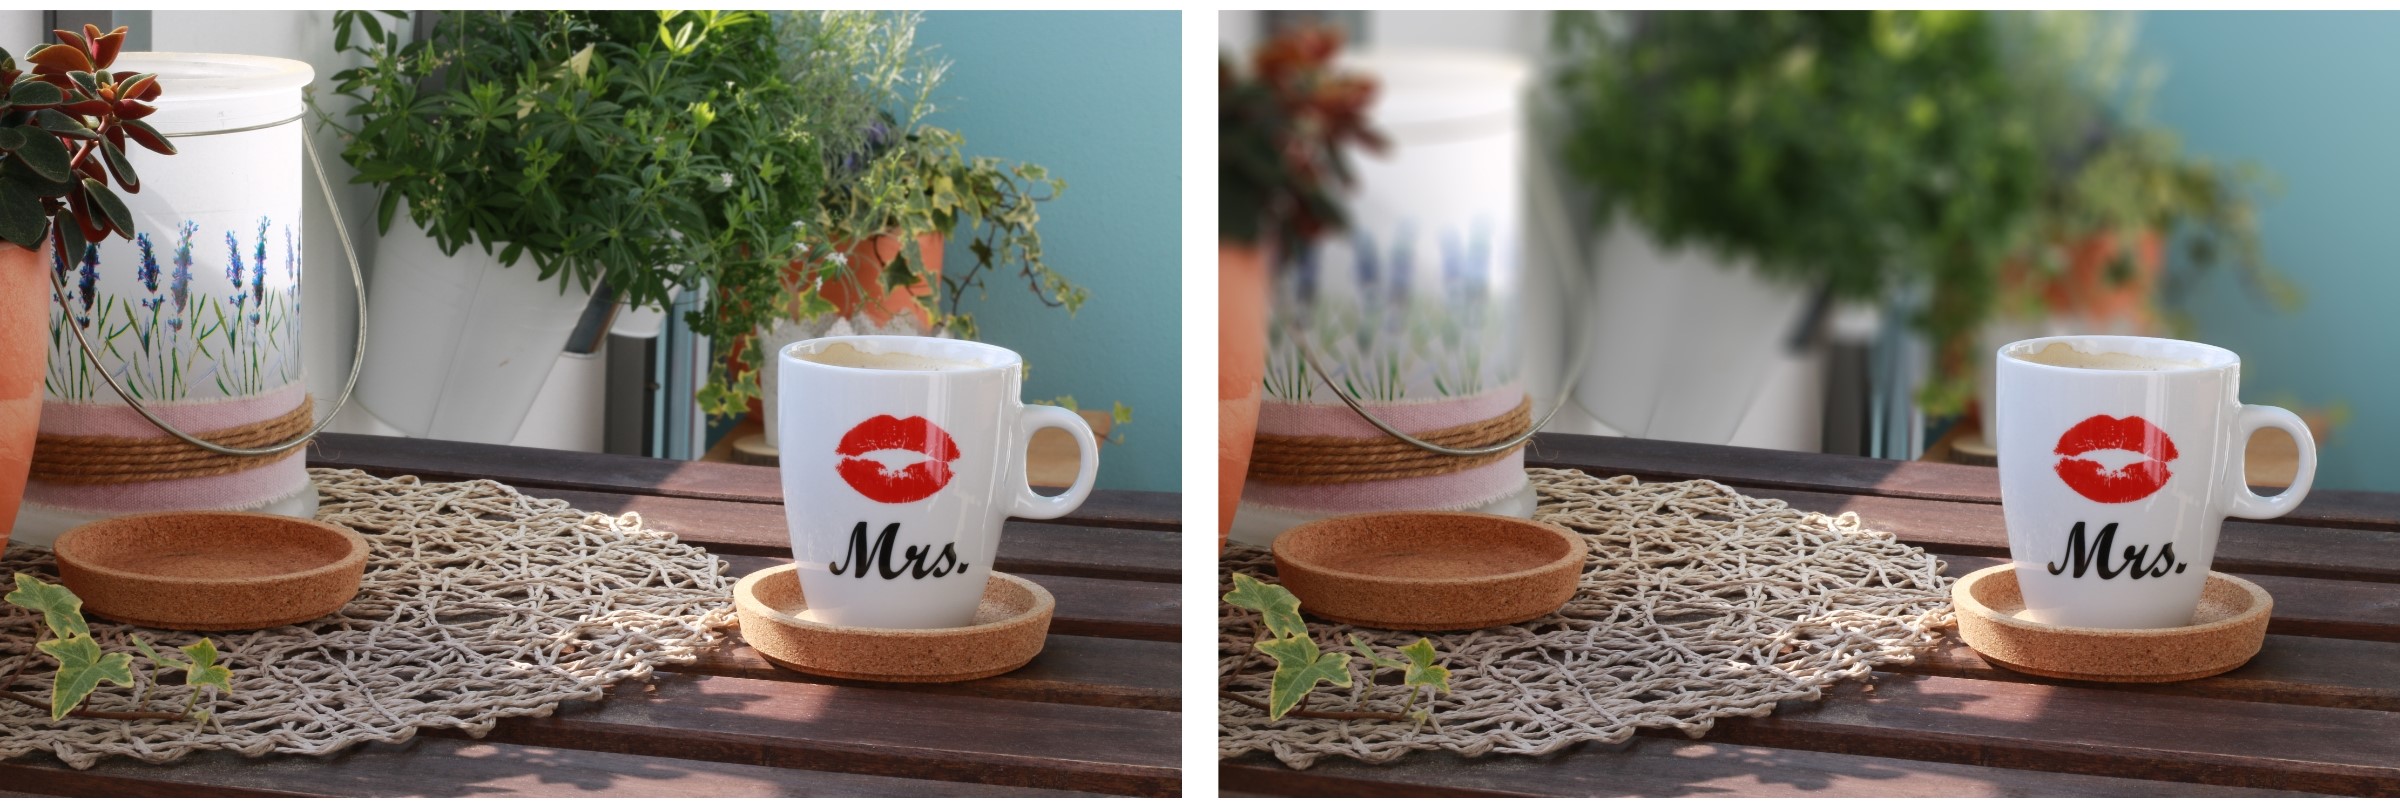
The term "bokeh" is Japanese and means blurred and out of focus. In photography this term is used to describe the aesthetics of areas of a photo that are out of focus. In terms of image effect, the bokeh effect helps to make the main subject really stand out in the photo.
This effect is created by a wide open aperture, which keeps the depth of field of the image shallow. If you cannot create a blur effect with a specific type of lens, then this can also be created afterwards on Photoshop. We will show you step-by-step how to do it.
Step 1: Creating a Blur in the Background on Photoshop
The first step is to create the desired background blur with the help of Photoshop. To make sure that you subject will not be edited, don’t forget to select your subject beforehand with the Quick Selection Tool. You can find this tool on the left toolbar.
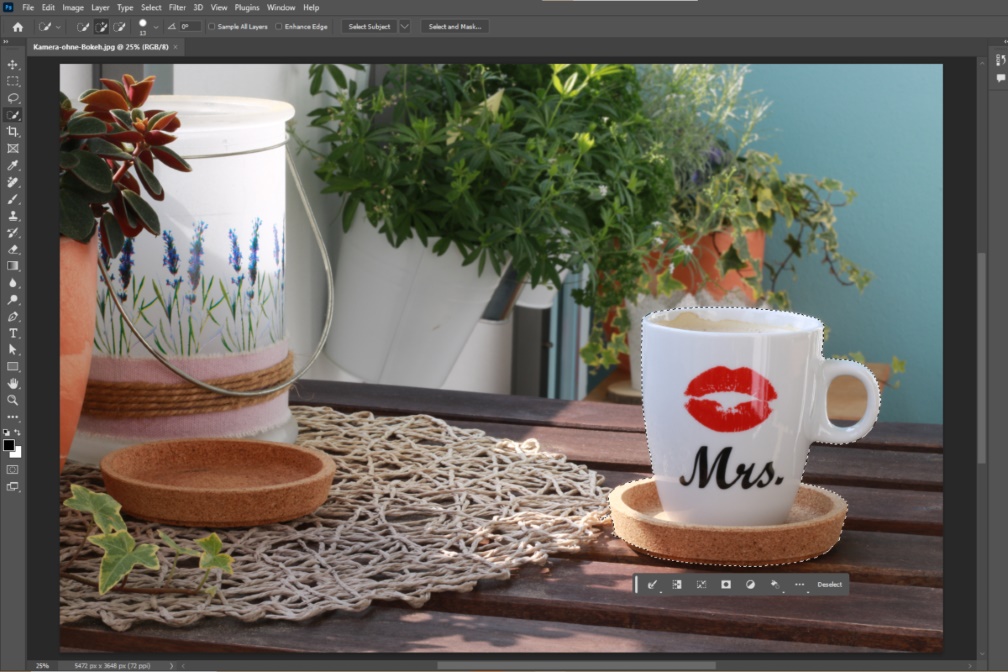
Once the object or your main subject has been roughly outlined, the "Select and mask" mode can be used to refine the selection. Use the "Overlay" view as this will make all unselected areas appear red. Then you can use the brush, the "Quick Selection Tool" or the "Refine Edge Tool" to clearly define your object. When you are satisfied with the selection, you can exit the "Select and mask" mode.
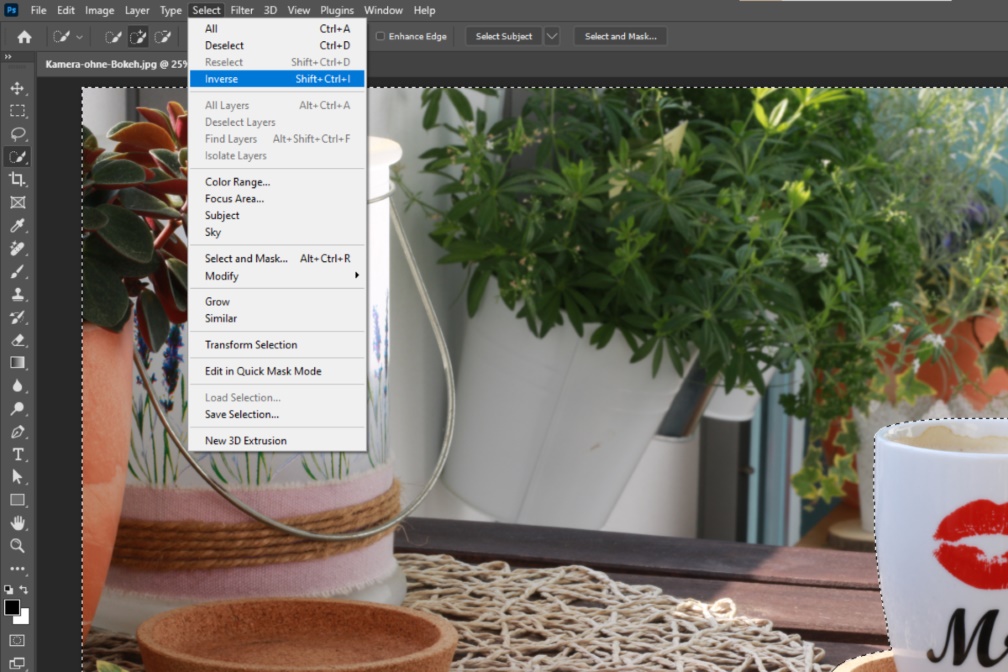
By selecting the object, all further editing steps will now refer to the selected area. However, the aim is to leave the selected object untouched. To select everything except the object, go to the "Selection" tab in the top menu and to "Invert selection" on the context menu.
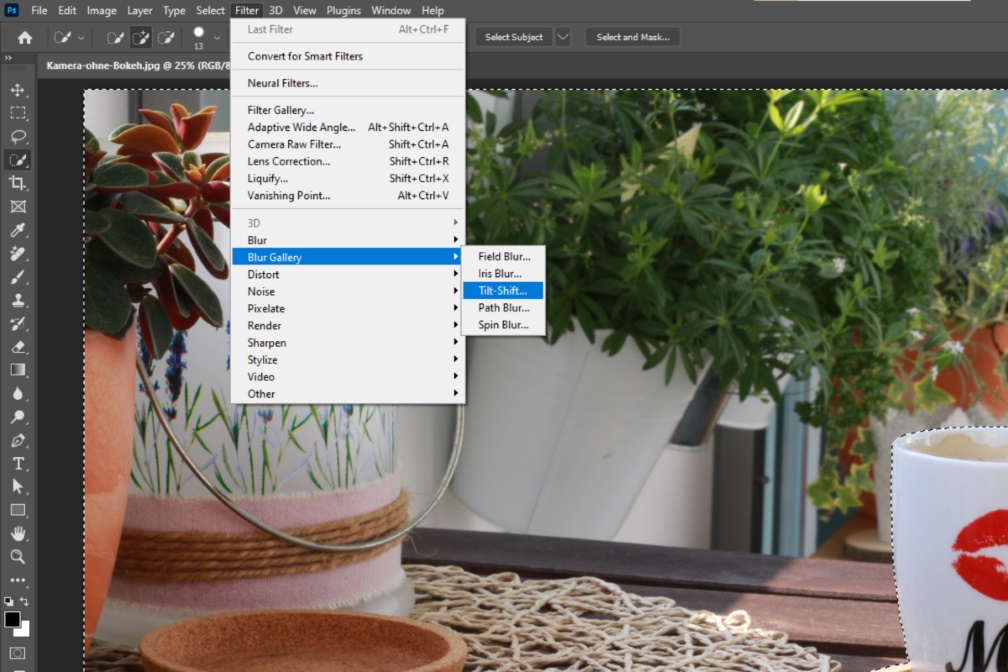
If the selection is reversed, the filter "tilt-shift" can now be applied. You can also find this in the upper menu under the tab "Filter" and "Blur Gallery".
The "tilt-shift" filter consists of a circle, two solid lines and two dashed lines. The two solid lines mark the area that is not blurred. Between the solid and dashed lines a transition from sharp to blurred will be created.
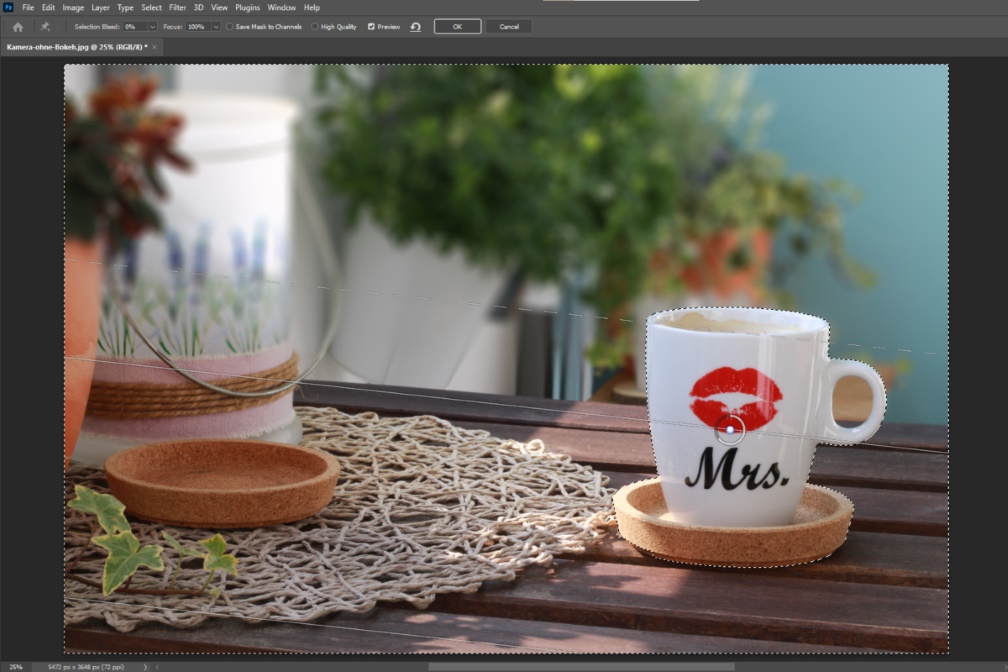
To begin, position the circle on your main subject or the object that will later be in the foreground. The white filling of the circle indicates the strength of the blur. This can be changed by moving the circle or by using the toggle on the settings of the blur tool. It is recommended to increase the blur effect right at the beginning to see the full effect of the repositioned lines.
Now align the lines in your image. In this example, a blur below the cup is not desired so the lower lines are pushed out beyond the edge of the image.
Apart from the blur areas, further changes can be made in the blur tool settings. For example, it is possible to create aperture spots by moving the "Bokeh highlights" and "Brightness range" toggle, which will then intensify the blur effect.
Step 2: Creating Artificial Aperture Spots in Photoshop
If the aperture spots created by the settings on the blur tool are not yet sufficient, you can also create this effect artificially.
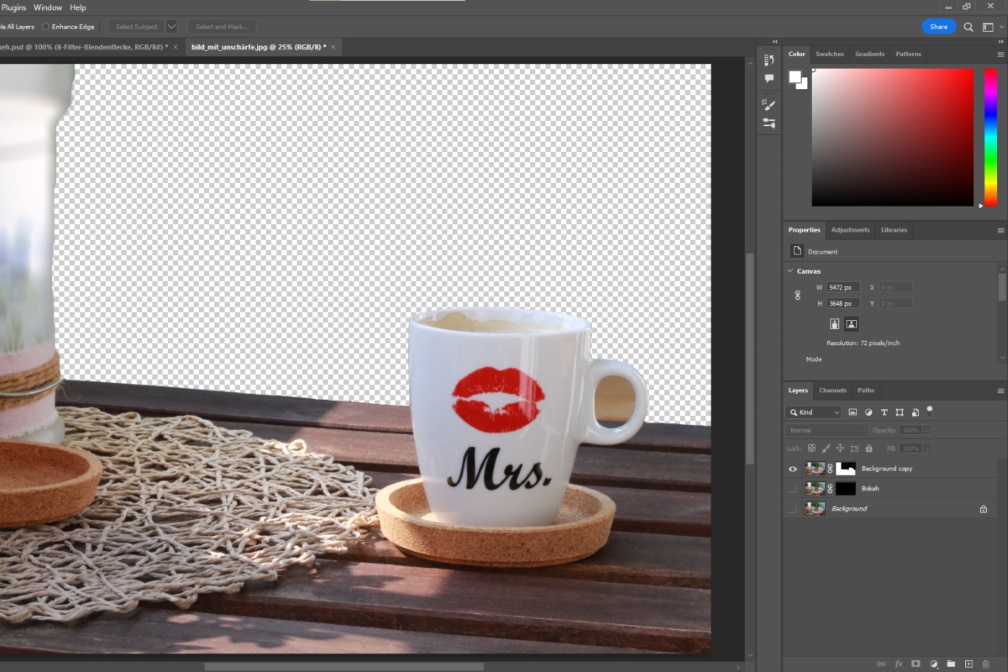
Just like in the first step, you should select the areas of the motif that you don’t want to edit. This time, select the entire foreground as the aperture spots should only be in the background of the image.
Use the "Select and mask mode" and this time create a new layer. To do this, check "Decontaminate colours" in the lower part of the settings on the right and select "New layer with layer mask". Rename this layer to "Foreground". Select layer 0 (background layer) again and create a new layer between background and foreground. In our example, this is called "Faded Stains".
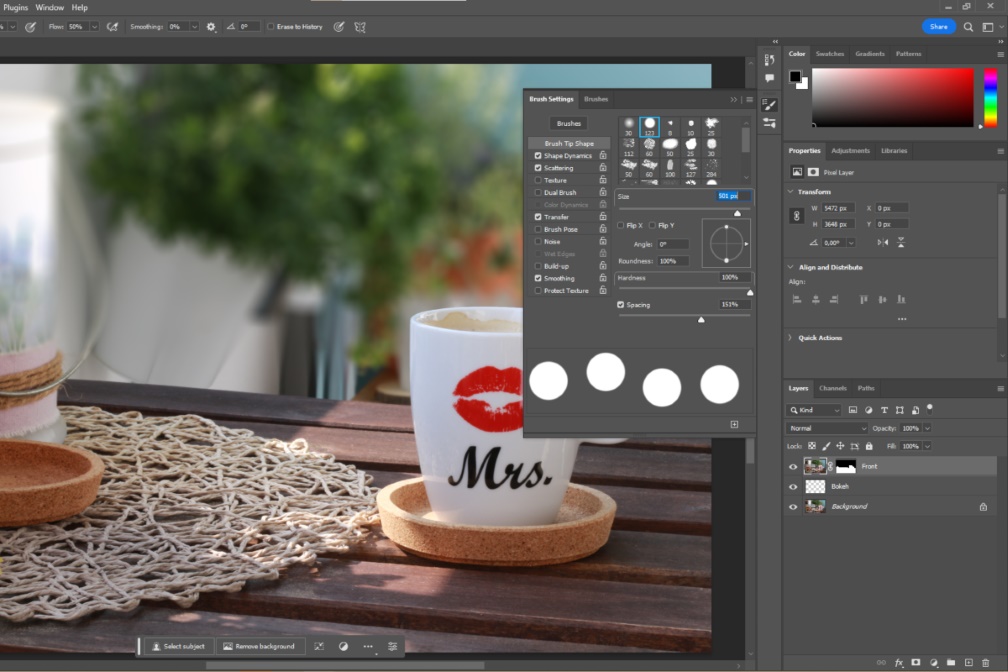
Now select the brush tool and then open the settings. Under the tab "Brush shape", select a hard, round brush and adjust the brush size to your image. In our example, a brush size of 500 pixels is required. Under brush settings, move the "Distance" toggle until you see individual circles instead of a line on the brush preview.
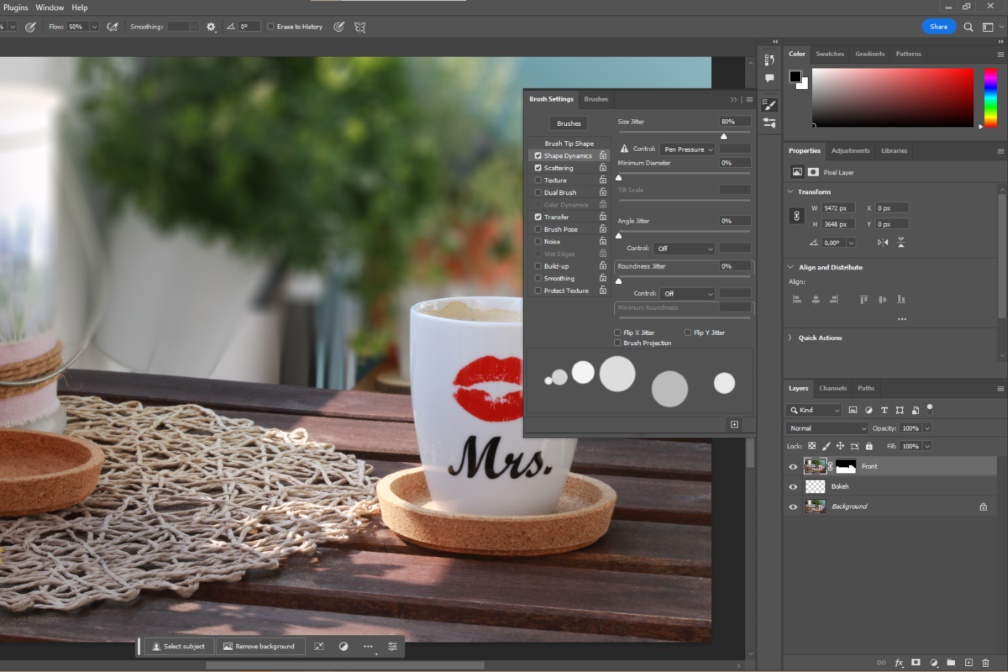
Switch to the "Shape properties" tab and increase the "Size jitter" value to 70 to 80 percent. This toggle will define difference in size of the individual circles. Under "Scatter" you will have to click on the box "Both Axes" and under "Transfer" you will be able to choose the opacity of the line or the circles. If you are satisfied with your settings, you can save your values as a brush template. For example, call it "Bokeh" or "Aperture spots".
Make sure that the colour white has been chosen for the brush and that the layer "Fade Patch Selection tool" has been marked. Now you can paint on this layer with your brush. Hold down the left mouse button and move the mouse to make curved lines over the area where the aperture spots should be.
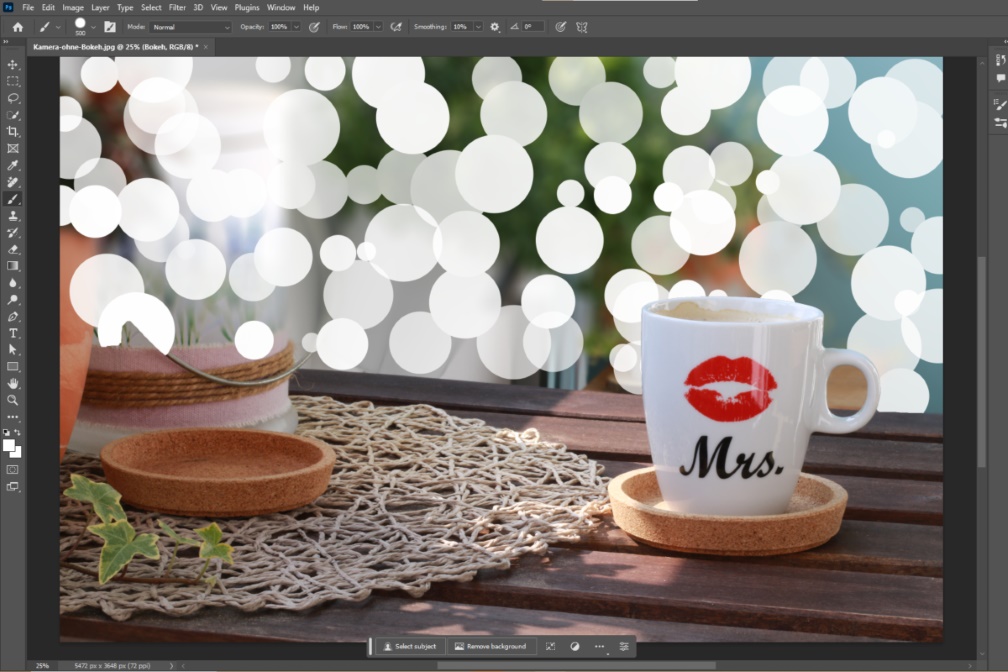
Open the context menu by clicking right on the mouse on the fade spot layer and select "Convert to Smart Object". Then select "Copy" in "Blend mode". To make the blend spots look more natural, select "blend spots" in the upper menu under "Filter" and "Render filter". If the aperture spots are too strong, you can simply reduce the opacity of the aperture spots layer.
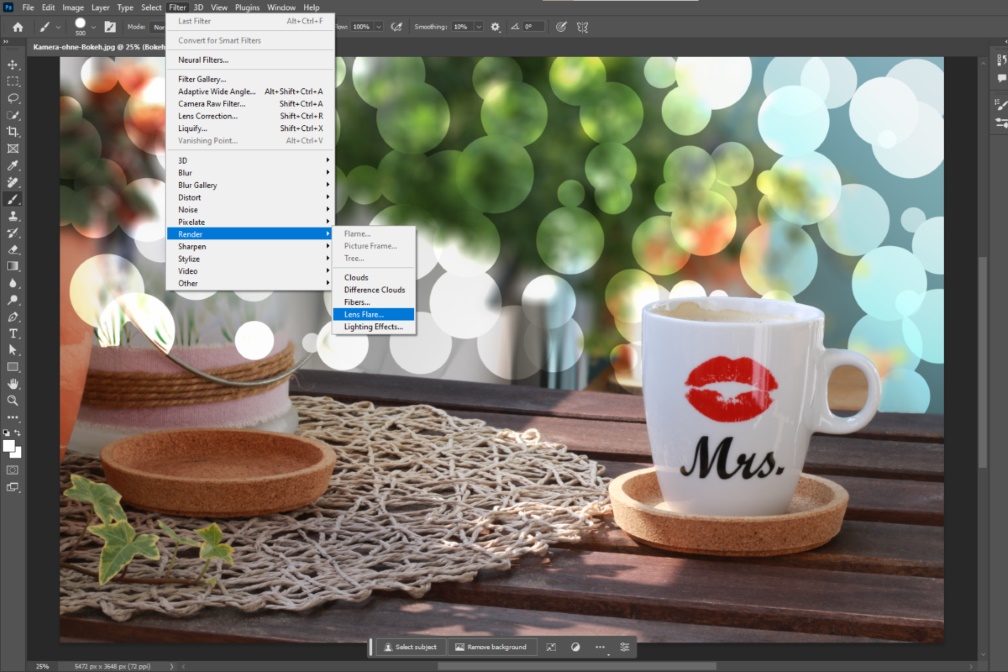
To refine your result, you can add another layer on top of the blend stain layer and repeat the process. Vary the opacity to create varying degrees of aperture spots.
.jpg)
Conclusion
You can use Photoshop if you don't have a lens, which you can use to create a stunning bokeh effect by opening the aperture wide. Thanks to the blur feature it is usually not very difficult to create a blur effect in the background. Often this blur effect is already enough to positively influence the overall effect of the image. You can use some aperture spots to finish off your background, which can give it a more sophisticated look.
Have fun getting creative!
