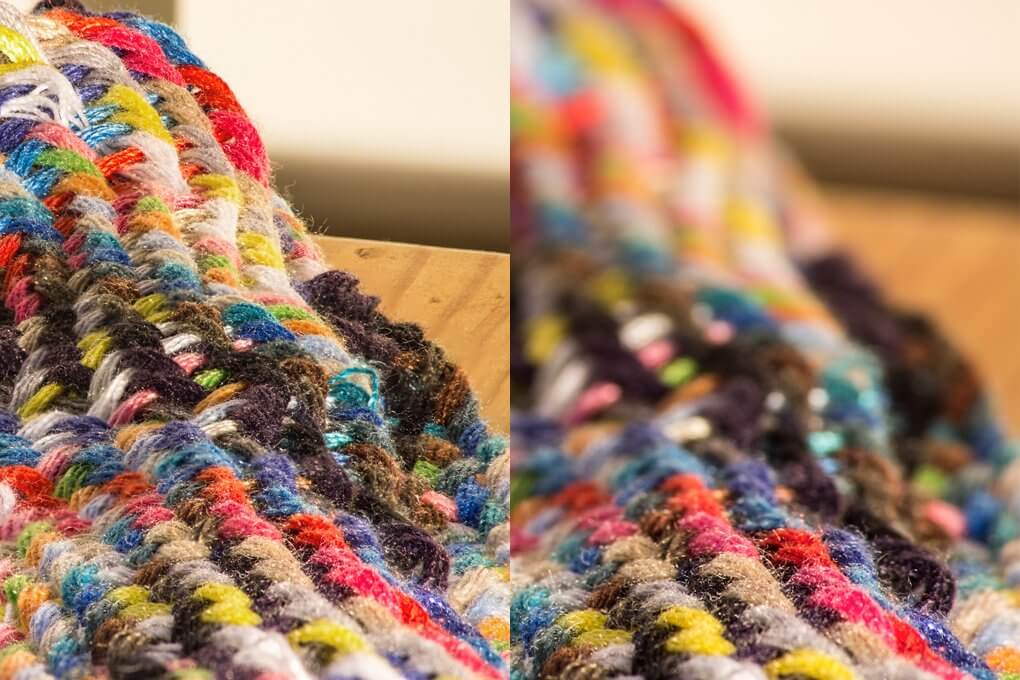
Photoshop Tutorial on Focus Photo Stacking for Continuously Sharp Images
The term ‘focus stacking’ describes an image processing technique in which several images of the same motif merge with each other. Differently selected focus points enable a sharp representation over large parts of the picture, which would normally not be possible.
We will show you what you should keep in mind when getting started, how to carry it out and how to edit the images on Photoshop.
Taking Photos
Good preparation is indispensable and increases the quality of the results that can be achieved in image editing. Focus stacking requires as many identical images as possible. The only exception is the differently selected focus.
That is why the DSLR camera should always be mounted on a tripod. It is also recommended to use a remote shutter release so that you don’t need to keep touching the camera. You should take the photos in RAW format as this makes it easier to edit them later.
In poor lighting conditions and the resulting long exposure times, even the slightest shocks can lead to blurred images. You can activate mirror lockup on the camera settings to avoid this. The mirror will now fold up a short time before shooting and will no longer cause any shocks.
Another factor that should not be underestimated is the lighting conditions. Fluctuating lighting has a negative effect on the series of pictures and makes it more difficult to merge them afterwards. Therefore, make sure that the lighting on your motif is as consistent as possible, regardless of whether you are taking pictures outdoors or indoors.
Furthermore, you should select a suitable motif for your photo shoot. The technique of focus stacking is particularly suitable for macro and product photography. Without image editing, the often very detailed motifs such as small animals or flowers cannot be completely sharply reproduced.
Thanks to focus stacking in landscape photography your can make all areas on your image really stand out. Therefore, choose a subject that will remain as still as possible for the duration of the photoshoot.
Useful Focus Stacking Tips
For the best possible result, take plenty of pictures with different focus ranges as this will help you to get some practice. It is important to focus as evenly as possible. In principle, there are two ways of taking pictures.
- Automatic focusing
- Manual focussing
If you want to take pictures using autofocus, you should use the Live View feature on your camera if possible. This allows you to see the composition of the image on the display and to move the focus point easily.
Alternatively, you can do the focusing yourself. To do this, simply switch from autofocus to manual focus on the lens. The focused area can be shifted with the focus ring of the lens.
Regardless of which method of focusing you choose, be careful when handling the camera. Touching the camera could cause the camera’s viewing angle to change, resulting in different shots. Therefore, make sure that the tripod is stable and the camera is firmly locked in place. Focus on the point closest to the subject and slowly work your way back over the several focus levels.
Image Editing and Merging Images
Once the entire subject has been photographed the computer can make changes to exposure, contrast, and similar parameters if necessary. Image editing can be done with most common photo editing software. However, it is important that each image is edited in the same way and that there are no differences between them.
Step 1: Merging Images in Lightroom Classic
First upload your images onto Lightroom Classic. On the grid view in your library select all the images you would like to overlay. Right-click on the images and select "Edit" and then "Open in Photoshop as layers". The images will now be opened on Photoshop in a single Photoshop file.
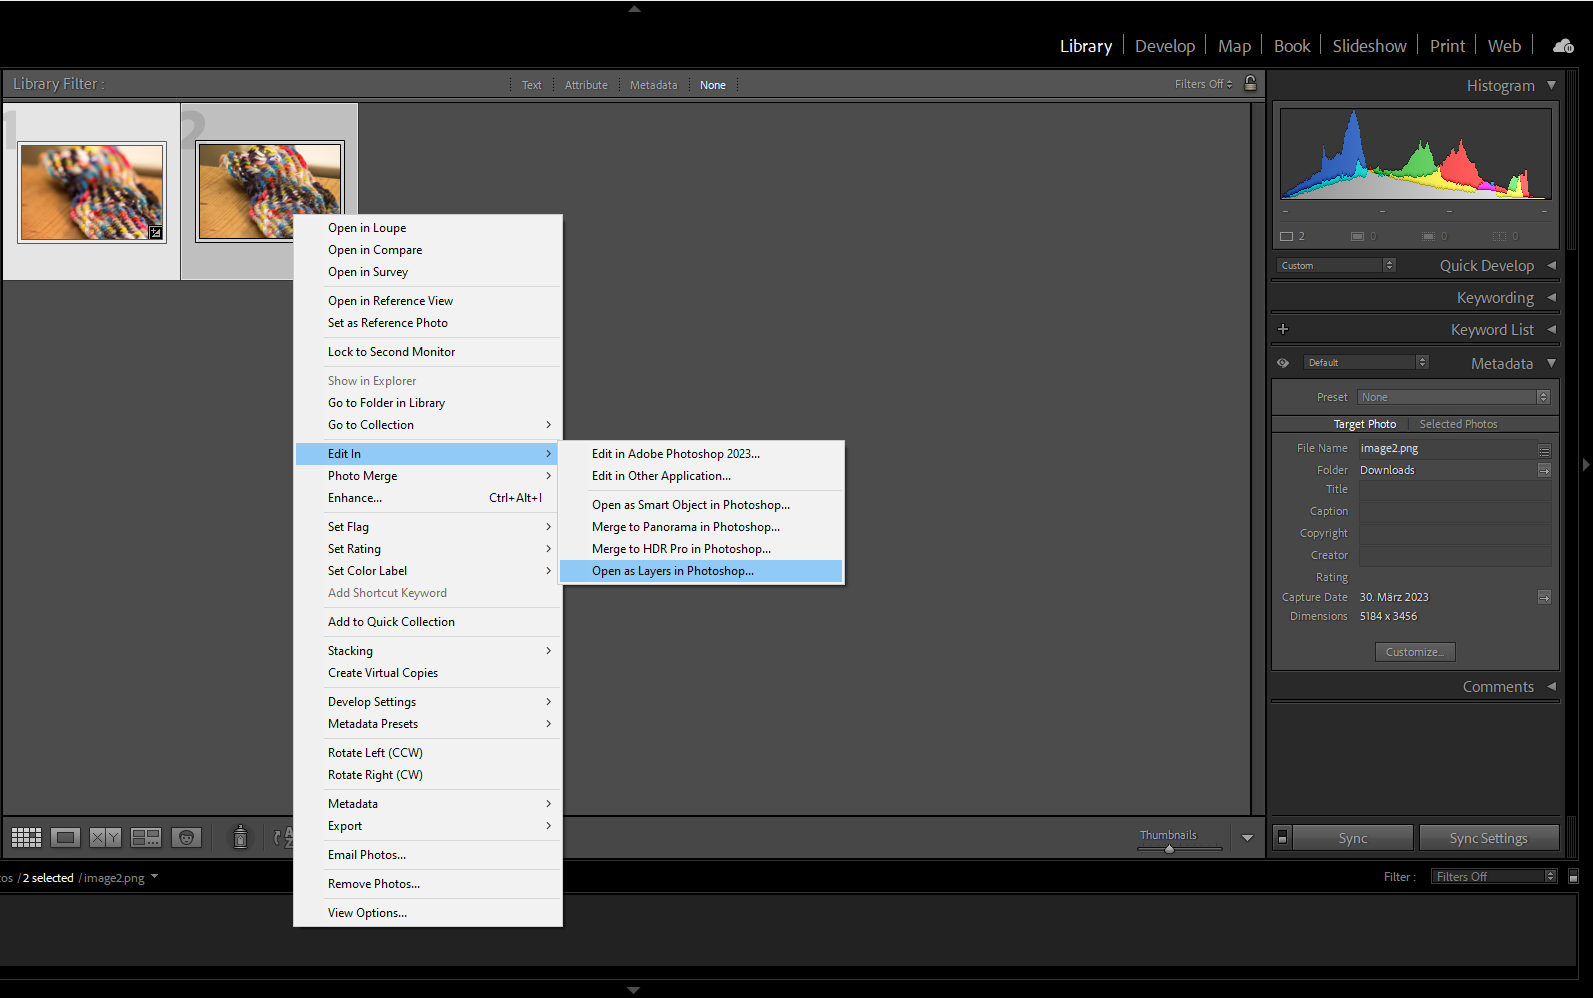
Step 2: Stacking on Photoshop
If the images have opened automatically in Photoshop, then select the corresponding layers on the layers panel and click on "Edit" and then on "Align layers automatically".
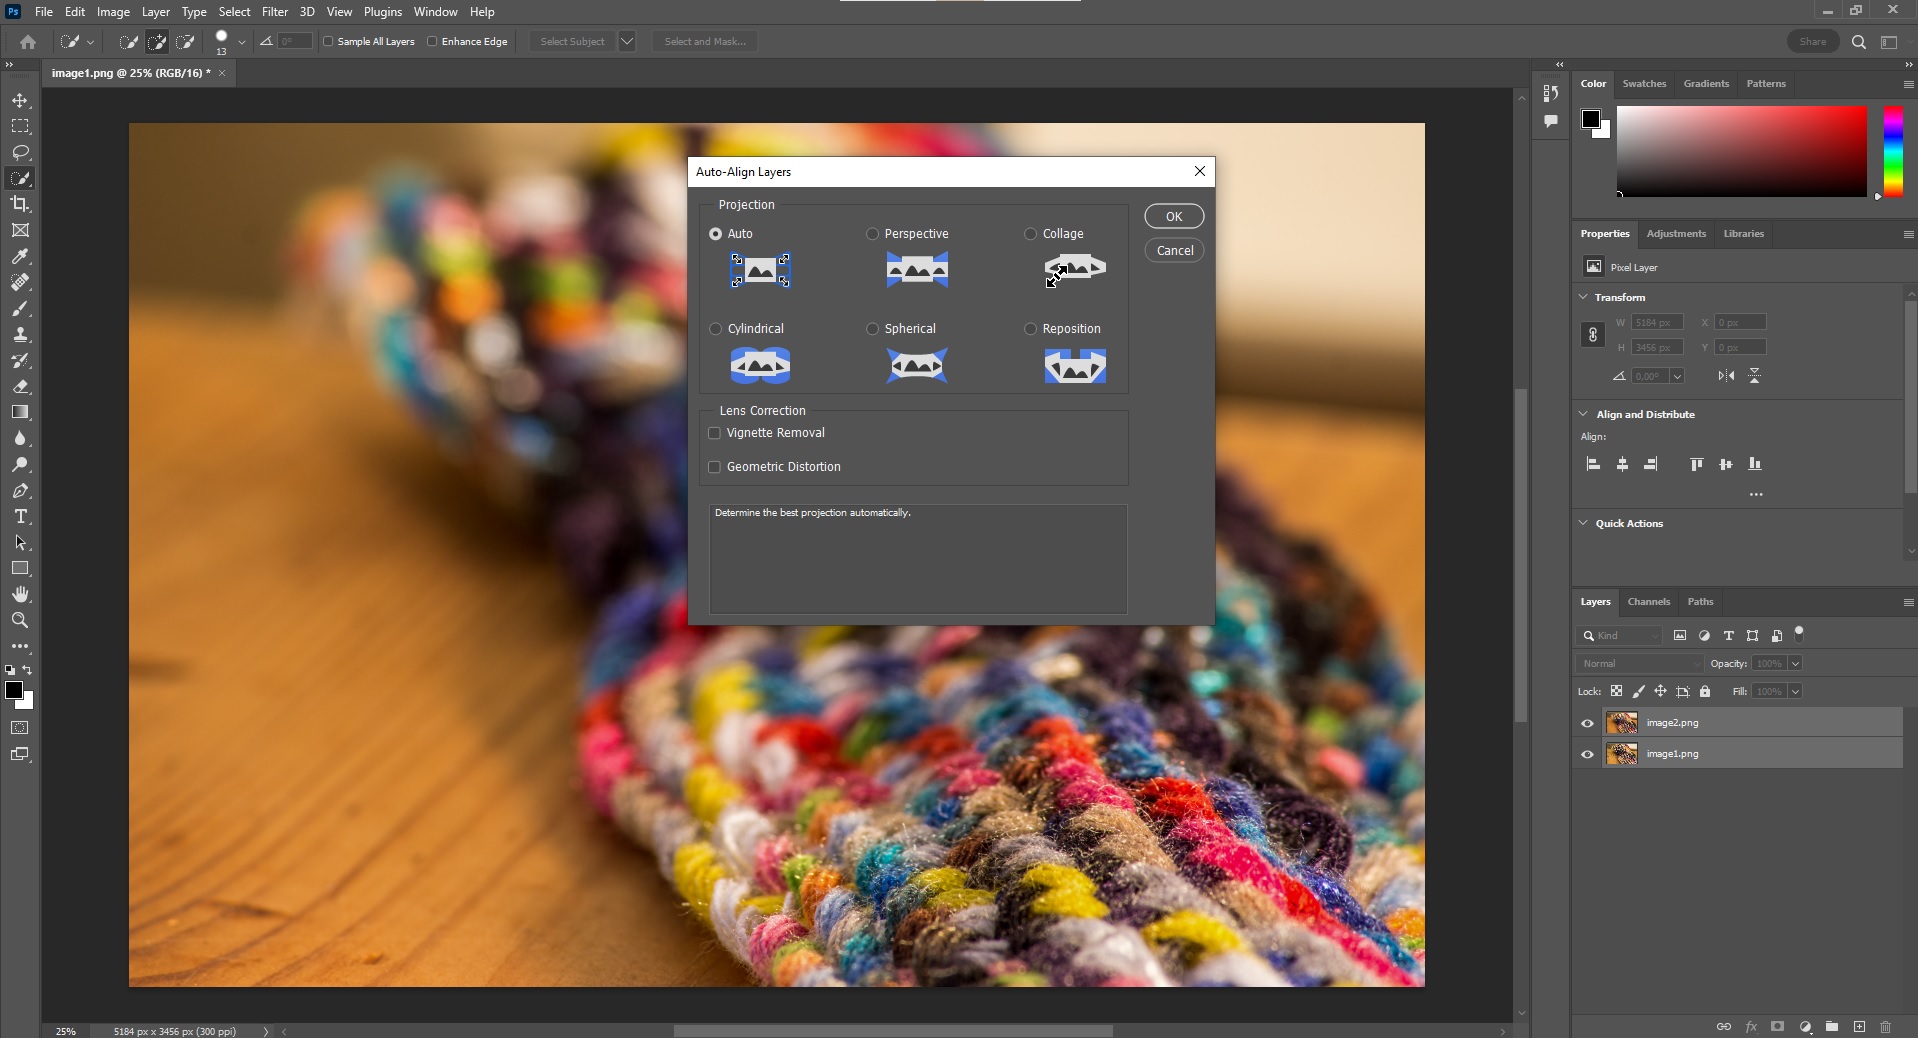
Make sure that the option "Auto" is selected in "Align layers automatically" and click on "OK". This step is important even if you have taken photos with a tripod.
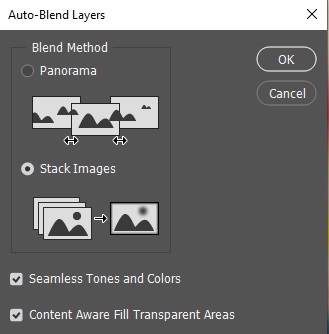
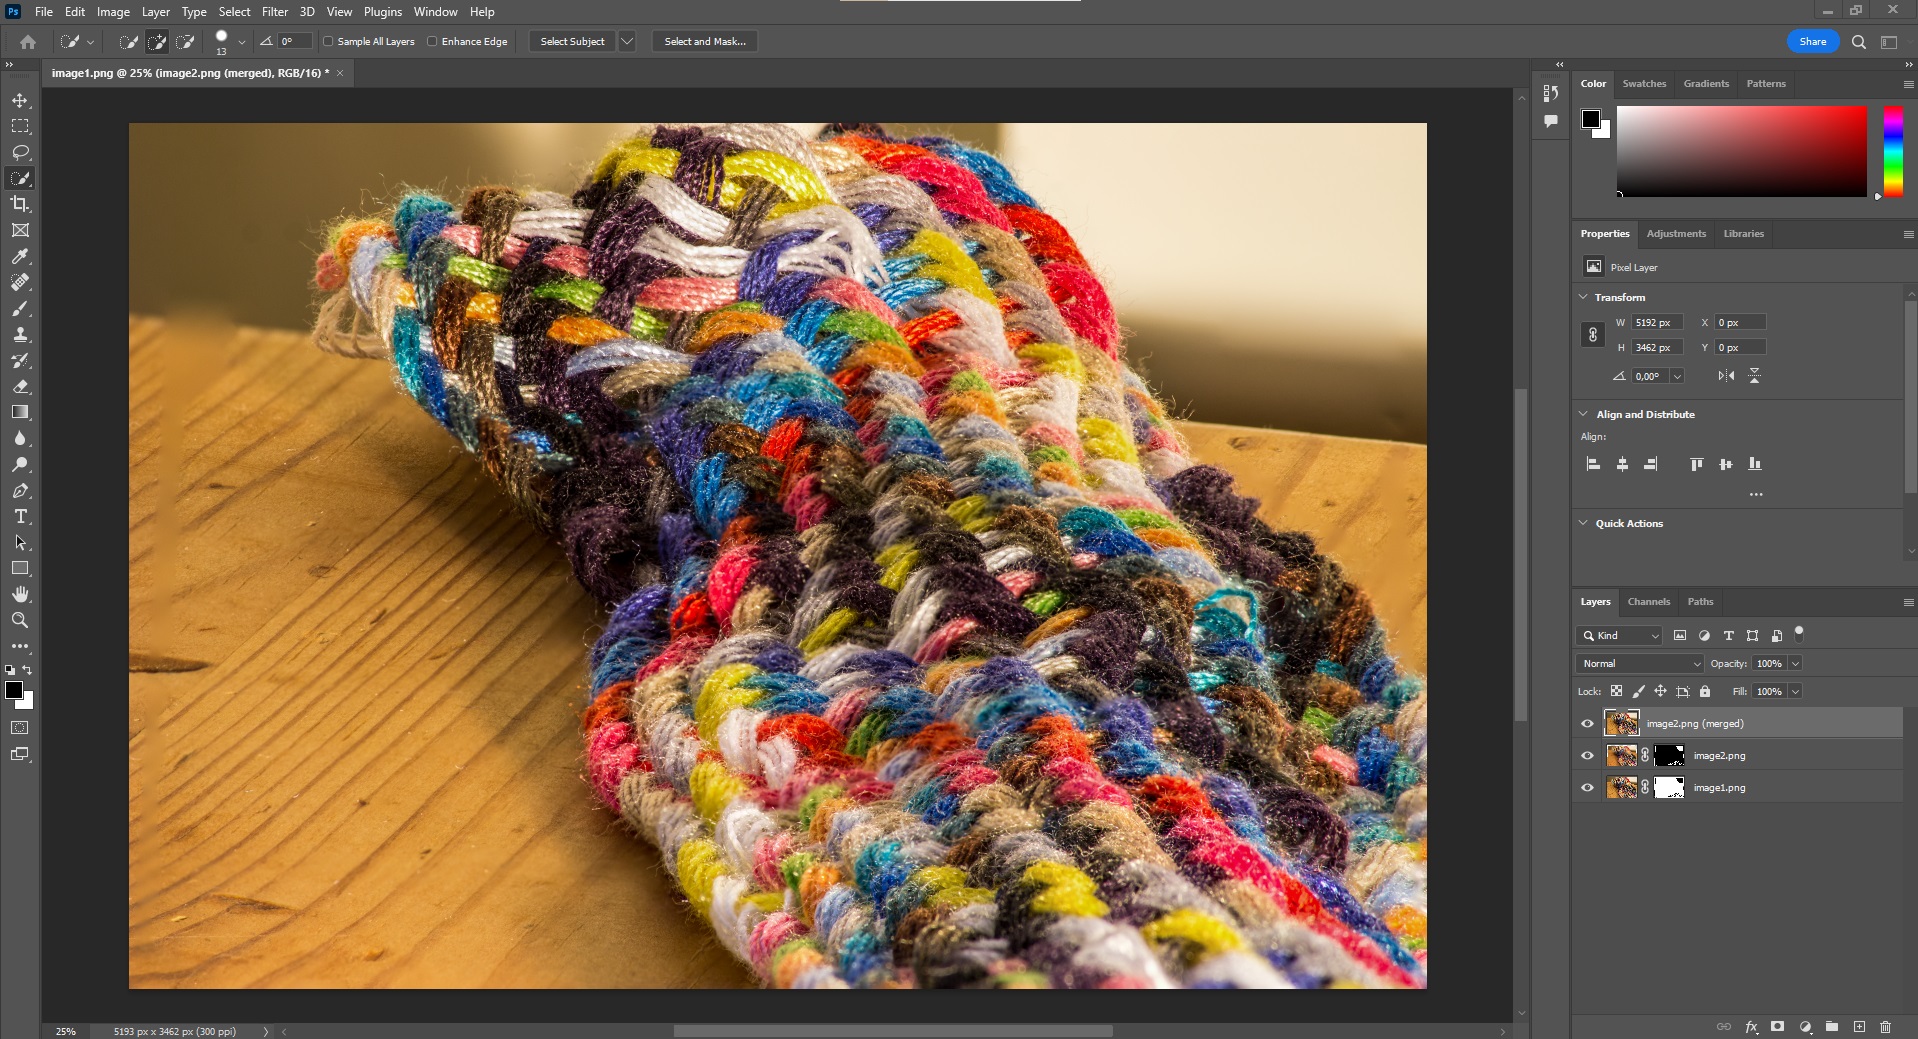
The Auto-Blend Layers feature. Click on "Edit" again and now select the option "Automatic blend layers". Next select "Stack images” and click on "OK" again. Photoshop will now create the final image from all the layers.
Joining the layers may take some time, depending on the performance of your computer. Photoshop analyses the existing layers for similarities and compares them with each other. The focused areas of the individual layers are then highlighted and connected. Once it has finished you will have a photo motif which is focused over the entire area.
Conclusion
Focus stacking allows you to combine several differently focused photos that you can then turn into one single sharp image. This procedure is particularly popular in macro photography, where it is sometimes impossible to focus on all desired areas of the subject despite a small aperture and high depth of field. However, focus stacking can also be used for other things, such as landscape photography. You will get great results with the right preparation and a lot of patience. Thanks to most modern image editing software, you can use a series of images combined together to make one perfectly sharp image in just a few simple steps.
