Photographing in poor lighting conditions
In photography, light plays a crucial role in creating a successful photo. However, unfavourable lighting situations that make photography a challenge are not uncommon.
When we talk about a bad lighting situation, there is usually too little light. But too much light or extreme differences in brightness within a shot can also be a problem. In this article we will show you how to deal with difficult lighting situations.
Problem 1: Too little light
Both indoors and outdoors, there is often the problem that there is not enough ambient light for a sufficiently exposed shot. How you should react to too little light depends strongly on what you want to photograph.
Solution 1: Using the camera settings correctly
The first and easiest way to get more light on the sensor is to adjust the various setting parameters such as aperture, exposure time and ISO.
Use a large aperture value to open the iris of the lens widely and let more light fall on the sensor. The wide opening of the aperture, however, poses the problem that the sharp area of the image becomes smaller. Consequently, this method is only suitable for most lenses if you want to focus on a certain object that does not cover the largest part of the image. Larger objects can’t be completely focused with this setting.
However, if you want to focus on a landscape or skyline in its entirety, you will have to increase the exposure time. The higher the exposure time, the longer the shutter remains open. However, a long exposure time is only suitable for still subjects. Unless you want to take advantage of motion blur, for example for a waterfall.
The third parameter that can help to achieve a brighter image is the ISO value. The standard value of ISO is between 100 and 200. This value controls the light sensitivity of the sensor. If the ISO value is doubled, the light sensitivity of the sensor also doubles. At first glance, this may sound like the ideal solution for insufficient light. But beware: an increase in the ISO value can lead to image noise and thus reduces the quality of the image.
Solution 2: Use a tripod as an aid
The longer the exposure time you select, the more light can reach the camera’s sensor. However, this has the disadvantage that humans cannot keep every exposure time blur-free. If your focal length is not too long, shutter speeds of up to 1/60 of a second can be maintained. However, a tripod is required for longer exposure times. By increasing the exposure time, you can close the aperture far despite low light to capture objects in full focus.
In addition to the tripod, a remote shutter release offers even more security for a blur-free and sharp image. Just pressing the shutter release can cause camera shake. As already mentioned, this method entails the risk of motion blur, which is why it is only suitable for motionless objects.
Solution 3: The choice of lens
When taking pictures, the choice of lens also affects the result of your shot. The first option is to choose a fast lens. Powerful lenses offer particularly high aperture values, allowing more light to reach the sensor. Such high f-stops are often found in fixed focal length lenses due to their simpler design. These lenses have the disadvantage that you can only adjust the image section by changing your own position.
Another possibility is to use a wide-angle lens and move closer to the subject. A wide-angle lens offers the advantage of a large depth of field even when the aperture is wide open.
Problem 2: Too much light
Indoors, too much light rarely poses a problem, as the light sources can usually be regulated. Even too much light entering through the windows can easily be remedied by curtains and shutters. This is not so easy in nature – the sun can neither be regulated nor simply covered. But there are solutions here too.

Solution 1: Using filters
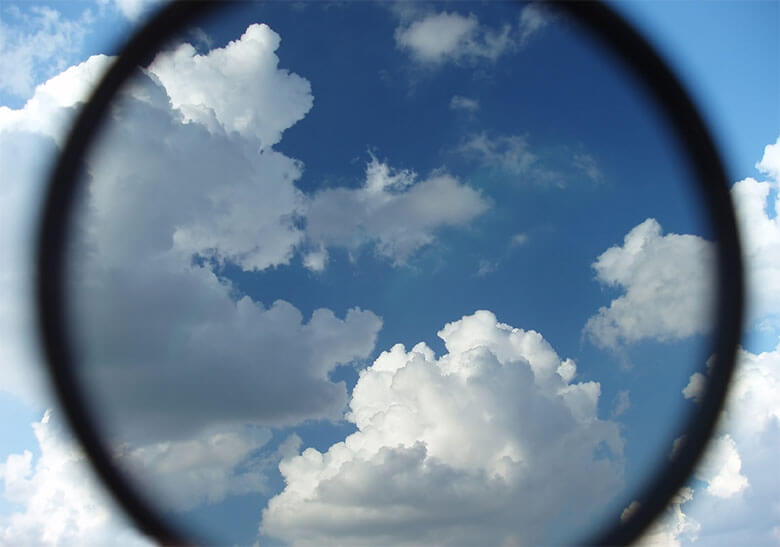
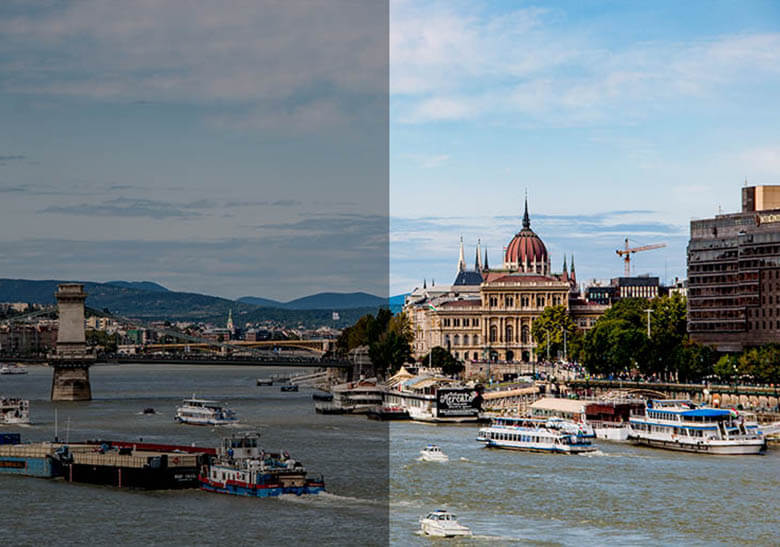
Neutral density filters, ND filters for short, or gray filters, have the purpose of absorbing a certain amount of light without changing the colours and details of the image. These filters are available in different intensities, allowing you to control different light situations.
Especially in landscape photography, the sky is overexposed or even burnt out. If the border between landscape and sky forms a halfway straight line, it makes sense to use a gray gradient filter. The gray gradient filter has the same function as the normal gray filter, with the difference that it does not evenly darken the image. As the name suggests, the filter has one strong and one only slightly darkening surface, which merges into each other in the middle by a gradient. This makes it possible to darken the sky more than the landscape in the foreground.
Solution 2: Restore brightness in post-processing
It is true that both the white and the black tones can burn out in a single image. However, this happens much faster with the white tones. It is almost impossible to retrieve burnt out areas on a photo through post-processing. Therefore it is always advisable to take a picture too dark rather than too bright. For images taken in RAW format, it is possible to bring more brightness and colour back into the image with just a few settings and sliders.

Solution 3: Using backlighting as an effect
In addition to the strong midday sun, the low sun in the early evening is also often problematic. In this situation you can consciously use the backlight and the resulting glare spots as a stylistic device. Position your subject exactly between your camera and the sun.
Problem 3: Handle strong differences in brightness
When taking pictures of black and white objects, as well as of various buildings with strong backlighting through their gates and windows, enormous differences in brightness arise in the picture. This becomes a problem because the sensor can only capture a limited range of brightness levels and such situations often exceed the dynamic range of the camera.
Solution: Create an exposure series
For an excessively large dynamic range, there is a very straightforward solution – bracketing. This consists of several shots in which the focus is placed on different areas of the subject, so that at the end of each shot, a different area is optimally exposed. These images are then superimposed in order to select and highlight the optimum exposure for each area of the image.
A tripod is used to ensure that the images are 100 percent congruent. If you focus even more on the contrasts and colours of the image instead of only on the exposure during creation and merging, you can also create an HDR image from the exposure series.
Conclusion
The adjustment possibilities and thus adapting to different lighting situations have their limits even with modern technology. Consequently, especially in very difficult lighting situations, such as too little and too much light, it is often not possible to easily capture what can be seen with the human eye.
For every problem that needs to be solved in photography, knowledge of the parameters aperture, ISO and exposure time as well as their effects on each other are of paramount importance. When the camera settings are exhausted, additional camera accessories such as a tripod or different filters help us master the difficult situations. However, if you don’t have the right equipment at hand, underexposed is better than overexposed. Underexposed areas are easier to correct and restore in photo post-processing than overexposed areas.
