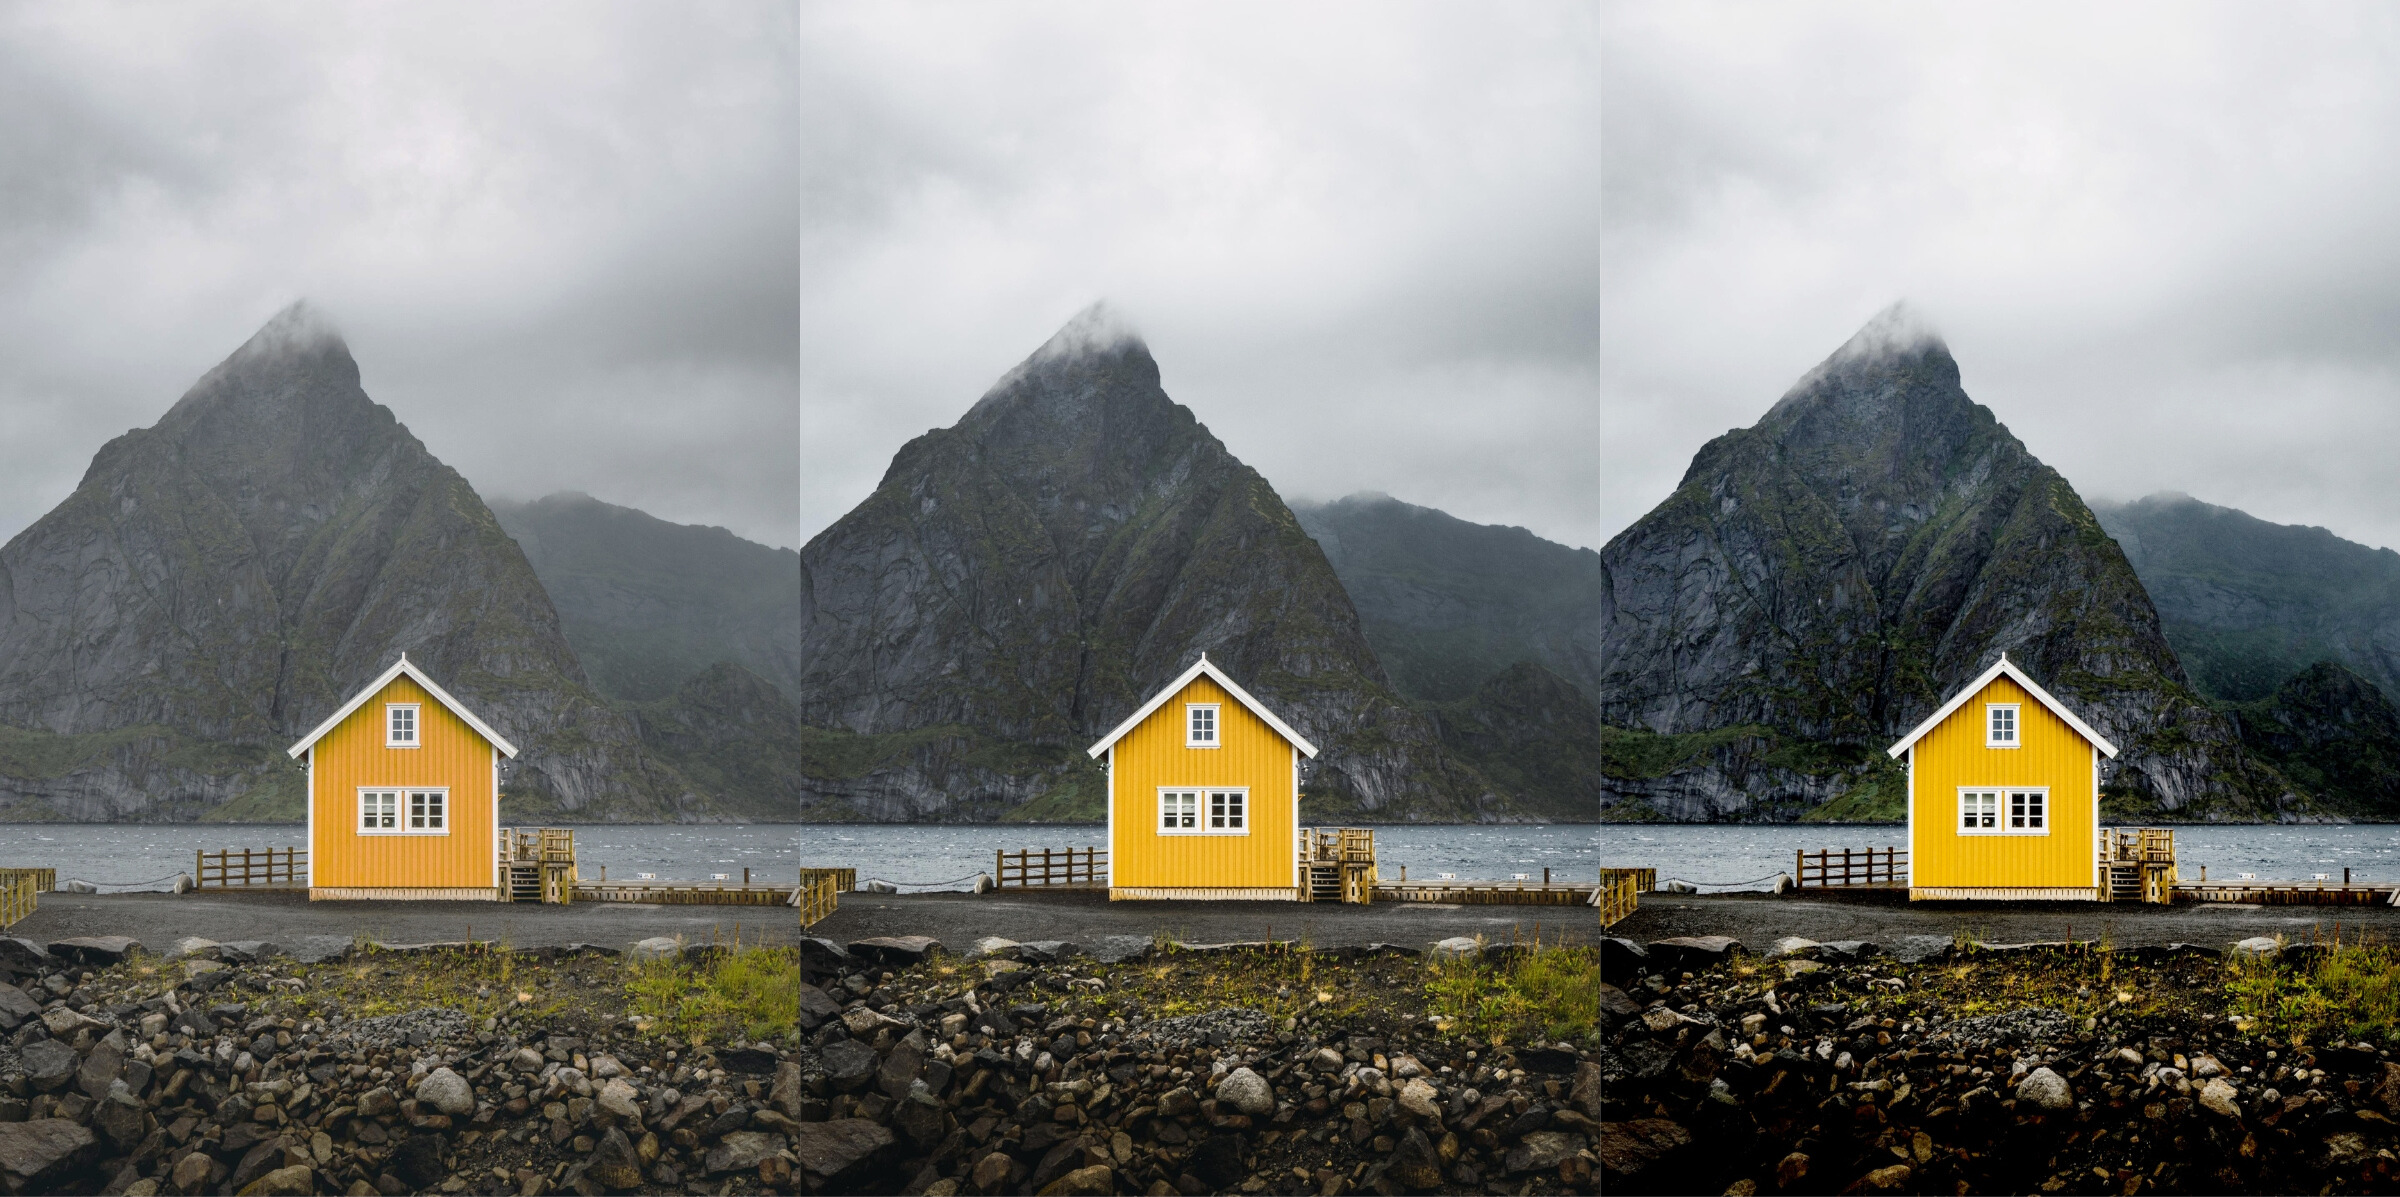
Image Editing: Increasing The Contrast In Your Photos
If your photos are not very clear, you can enhance them with image editing programs. Brightness and contrast are the first tools used to optimise a photo. However, it is important to keep in mind that the contrast should not be too high.
Below we'll show you how you can use Photoshop to optimise the contrast in your photos so that they look impressive yet natural. In addition, in this article you will find some of the most common features in Photoshop and also some of the other options on different image editing programs.
Contrast: Too Little Or Too Much?
Contrast refers to the difference between the individual brightness values in an image. If an image has a low contrast, then it will appear quite dull. The reason for this is usually the diffuse scattering in the lens, which can be caused by dirt or water particles in the air. If you increase the contrast, lighter colours will appear brighter and darker colours will look darker, which gives the entire photo more depth and a realistic look.
However, too much contrast can quickly make the image look rather unnatural, as the brightness gradations and details of certain colour nuances will disappear. Individual areas of colour will not appear in different shades, but merely as a mixed surface that makes the image look like a comic strip. Conversely, low-contrast photos are not automatically more detailed. In this case, the image turns grey with decreasing contrast and looks as if it was taken on a very foggy day.
How To Automatically Fix The Contrast Of An Image
Almost all common image editing programs, such as Photoshop or Gimp, have options that will automatically correct the contrast. Many smartphone apps for image editing also have these options. These include, for example, Snapseed, Lightroom and Afterlight for Android and iOS. However, this feature does not always offer perfect results. It will usually show how an image can be optimised and is therefore always worth a try.
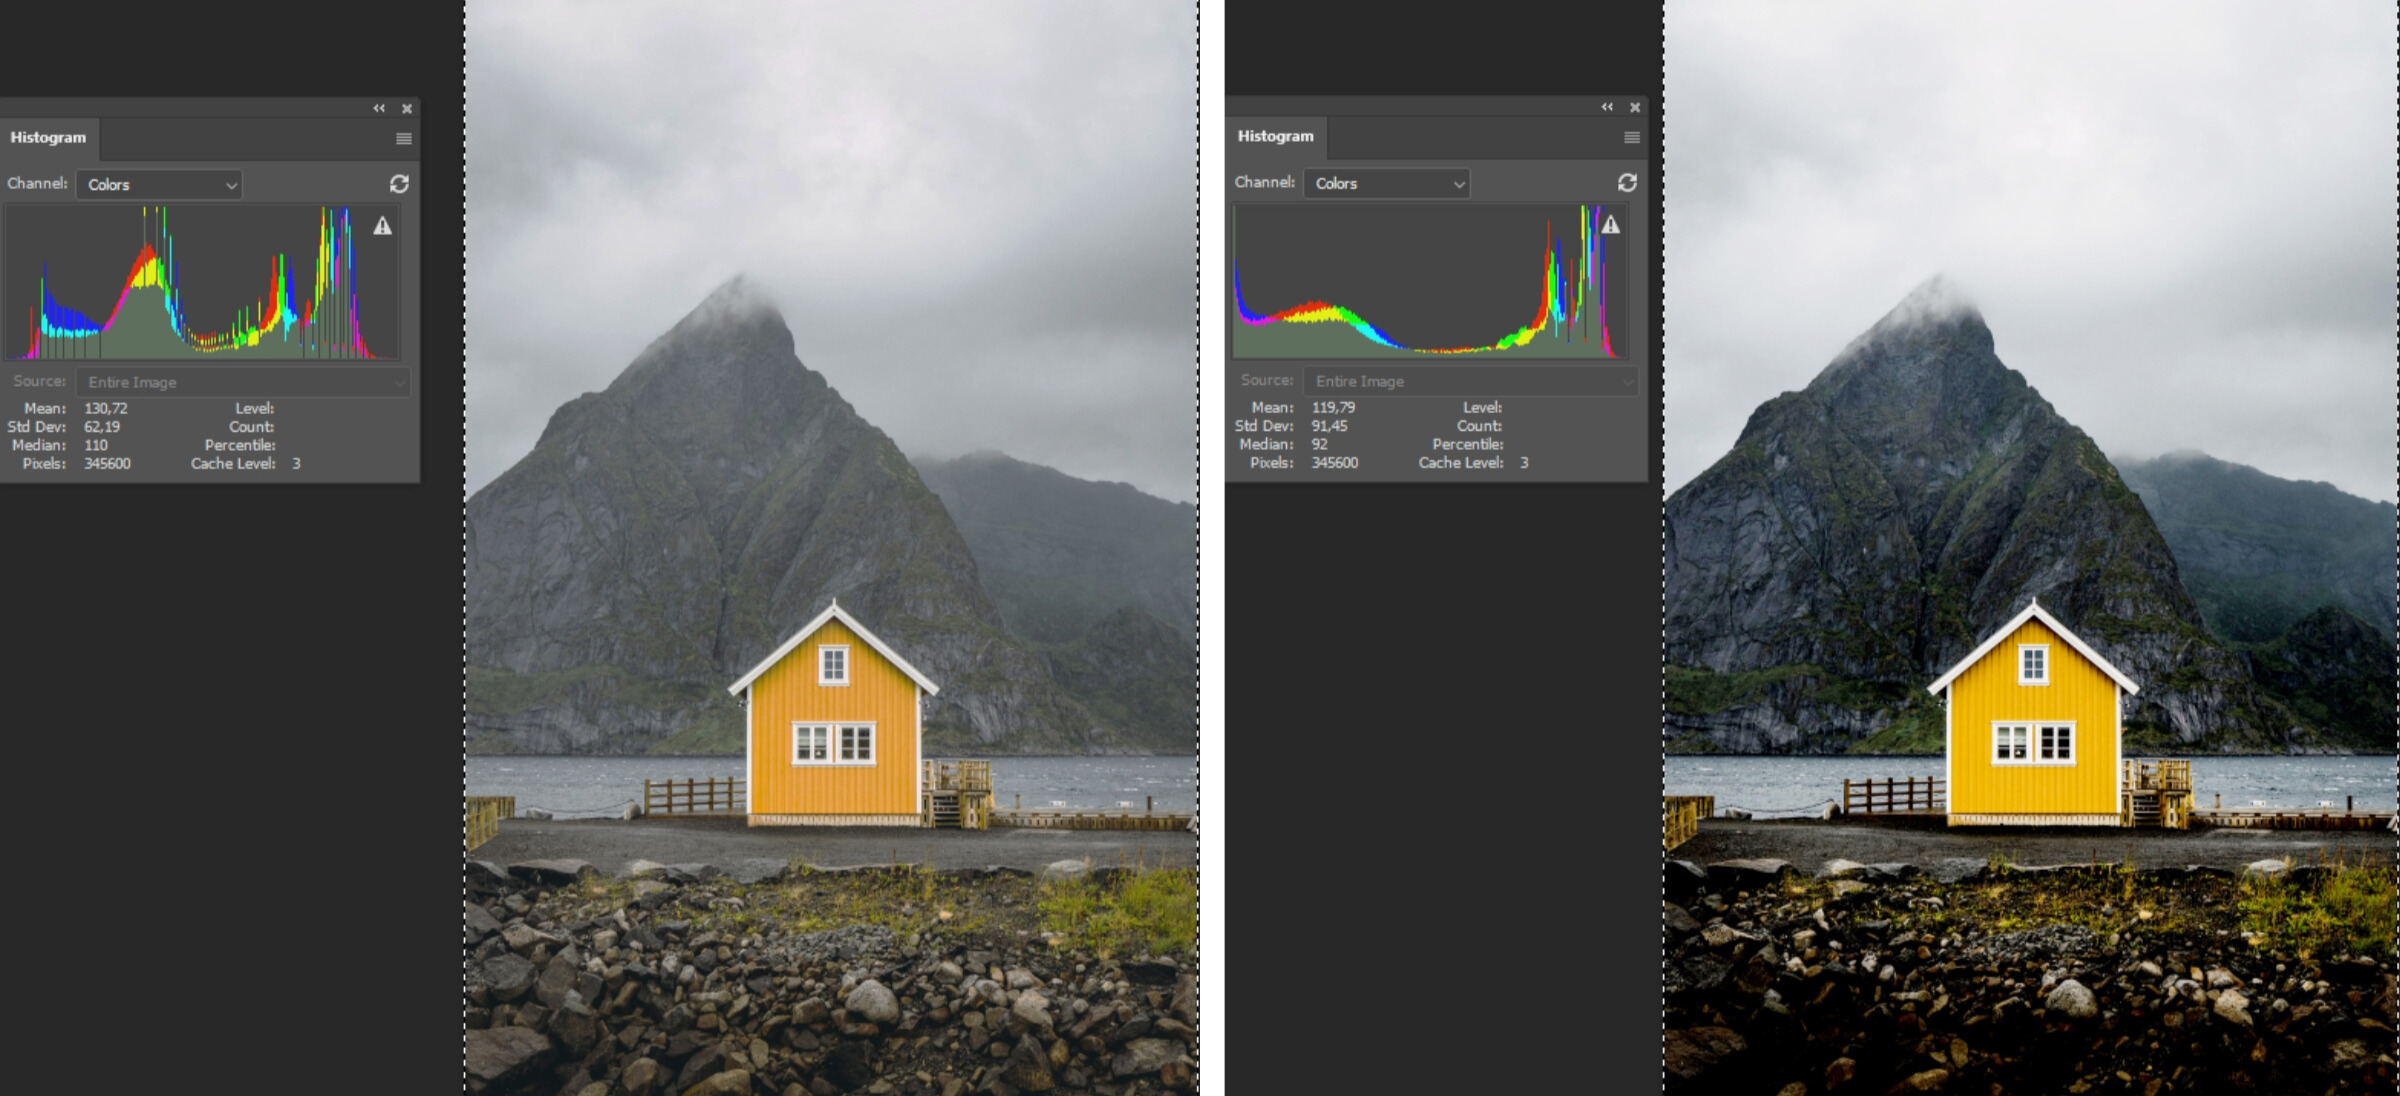
In this context, it is also advisable to take a look at the so-called histogram, which many image editing programs offer. The histogram gives you an overview of whether the image has too little or too much contrast. In the following example, the histogram in Photoshop is being used for an initial impression.
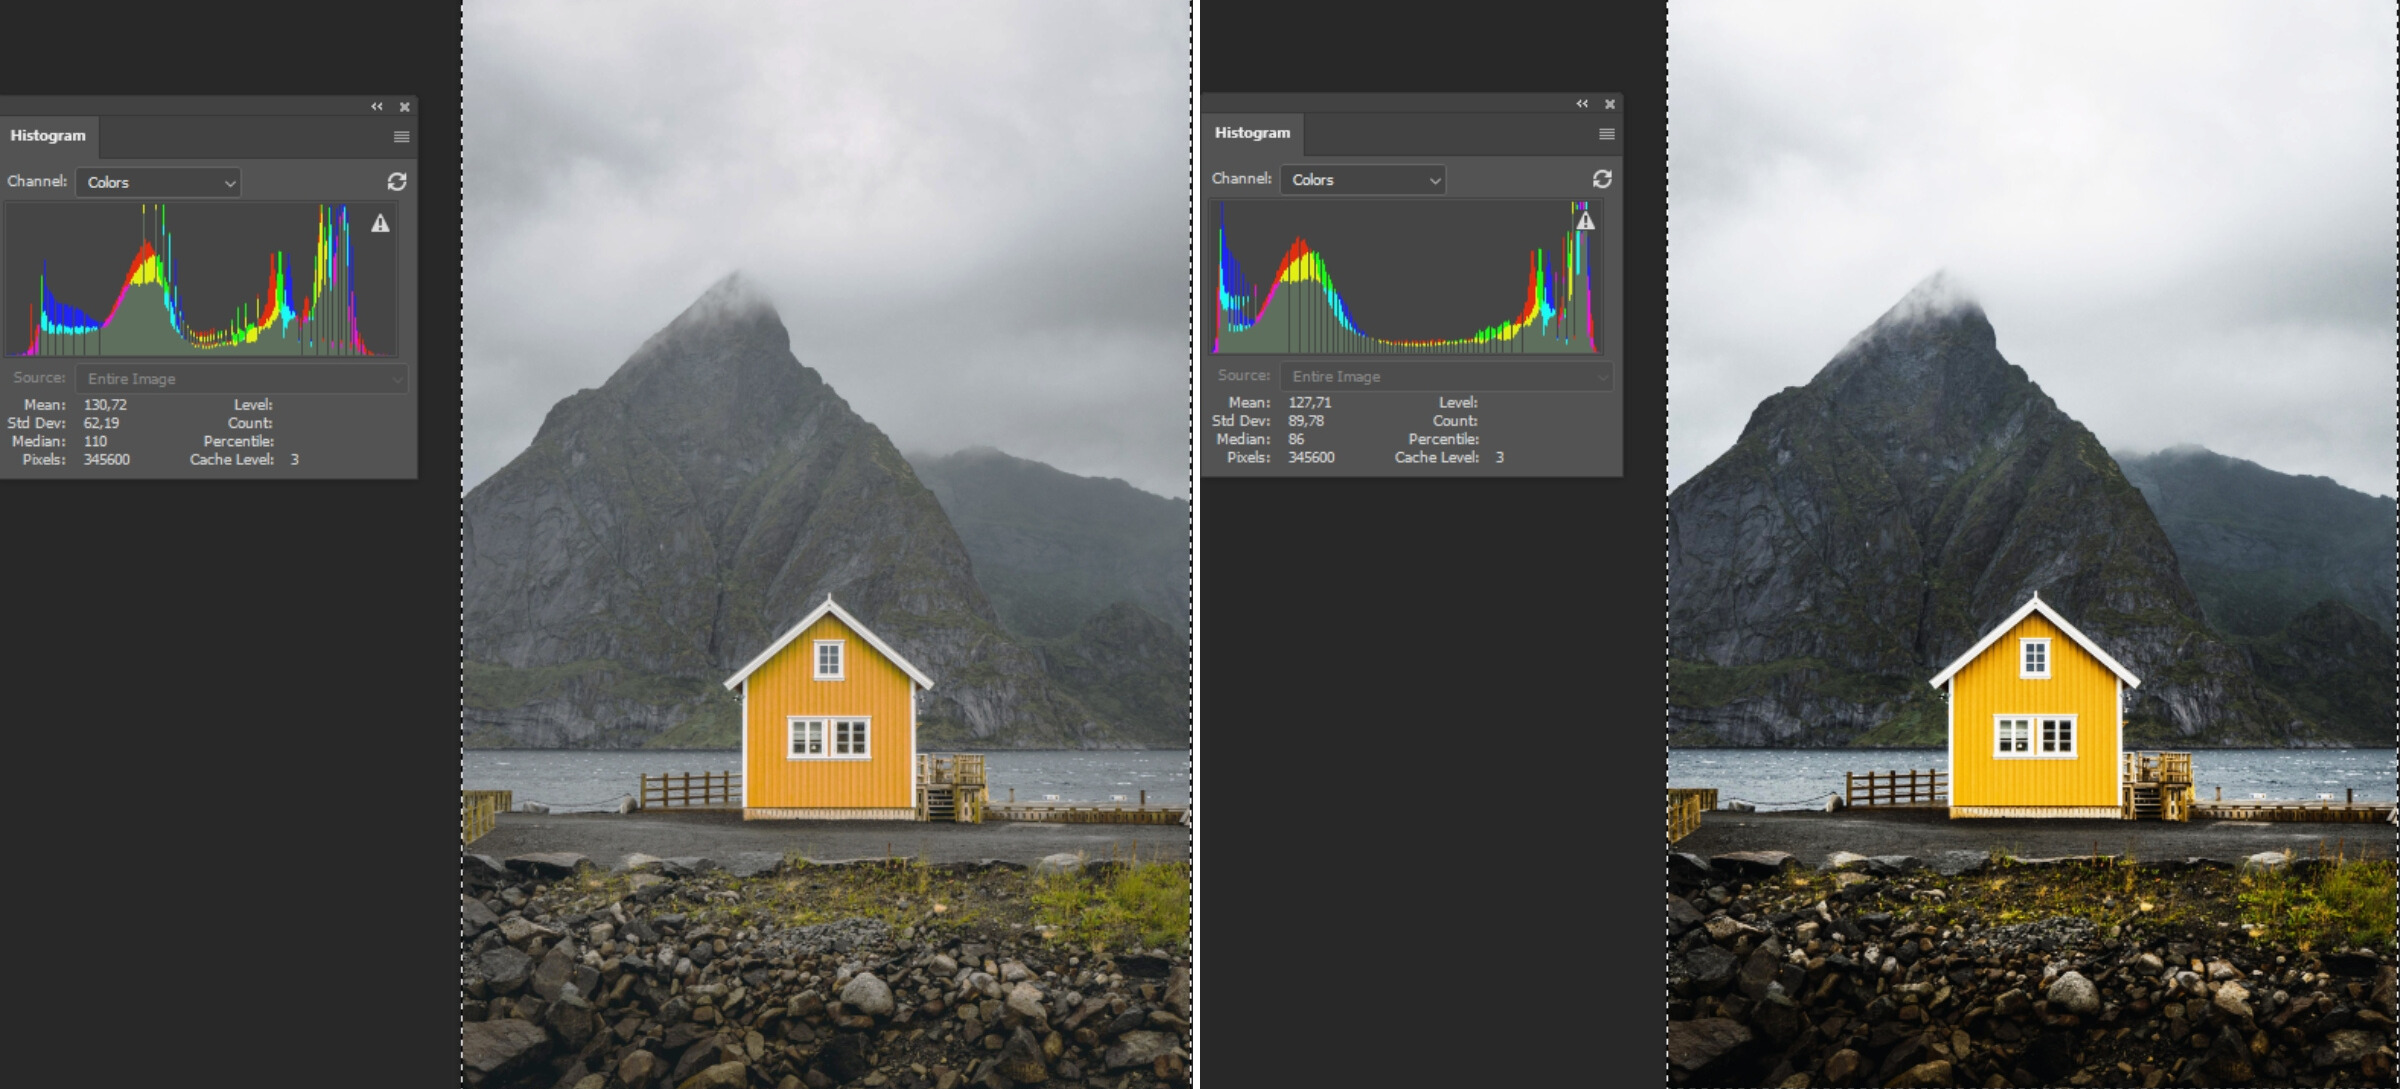
In the first image, you can see on the histogram (in Photoshop: Window > Histogram) that there are hardly any peaks on the left-hand side of the diagram. This indicates that the image does not contain enough dark pixels and therefore has too little contrast. After the contrast in the image has been automatically corrected (in Photoshop: Image > Adjust > Auto Contrast), the image has become significantly darker in some areas, the shadows are a lot more visible and there is less fog visible in the image. Correspondingly, the right-hand diagram now also shows more detail in the bright areas in the image.
Gimp is a free image editing program and the same feature can be found under Window > Dockable dialogues > Histogram. Most image editing programs also automatically come with an automatic correction option. Even most smartphone apps will allow you to quickly adjust the contrast in your photo.
How To Manually Adjust The Contrast In An Image
For those who would like to experiment with different contrast settings, you can try editing the image manually with adjustment options via gradation curves and the tone value.
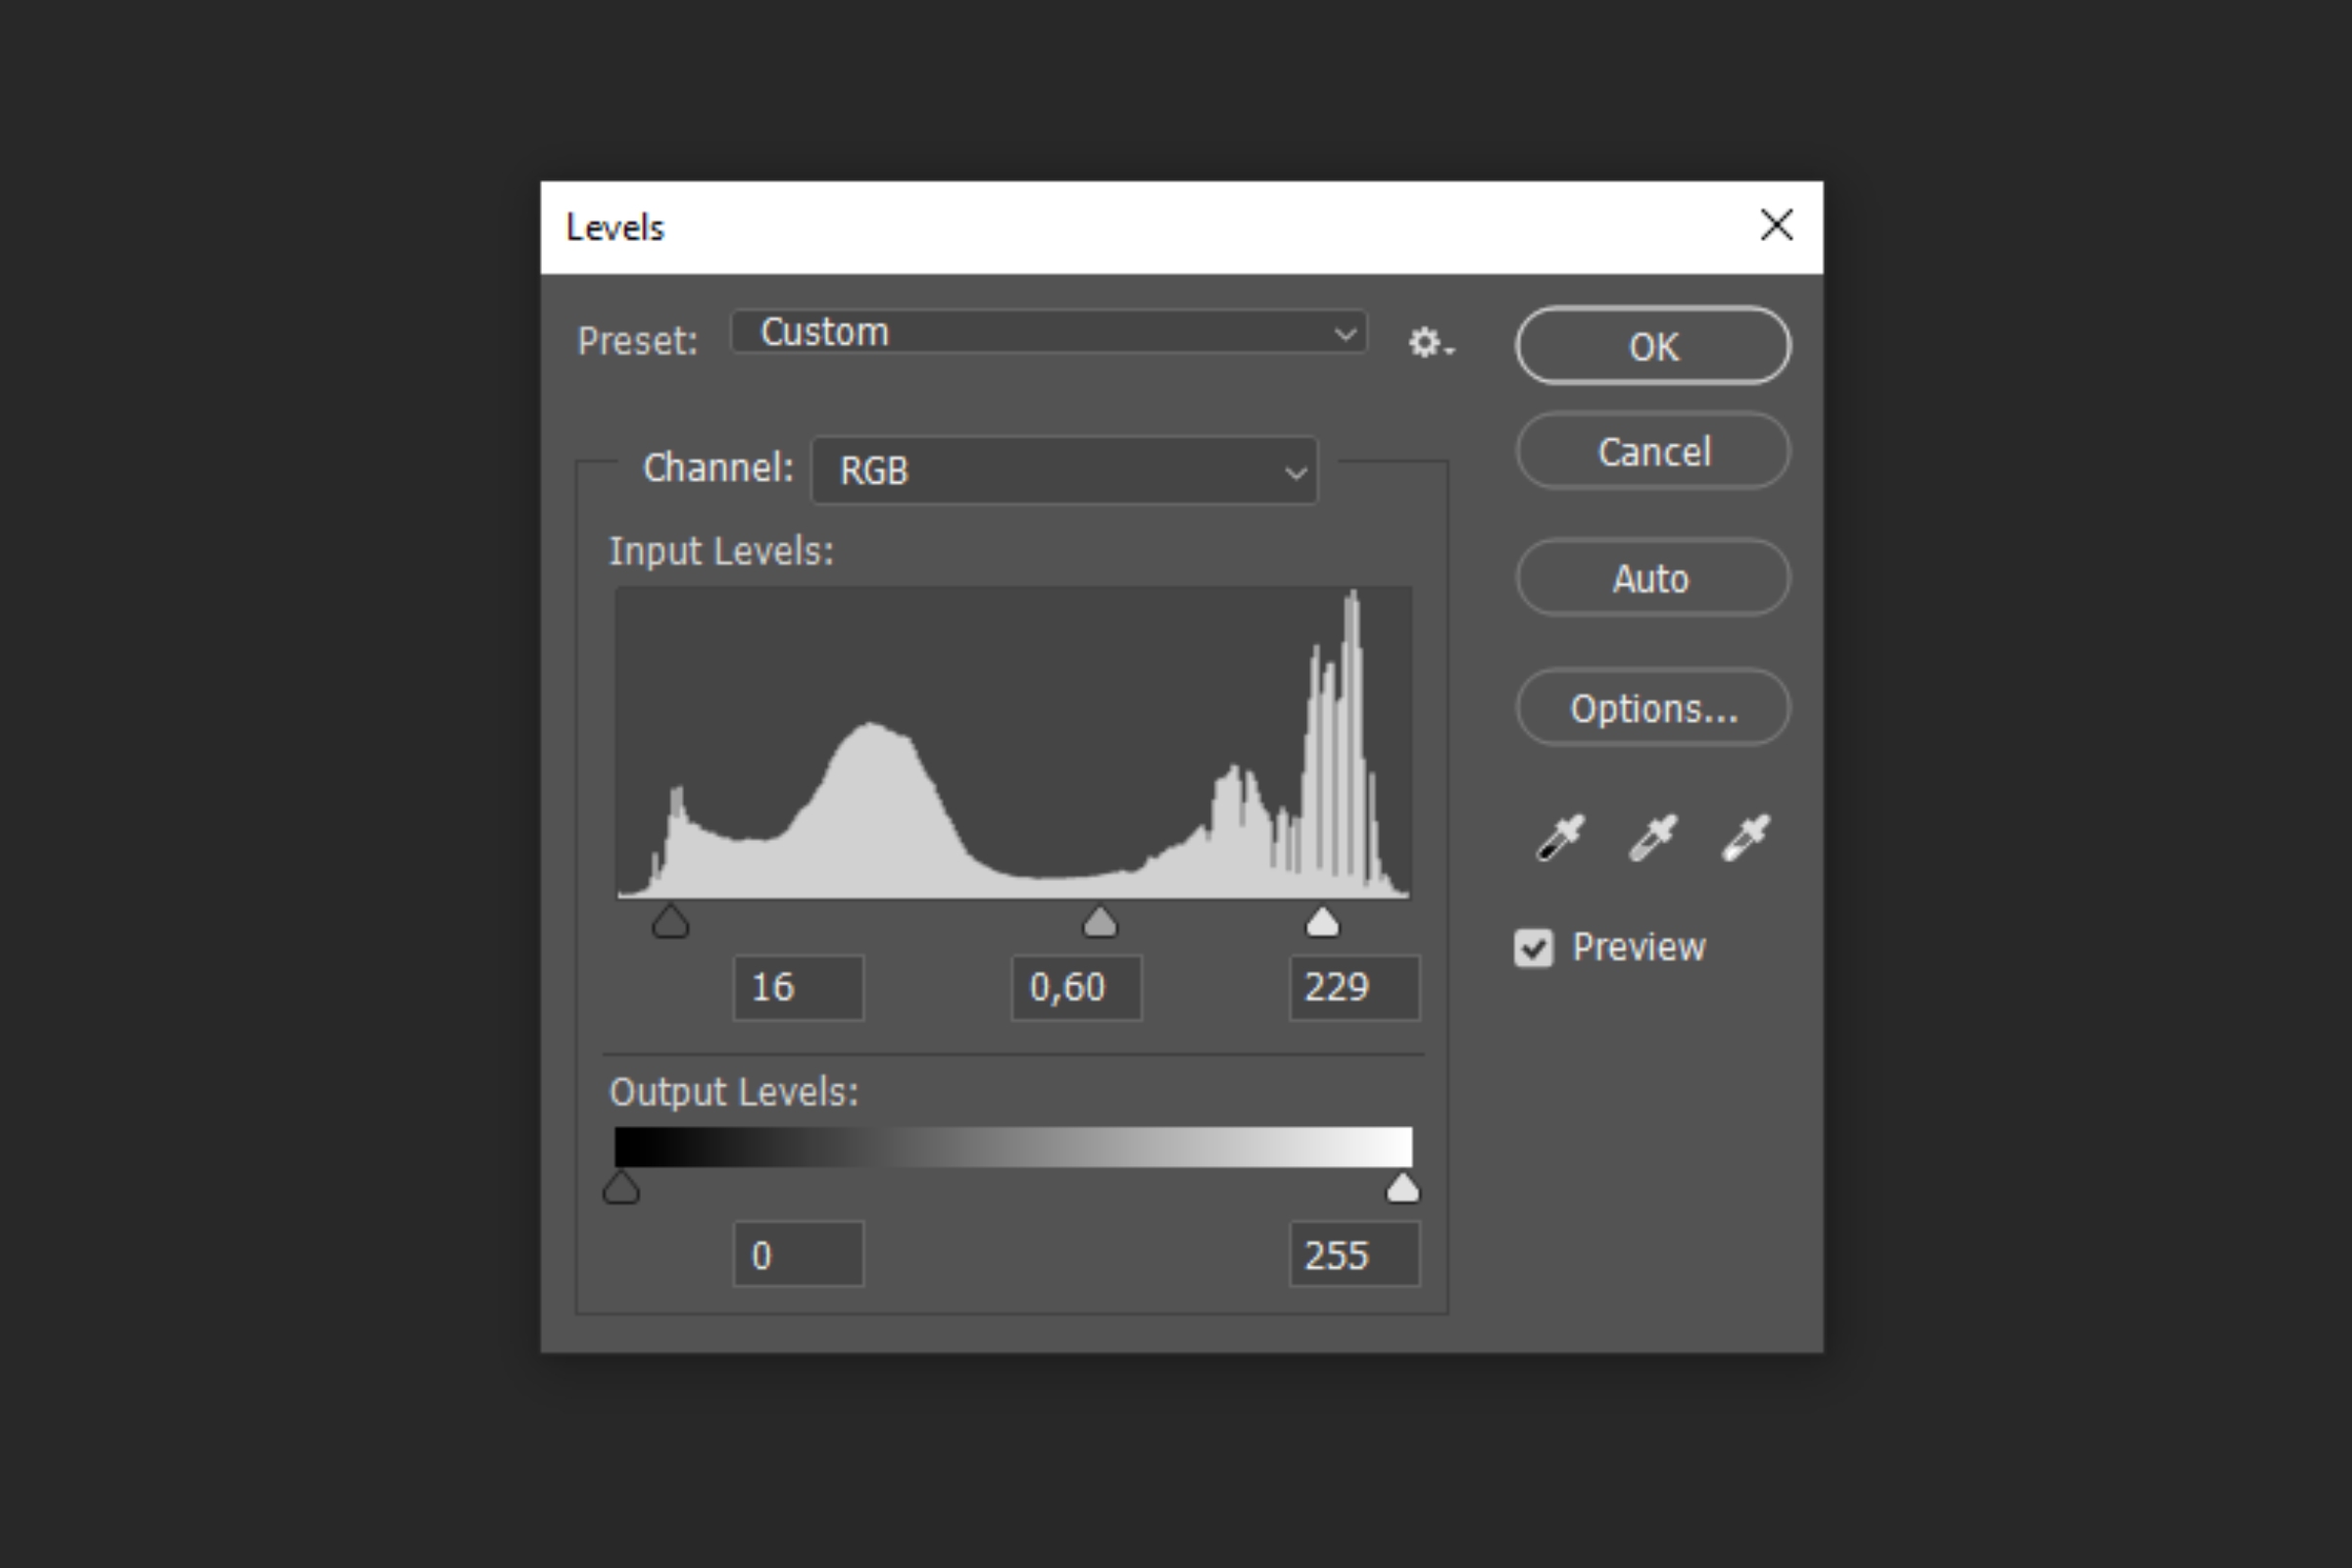
You can edit the tone in Photoshop by clicking on Image > Adjust > Tone correction. Next, the histogram will open and the individual areas can now be adjusted so that the contrast is also increased. This can be achieved by moving the small outer arrows below the histogram upwards so that the dark or light areas will then be emphasised. It is also advisable to move the centre arrow, which is for the middle tone value. By doing so, the brightness of the areas that are too dark can be corrected without losing the newly gained contrast.
As can be seen below, this results in the following altered contrasts in comparison to the original image:
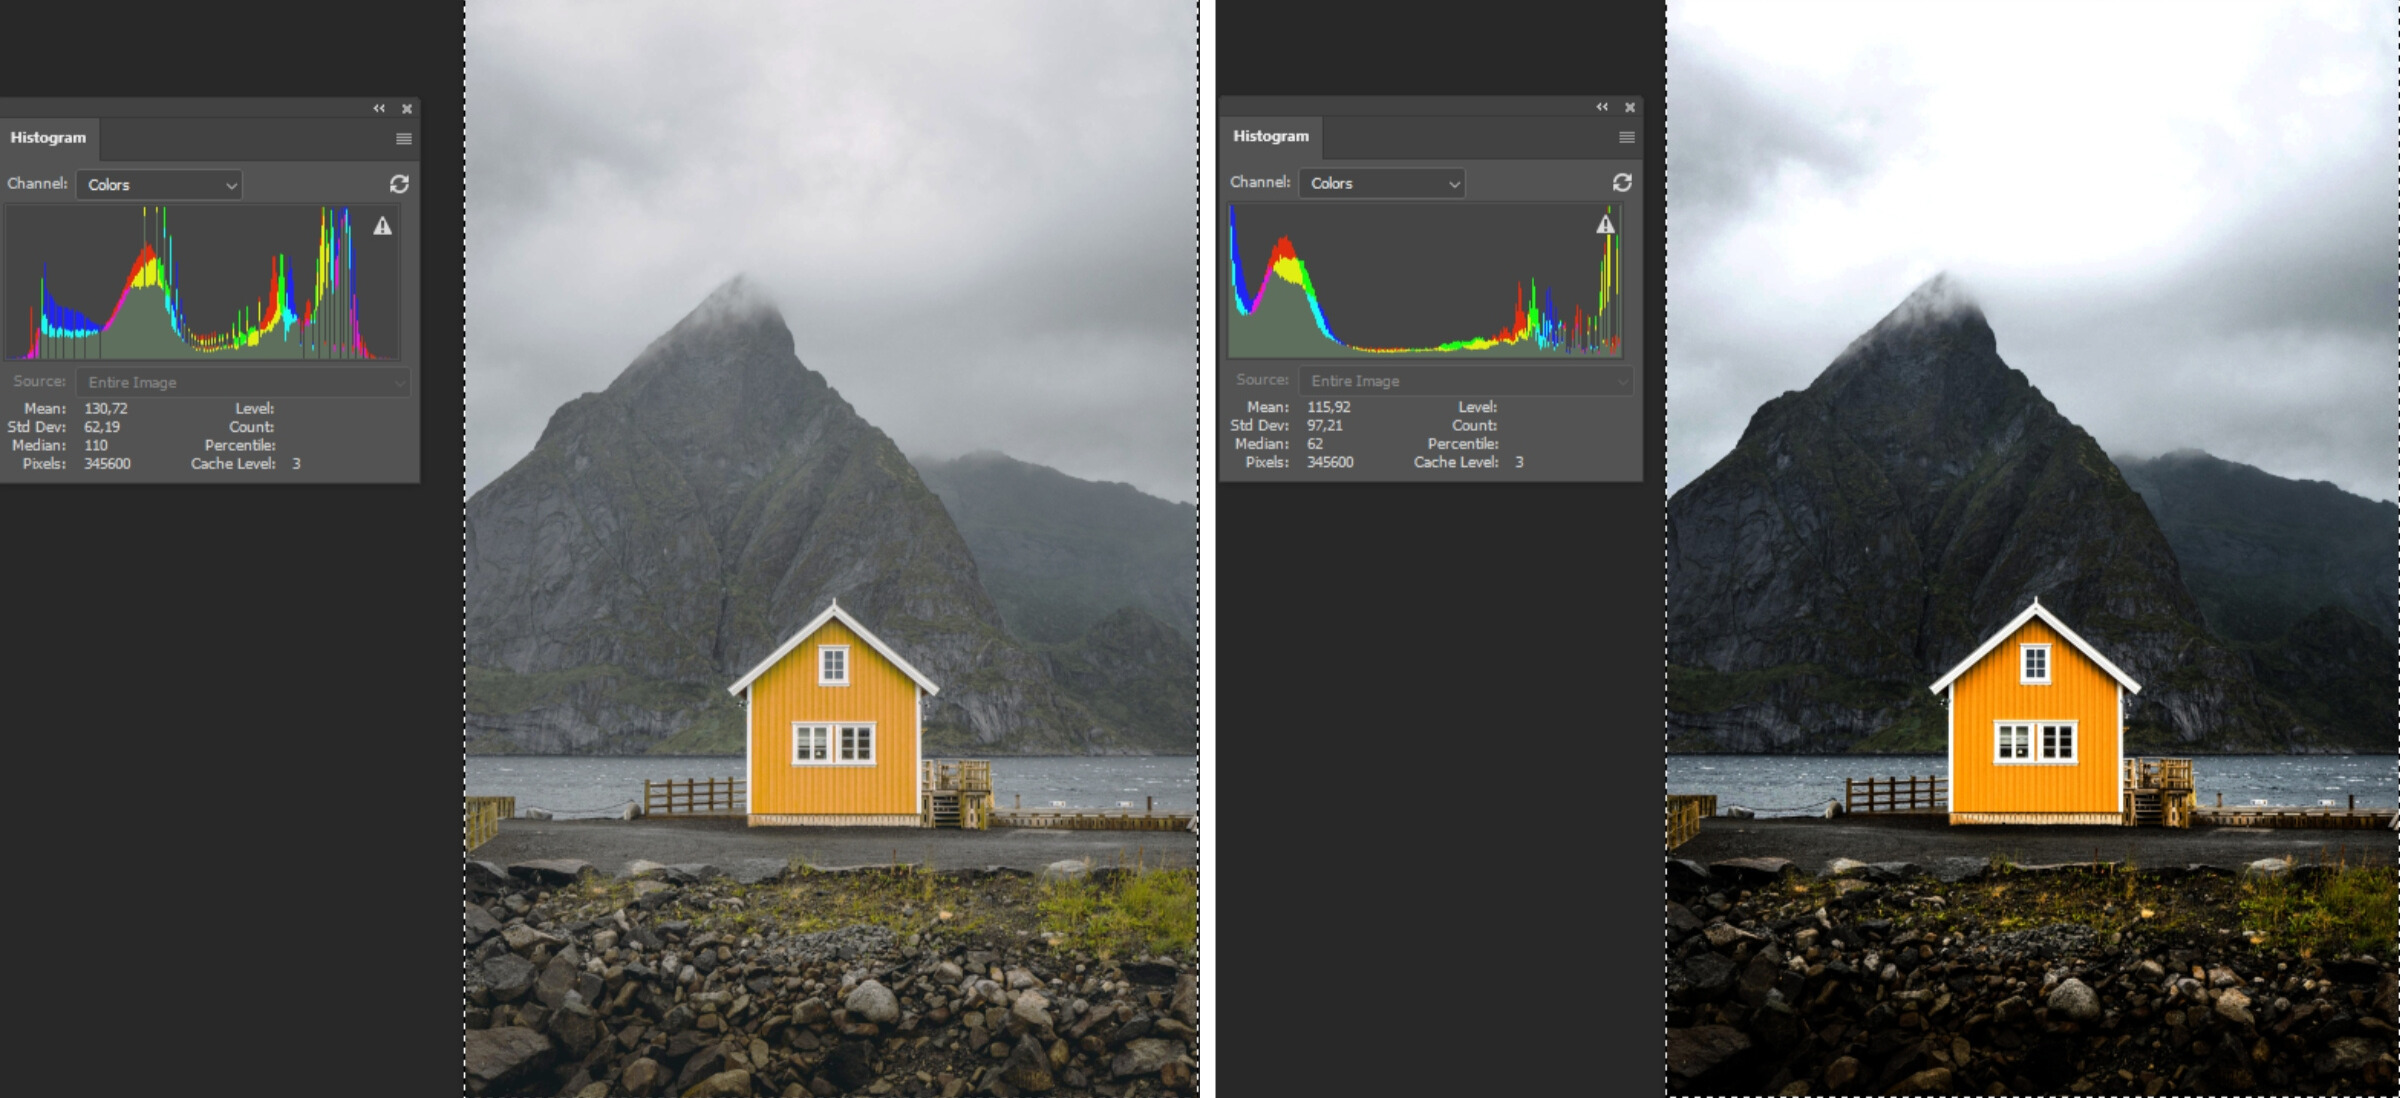
When using Gimp, you can find this option under Colours > Values. It works similarly to the one on Photoshop, which uses three moveable arrows for light, dark and mid tones.
Using Gradation Curves To Manually Adjust The Contrast In An Image
The highest level of a manually corrected contrast can be achieved by using the gradation curves. This feature offers the most precise, but also the most detailed adjustment and is therefore primarily used by professionals.
You can find the gradation curve under Image > Customise > Gradation curve. A diagram will open with a graph that can be moved as desired by using your mouse. You can also see the effects on the image. As a general rule, dark areas can be edited by the lower part of the graph and light areas in the upper part. If you drag the graph into the dark area on the right, for example, the contrast of the dark pixels will be increased. Conversely, dragging the upper graph towards the left will increase the contrast of the light-coloured pixels. This will result in an increased contrast.
As with manual contrast editing, the middle colour areas can also be adjusted by moving the graph in the middle to the left or right as required. This high degree of flexibility results in differentiated changes to the contrast down to the smallest detail. A little skill and a good eye for detail are required here to determine which adjustments on the graph produce the best image. This can be seen in the example below:

The differences between the original image and the edited image can be seen in the example below:
The gradation curve feature on Gimp can be found under Colours > Curves.
Conclusion
Making small changes to the gradation curve will produce the best result in terms of contrast, but this requires a little skill in handling the graph and a good eye for a realistic contrast. However, most of the time a basic correction will be sufficient. It is advised to adjust the image by using the tone correction, which will correct most contrast issues in your image. This is a simple and accurate method. Automatically correcting the contrast is ideal for amateur image editing, as this can be used to quickly improve the overall effect and appearance of your photo. Automatic and tone correction are also included in almost every image editing program. Generally, only more professional or advanced image editing programs will offer gradation curves.
