Avoiding or getting rid of red-eyes in photos
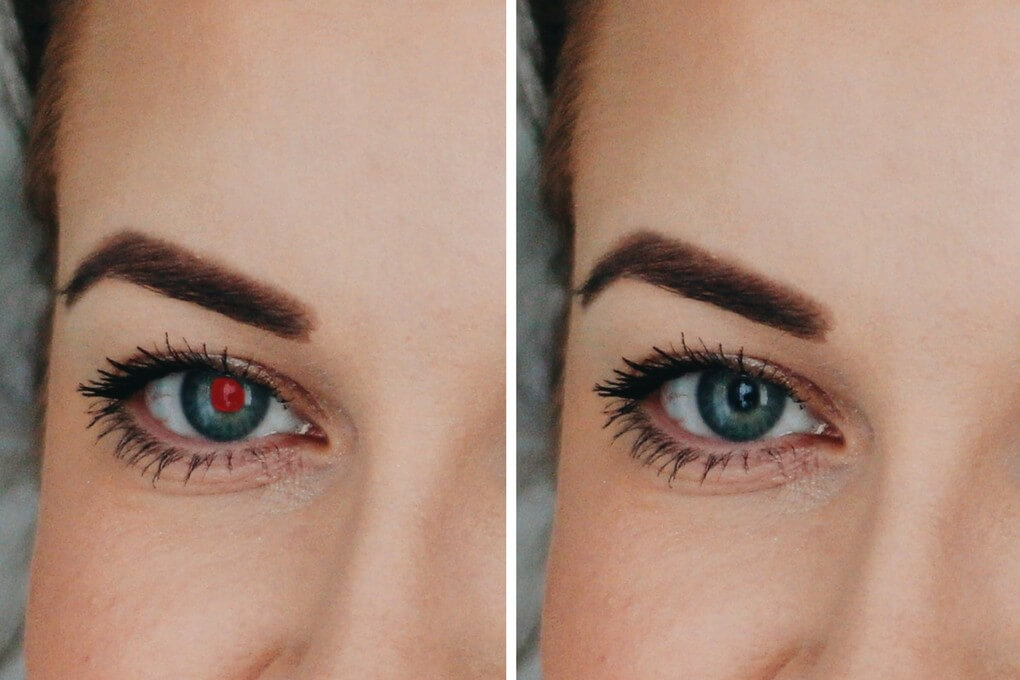
The so-called "red-eye effect" occurs mainly in photographs taken in low light and whilst using a flash. The reason for this is simple. In a dark environment, the pupil opens to let as much light in as possible into the eye. To compensate for the poor lighting conditions and to brighten up the picture, many people use a flash. When the flash hits the eye, it is reflected as red light by the retina due to its rich supply of blood. Unwanted red-eye can often occur when taking snapshots with compact digital cameras, where the flash is very close to the lens.
The "red-eye effect" on photos is very annoying. We will tell you what you need to be mindful of when taking photos and how you can fix the unsightly red eyes with the help of digital photo editing.
4 tips to avoid red eyes whilst taking a photo
The unwanted "red-eye effect" can be avoided even whilst taking a picture. Be it through external light sources or by using a pre-flash. We have summarised the 4 most important tips for avoiding red-eye.
1. Make sure there is sufficient light
If you want to be on the safe side, you should avoid using the flash. If there is no other way, external light sources will help to make the surroundings as bright as possible. When indoors switch on lights or lamps or use lanterns for outdoor shots. Basically, the more light there is, the smaller the pupil becomes, hence less light from the flash will be reflected from your eye.
2. Use a pre-flash
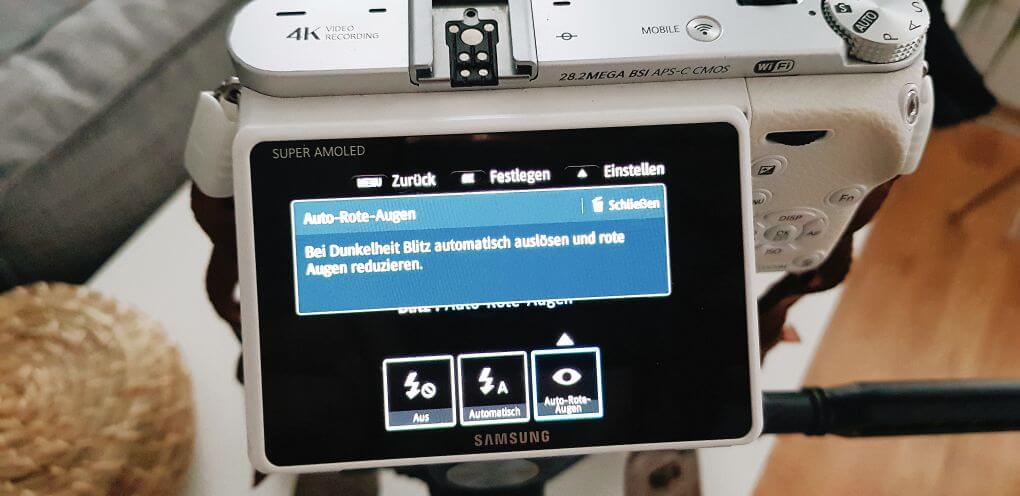
Many cameras have a pre-flash or "red-eye" mode. You should always turn on this special mode even though it is not a hundred percent effective, especially with compact digital cameras. The pre-flash works by letting light enter the eye before the main flash, causing the pupils to close briefly and reducing the "red-eye" effect. Let the person know that there is a pre-flash. Otherwise, they may already move after the first flash.
3. Use an external flash
To avoid the "red-eye effect", it is advisable to use an external flash if it cannot be avoided for the shot. In this case, it is sufficient if the flash is in the hot shoe or even better, if it is placed far away from the lens. The further away the flash is from the lens, the less likely it is to cause a red-eye effect.
4. Not looking directly at the camera
As mentioned at the beginning, the "red-eye effect" occurs mainly when the light from the flash hits the eye dead on. To avoid this, the person being photographed should look away from the camera. By not looking directly at the camera can help to stop unwanted red eyes occurring in photos.

Digital photo editing: removing red eyes
Unfortunately, it is not always possible to avoid red eyes creeping into pictures. If this is the case, red eyes can be removed with the help of digital photo editing programmes. For this purpose, many image editing programmes and apps have a special function to remove red eyes with just one click.
Quick tip: be mindful that if you focus and edit too much on the area around the red-eye, you will end up having a black spot in the eye instead of a red spot. This looks just as unnatural and it will stand out in the photo. We will show you below how you can remove red eyes with the help of a photo editing programme GIMP.
Removing red eyes with GIMP
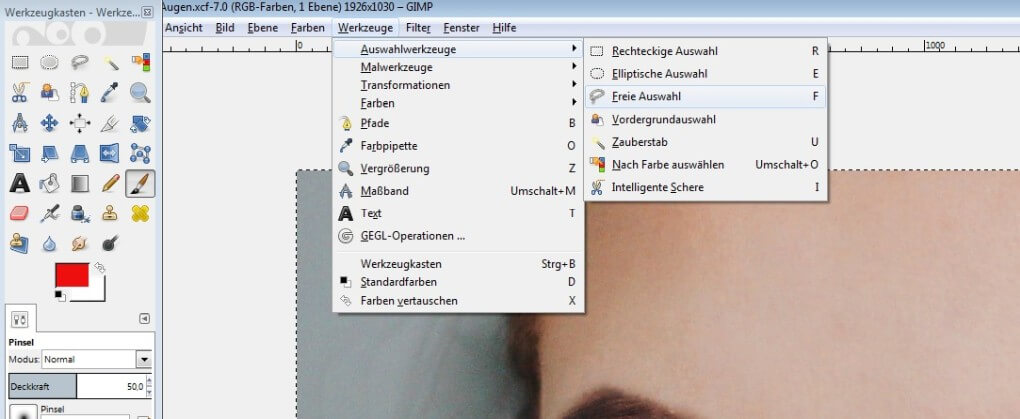
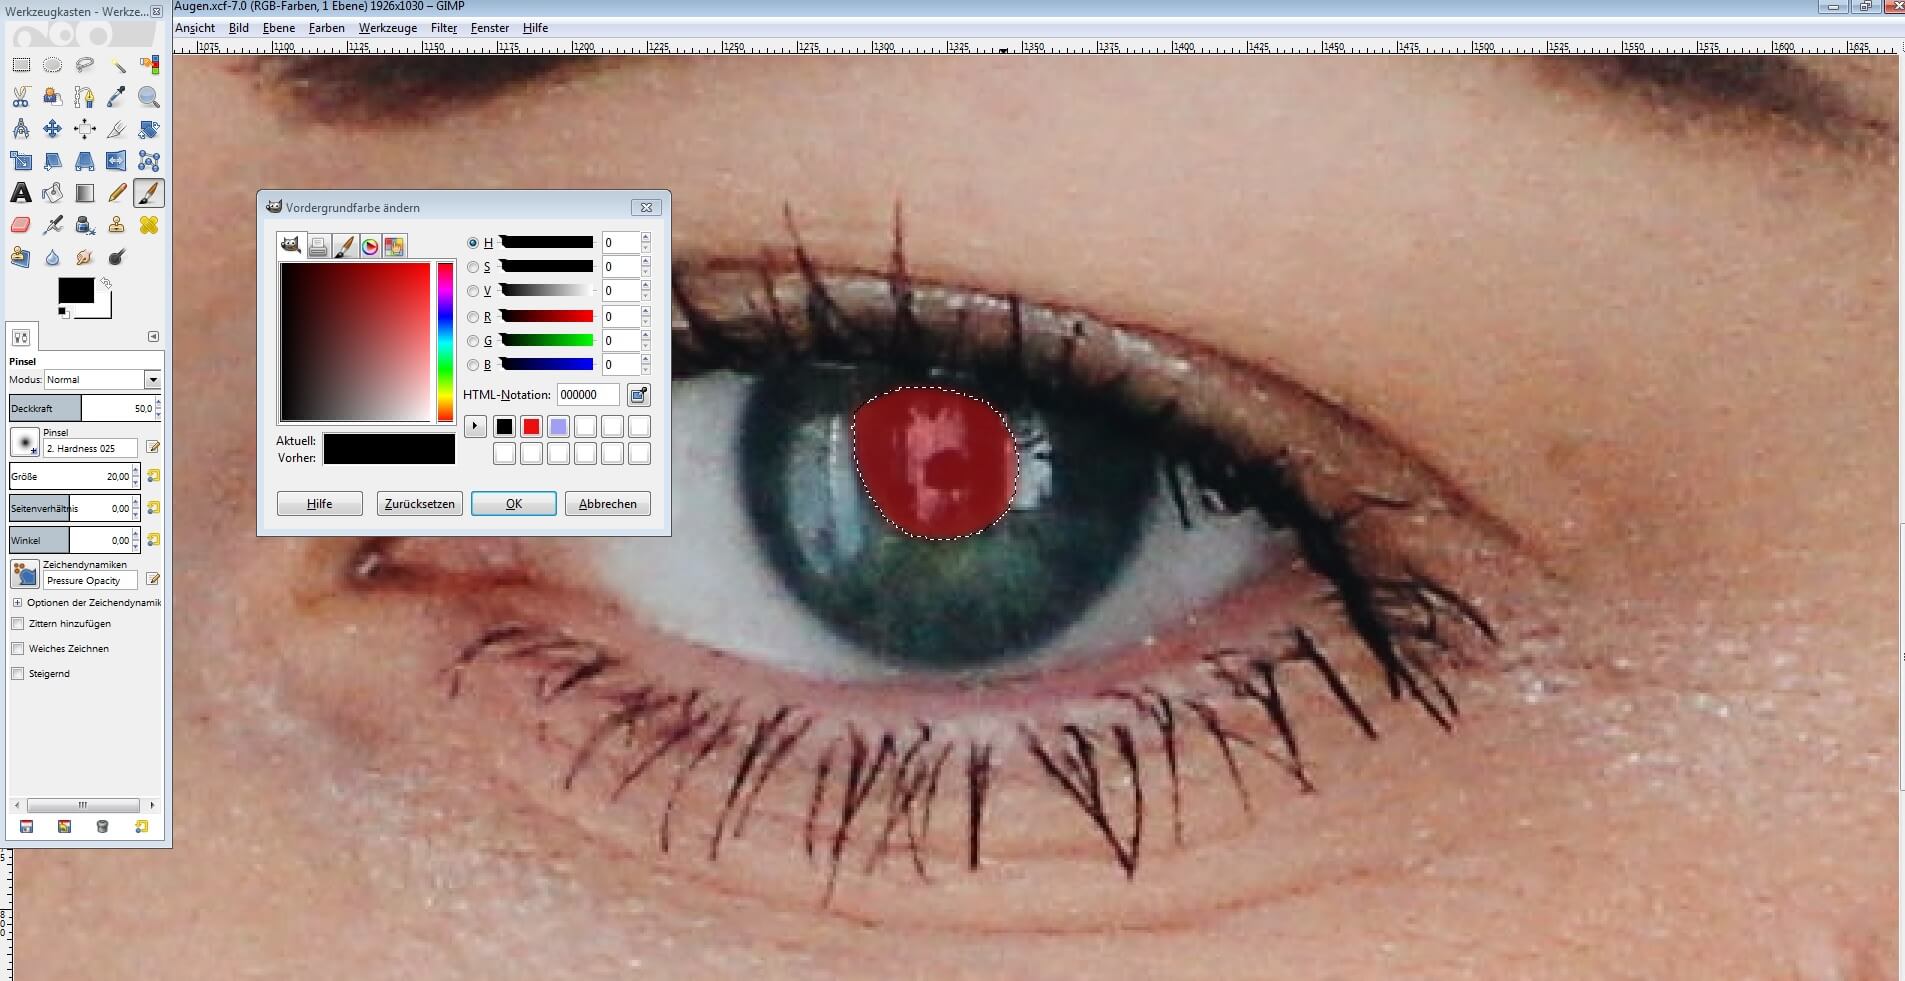
With the free picture editing programme GIMP, red eyes can be removed in just a few simple clicks. To do this, first zoom in on the image so that you can see the eye clearly. Now click on tools and under selection tools you will find the option "Free Select" and now you can circle the red-eye. Once you have circled the red area of the eye, click on "Remove", which can be found under the menu item "Select". This will highlight a circled area for further editing, which will only apply to the marked area in the eyes. Now, click on the brush symbol in the toolbox and select a colour. We would recommend choosing black as it would work best. Under tools select "Colour" and now you can move the brush over the eye and gradually darken it. Make sure that the eye still has a small part that is white. This will make the shot look more authentic. If you remove the white part in the eye by accident whilst editing, it can be quickly readded by using the brush tool.


Conclusion: Avoiding and removing red-eyes from photos
Red-eyes in photos are very annoying. However, if you pay attention to a few things while taking photos, you can minimise this effect. Red-eyes only occur when the lighting for a photo isn’t very good and a flash is used. If red-eyes cannot be avoided, they can be quickly removed with the help of digital photo editing. Most programmes have special tools to make eyes look natural again with just a few simple clicks.
