Taking Live Photos on iPhone and Creating Moving Photo Books
We’ll Show You Some Tips and Tricks
A photo is a recording of a moment in the form of an idle and stagnant image. When taking a Live Photo, however, you can breathe life into your pictures. This feature is integrated in the camera app of any iPhone 6s or later model.
When taking a Live Photo, you’re not only capturing the moment, but also the 1.5 seconds both before and after pressing the shutter release, also with sound. Each Live Photo has a play time of three seconds.
Some people might think that a Live Photo is just a short video. Yet, this isn’t the case since a Live Photo is made up of multiple JPEG shots and takes on the appearance of a flipbook when being played back. When playing a Live Photo, there is no play button to click or tap. An opened Live Photo is initially displayed as a still image and only plays back when you press and hold your finger on the display. Once you remove your finger, the Live Photo will once again be displayed as a still image.
We’ll show you for which situations Live Photos are especially well suited, how to edit them, and how to send them to your friends and family.
Which Moments Make the Best Live Photos?
The special aspect of a Live Photo is that movements are captured in the form of a picture. Thus, it doesn’t make much sense to use the Live Photo mode for recording landscapes, monuments, or other still motifs. Since a Live Photo recording takes up much more storage space compared to a normal still image, you should only switch on Live Photo mode when you want to record movement.
Children running about, pets playing with one another, friends dancing at a party, or even an exciting moment at a sporting event are perfect motifs to capture using the Live Photo mode. If you find yourself in a place where the wind is really blowing or in front of a waterfall, taking a selfie while in Live Photo mode could also be a great way to capture the moment. In any case, when using Live Photo mode there should be some movement present.
Editing Live Photos on iPhone
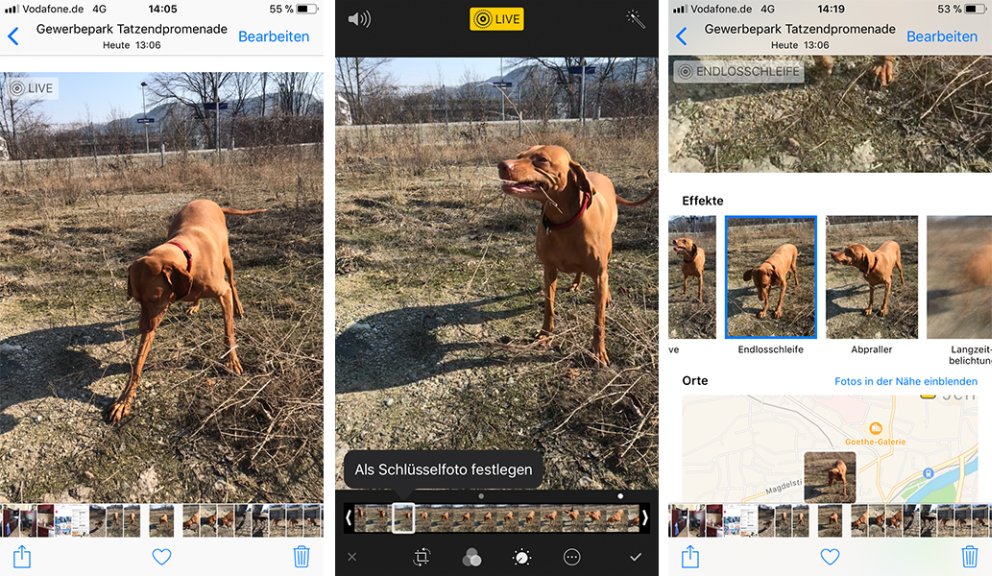
When opening a Live Photo in the Photos app, you have two different options for editing. Firstly, you can change the key photo. The key photo is the still photo displayed after the Live Photo has been played back. In order to change this, you’ll have to open the edit mode. Afterwards, your Live Photo is then displayed at the bottom of the screen in the form of multiple still images. The current key photo is displayed in a white border. You can move this border to the right or left in order to select a new key photo. Once you’ve repositioned the border, you’ll see the message “Make Key Photo.” After tapping on this, the new key photo change will be applied. While in edit mode, you can turn on/off the sound of your “short video” by tapping in the upper left-hand corner of your screen.
In addition, you can also make use of various effects when playing back a Live Photo – not while in edit mode, however. You can select different effects to use by opening the Live Photo and sliding it towards the top of your screen. Here you’ll see the various effects available, including “Loop”, “Bounce”, and “Long Exposure.” By tapping on the effect of your choice, it will automatically be applied and can later be changed at any time.

Sending Live Photos
If sending and receiving a Live Photo between iPhones that are both capable of recording Live Photos, you can transfer these easily per AirDrop. The social network Facebook also supports posting Live Photos on its website.

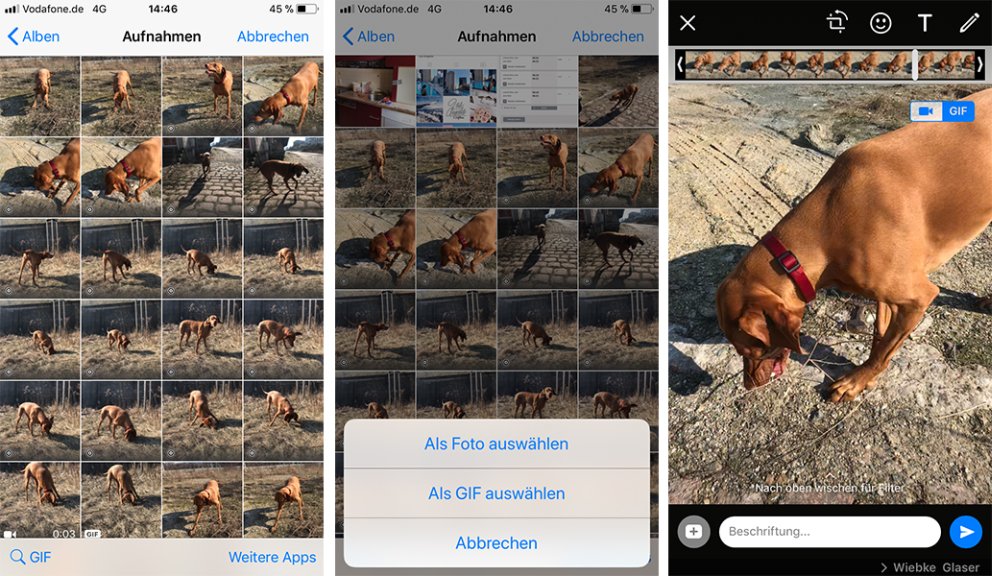
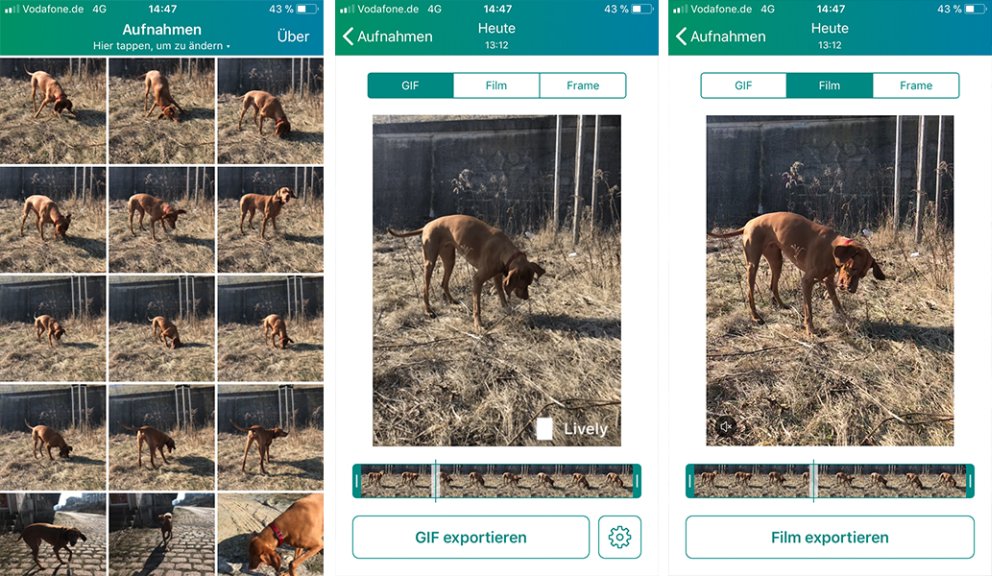
Transferring a Live Photo by other means such as via WhatsApp or from an iPhone to an Android smartphone isn’t possible without first taking other steps. In order to send a Live Photo with all its movement intact, you’ll need to first convert the Live Photo into a GIF. In order to convert a Live Photo into a GIF, there are apps available such as “Lively – Live Photo to GIF.” If sending the Live Photo via WhatsApp, the conversion can be done directly in the app. To do this, simply tap on the plus symbol next to the text input field and select “Photos & Videos.” In the selection screen, Live Photos are labelled with the Live Photo symbol. In order to select a Live Video, instead of just tapping on it you’ll need to tap and hold on it until a new menu appears. Here you’ll see the options “Select as Photo” or “Select as GIF.” When selecting the second option, the Live Photo will be converted into a GIF and can then be sent.
When converting a Live Video into a GIF, the quality will be reduced due to colour spectrum limitations. In order to avoid this, you can also use the app “Lively – Live Photo to GIF” to instead convert a Live Photo into a video.

Creating a Photo Book with Live Photos Using the My Moments App from ifolor
The recently released “My Moments” app from ifolor uses artificial intelligence technology to create a photo book in just a few clicks. This app independently scans your smartphone and social networks, such as Facebook and Instagram, for photos from a given day and then compiles these. This makes it possible to automatically create a complete photo book.
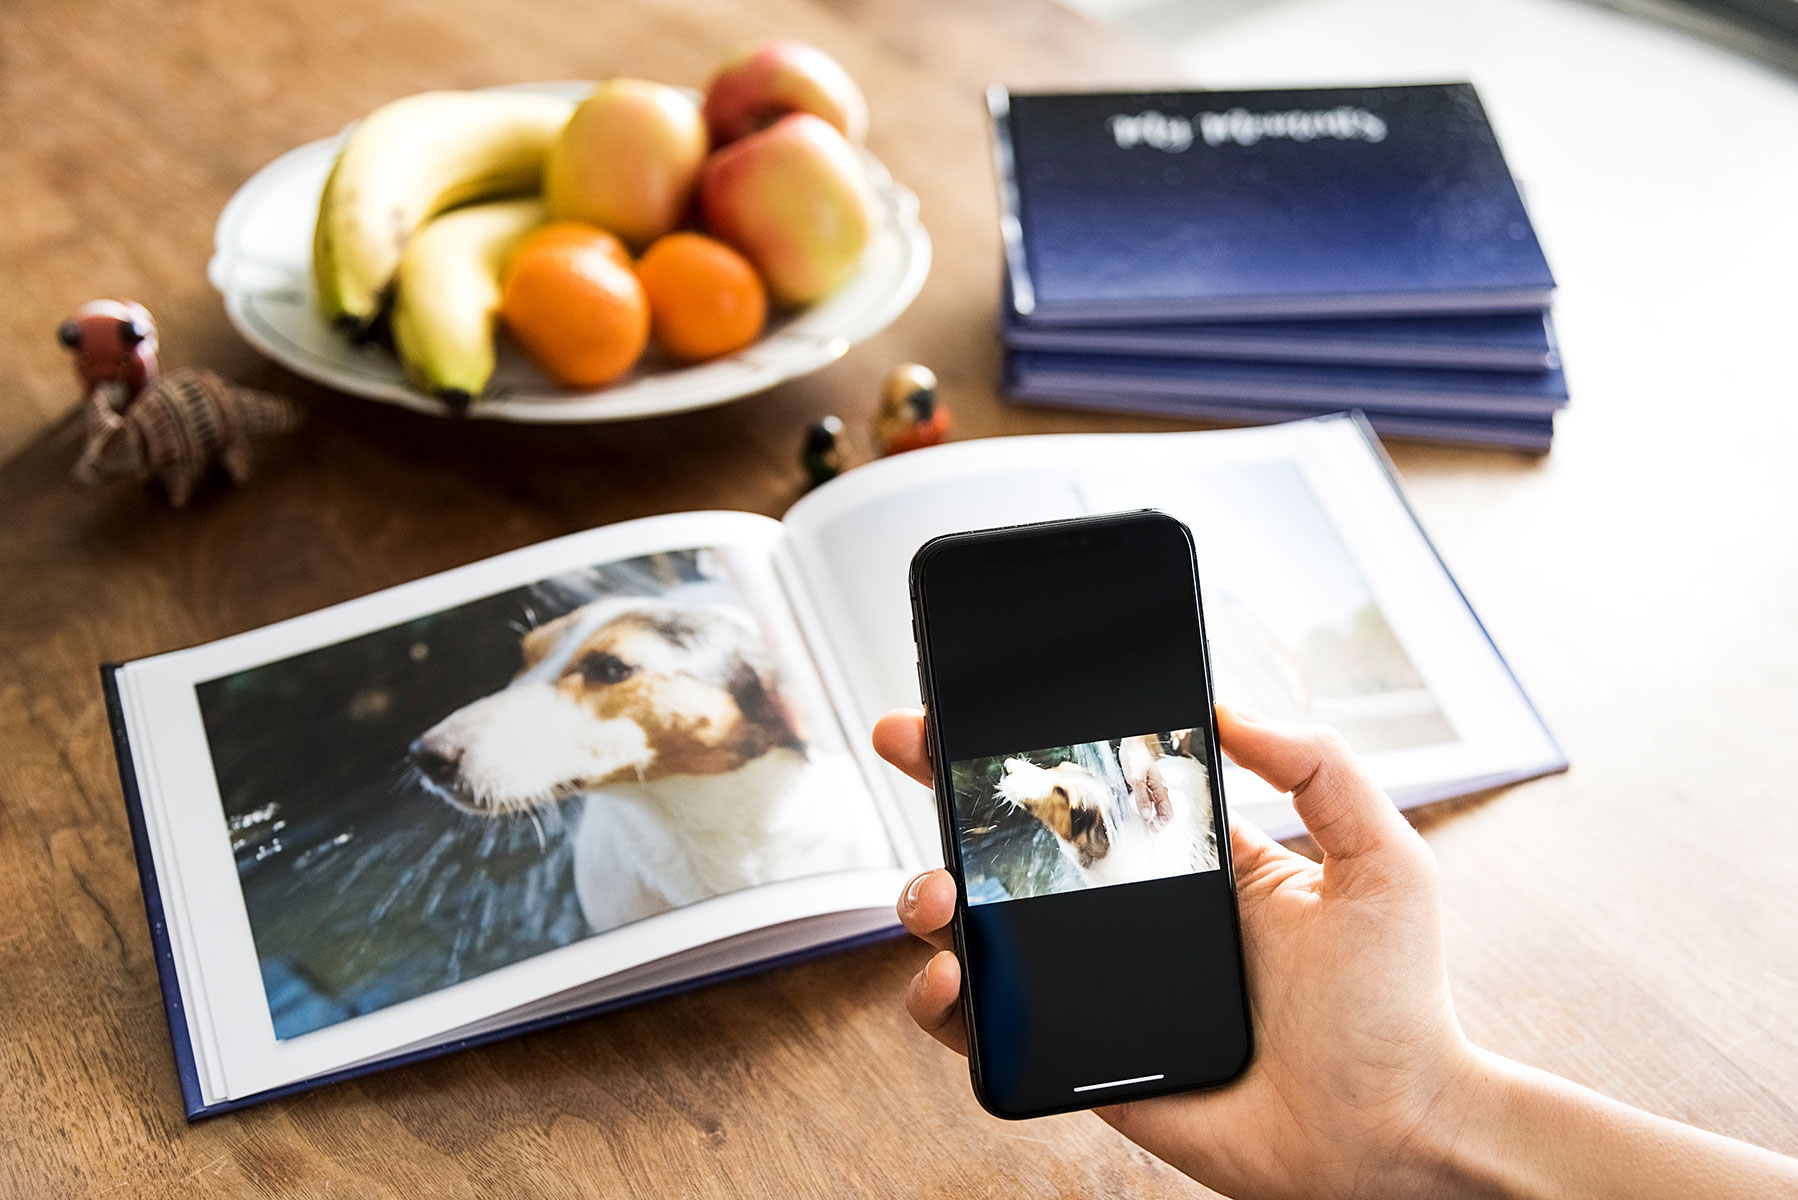
In addition, the app also makes it possible to integrate Live Photos as well as videos into the photo book using augmented reality. This won’t make your Live Photo move in the printed photo book like in the Harry Potter universe, but you can use your smartphone’s camera to bring the Live Photo to life.
This kind of photo book isn’t only great for storing memories for yourself, but also makes a great gift. The recipient will receive access to all the Live Photos and videos printed in the photo book by simply scanning a QR code, which is located in the photo book.
Bring live photos to life with the “My Moments” app
Simply download the “My Moments” app for free from the App Store and create your first living photo book.

