DSLR – Taking Photographs with Aperture Priority (A/Av Mode)
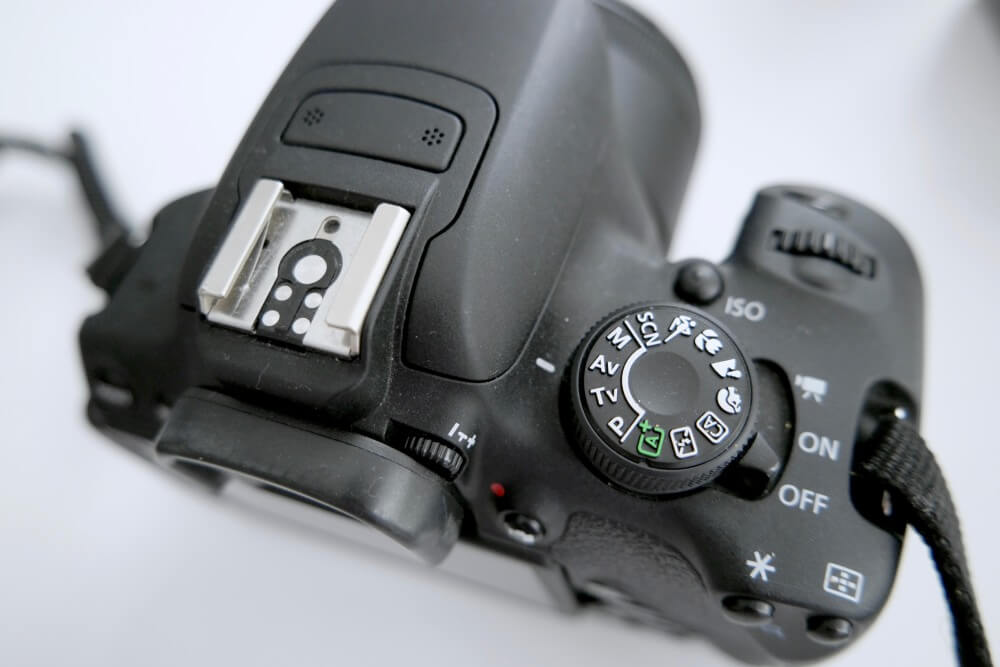
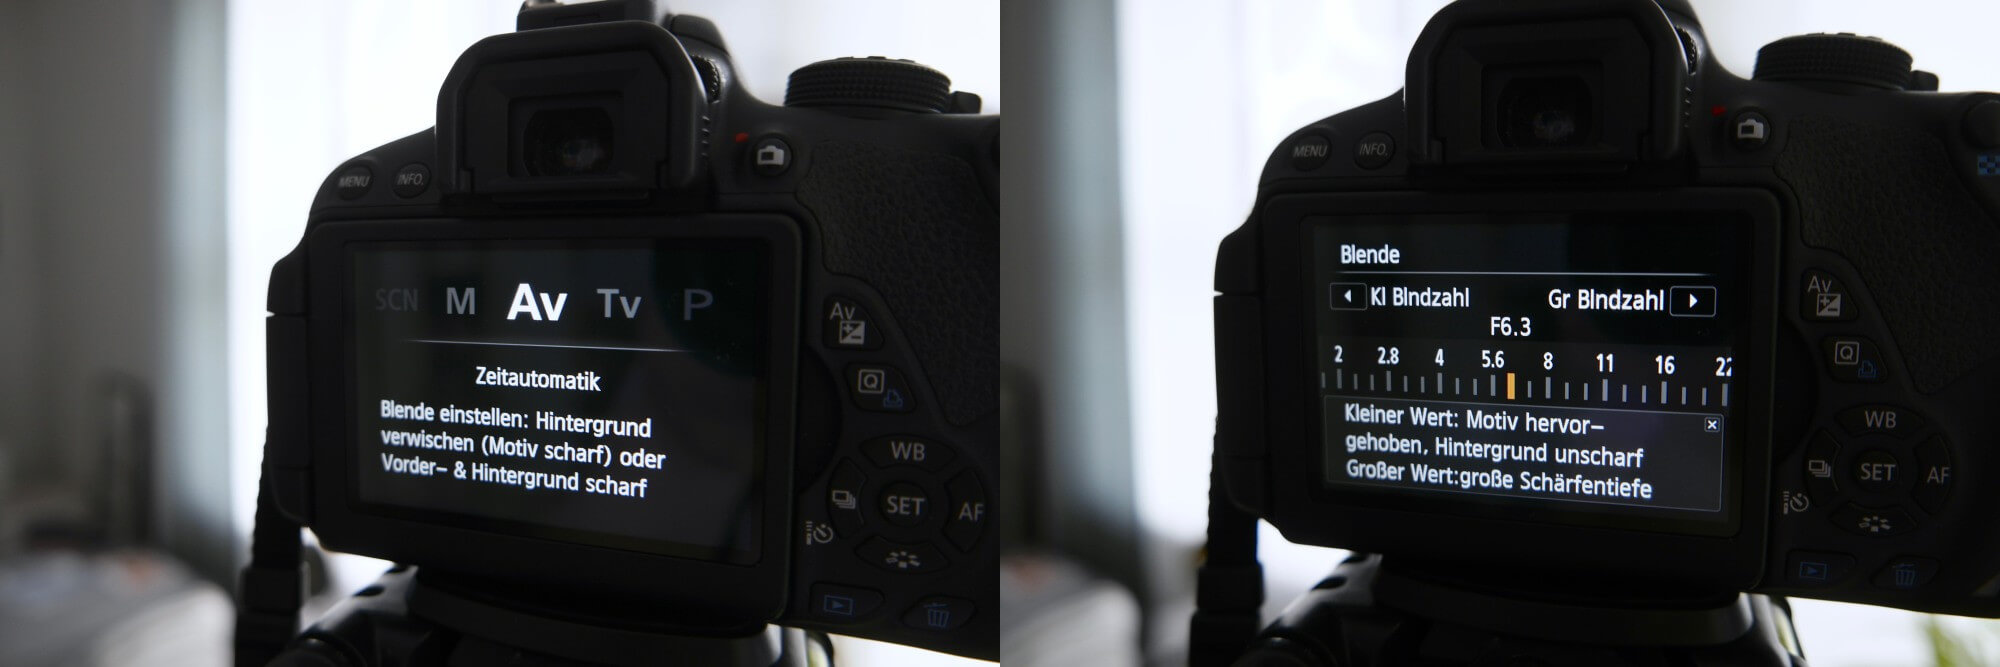
Aperture priority is a practical alternative to automatic or program mode, with which you can specifically control the depth of field. By automatically adjusting only one or two parameters of the manual aperture setting, this mode offers a lot of creative scope for the photographer. Depending on the camera, the Aperture Priority or Aperture Value mode is marked A or Av on the mode dial, which stands for Aperture Priority or Aperture Value mode. As the symbols are similar, Av mode is sometimes confused with fully automatic mode. To avoid confusion, many cameras display a short help text explaining the program’s core function when it is selected. Automatic mode is labeled “AUTO” or displays as a green box labeled “A”. Furthermore, P stands for programmed auto, S (Tv) for shutter priority, and M for manual mode.
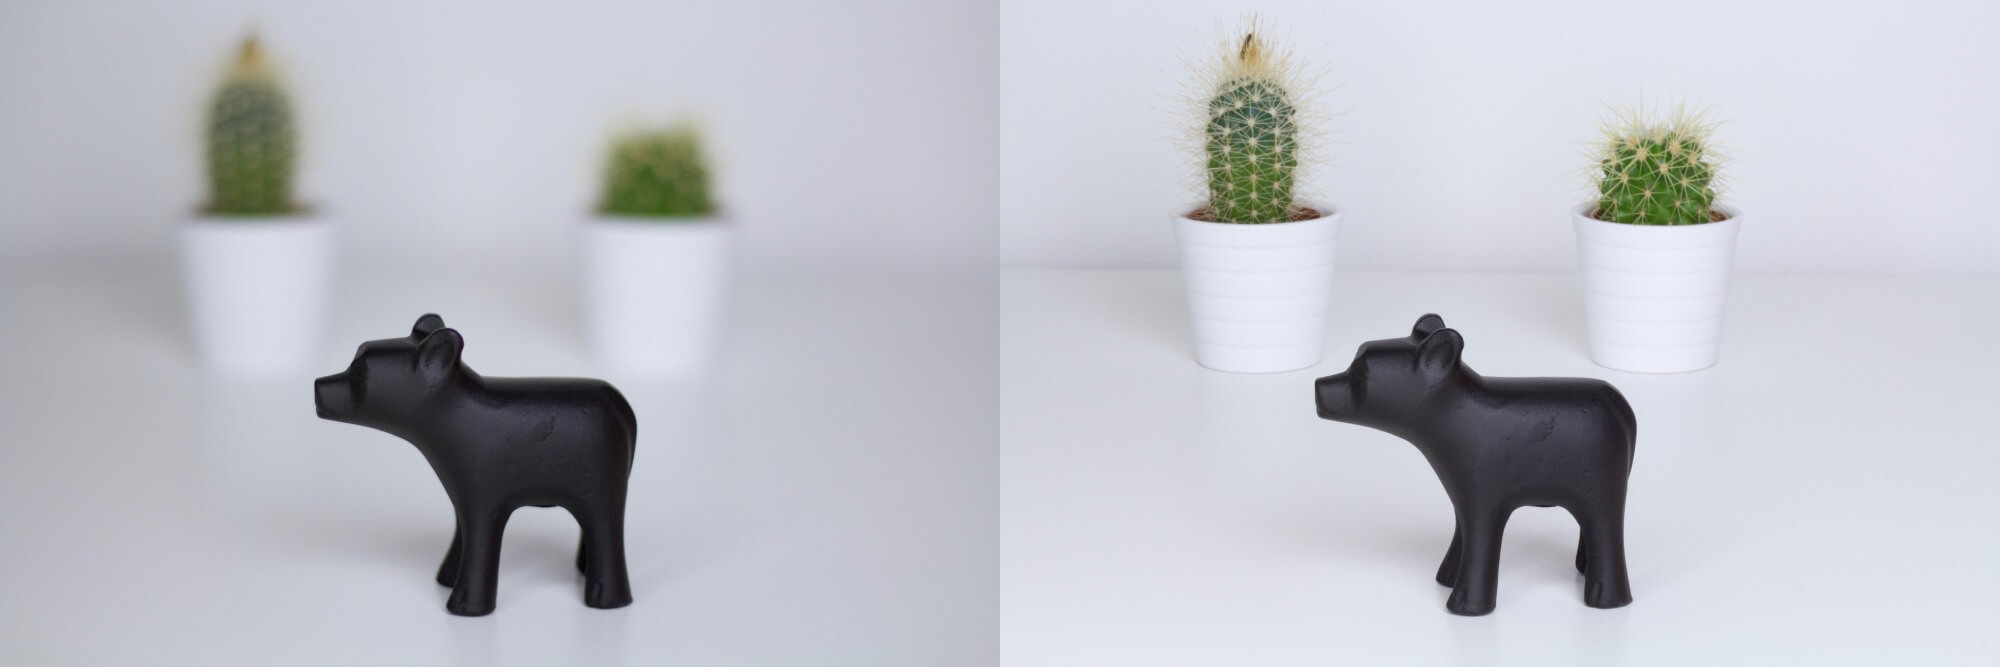
In Av mode, the photographer sets the aperture value and the camera automatically adjusts the exposure time and, depending on the camera, the ISO value accordingly. By specifying the aperture value, the photographer can control the depth of field without having to select or evaluate the appropriate shutter speed. Aperture priority is often used specifically in portrait photography or for subjects with an unsteady background, because when a low aperture value is set, the subject in the foreground is sharp while the background is slightly blurred.

How do I set the Aperture Priority and what do I need to keep in mind?
To shoot in Av mode, first set the mode dial to A or Av. Once you have set the aperture priority, the display will show the current aperture value, which you can then open or close depending on the desired depth of field. The larger the f-number, the greater the depth of field. With a small aperture value you can blur the background and sharpen the foreground.
When the shutter release button is pressed halfway, the camera starts metering and displays the calculated shutter speed and the appropriate ISO value, if applicable.
To determine the ideal depth of field for your subject, try different aperture values. When checking shots, be aware that the preview on the display shows a smaller version of the captured photo, which may cause the sharpness and image quality in the preview to differ from the actual image. The actual result can usually only be judged on the computer or after the photos have been developed.

What are possible errors and how can they be fixed?
Frequent errors associated with aperture priority are overexposure or underexposure due to an aperture that is too wide open or closed. When looking through the viewfinder of the camera, the image effect achieved by the settings is usually not visible. Unfortunately, the viewfinder does not allow you to estimate the depth of field or possible exposure errors that will occur later, and the subject usually appears brighter than it should be with the aperture value set. Some SLR cameras have a Depth Preview button that serves to control the depth of field at the set aperture value. By pressing the button while looking through the viewfinder, the camera fades down to the set value and makes it easier to control the depth of field and creatively design the image.
Since A/Av mode automatically calculates the exposure time, warnings are displayed when the required adjustment exceeds the technical capabilities of the camera. If the shutter speed starts blinking red next to the set aperture, change the aperture or if possible the ISO value, otherwise the photo may be overexposed or underexposed. If the aperture is too wide open, the fastest shutter speed blinks and warns of overexposure. If the longest shutter speed blinks, the aperture value is too low and the image is underexposed. If possible, you can compensate for this by increasing the ISO value or by opening the aperture further.
Also note that Aperture Priority refers only to the aperture value, shutter speed, and ISO depending on the camera type. Before shooting in A/Av mode, you should also check other settings such as exposure compensation and image quality and adjust them to the shooting conditions if necessary.
Conclusion
Aperture Priority is a creative mode in which the aperture is used as the main design element. By selectively influencing the depth of field of the photo, the photographer can achieve a specific image effect. For example, a portrait can be sharply highlighted against a restless background such as a busy street. The A/Av mode is also ideal for beautiful macro shots, for example of plants, insects or small objects with a blurred background. The automatic adjustment of the exposure time makes it possible to achieve the desired depth of field even under changing shooting conditions, while still leaving enough room for various adjustment options.
